So you want to make a targate?
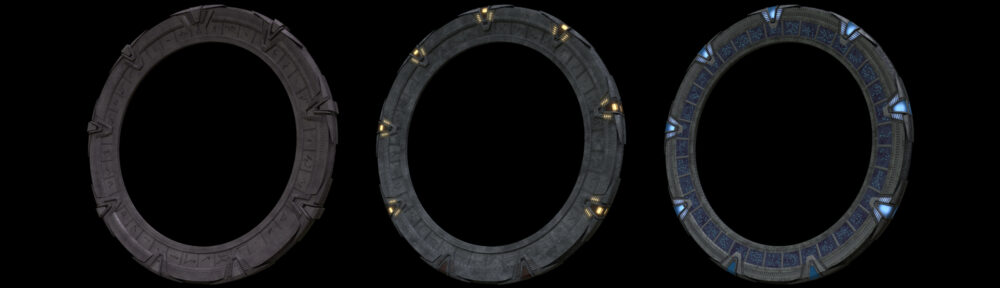
This article will discuss three related designs; the versions seen in the original 1994 movie, as well as the two TV shows Stargate SG-1 and Stargate Atlantis. The design seen in Stargate Universe is entirely original, so it’s out of my scope. I want to go over not only the key features of the design, but also subtle differences that are sometimes missed when artists create the different variations.

The TL;DR is that the SG-1 stargate is a modification of the film stargate, so if you’re building either of those versions, you can source them both for reference material. The Atlantis stargate was built from scratch, so if you reference the SG-1 stargate while building that one (or vice-versa), you’ll run into confusing contradictions in terms of exact shapes and details. Despite how similar the Atlantis version looks to its predecessors, you can’t assume it matches them.
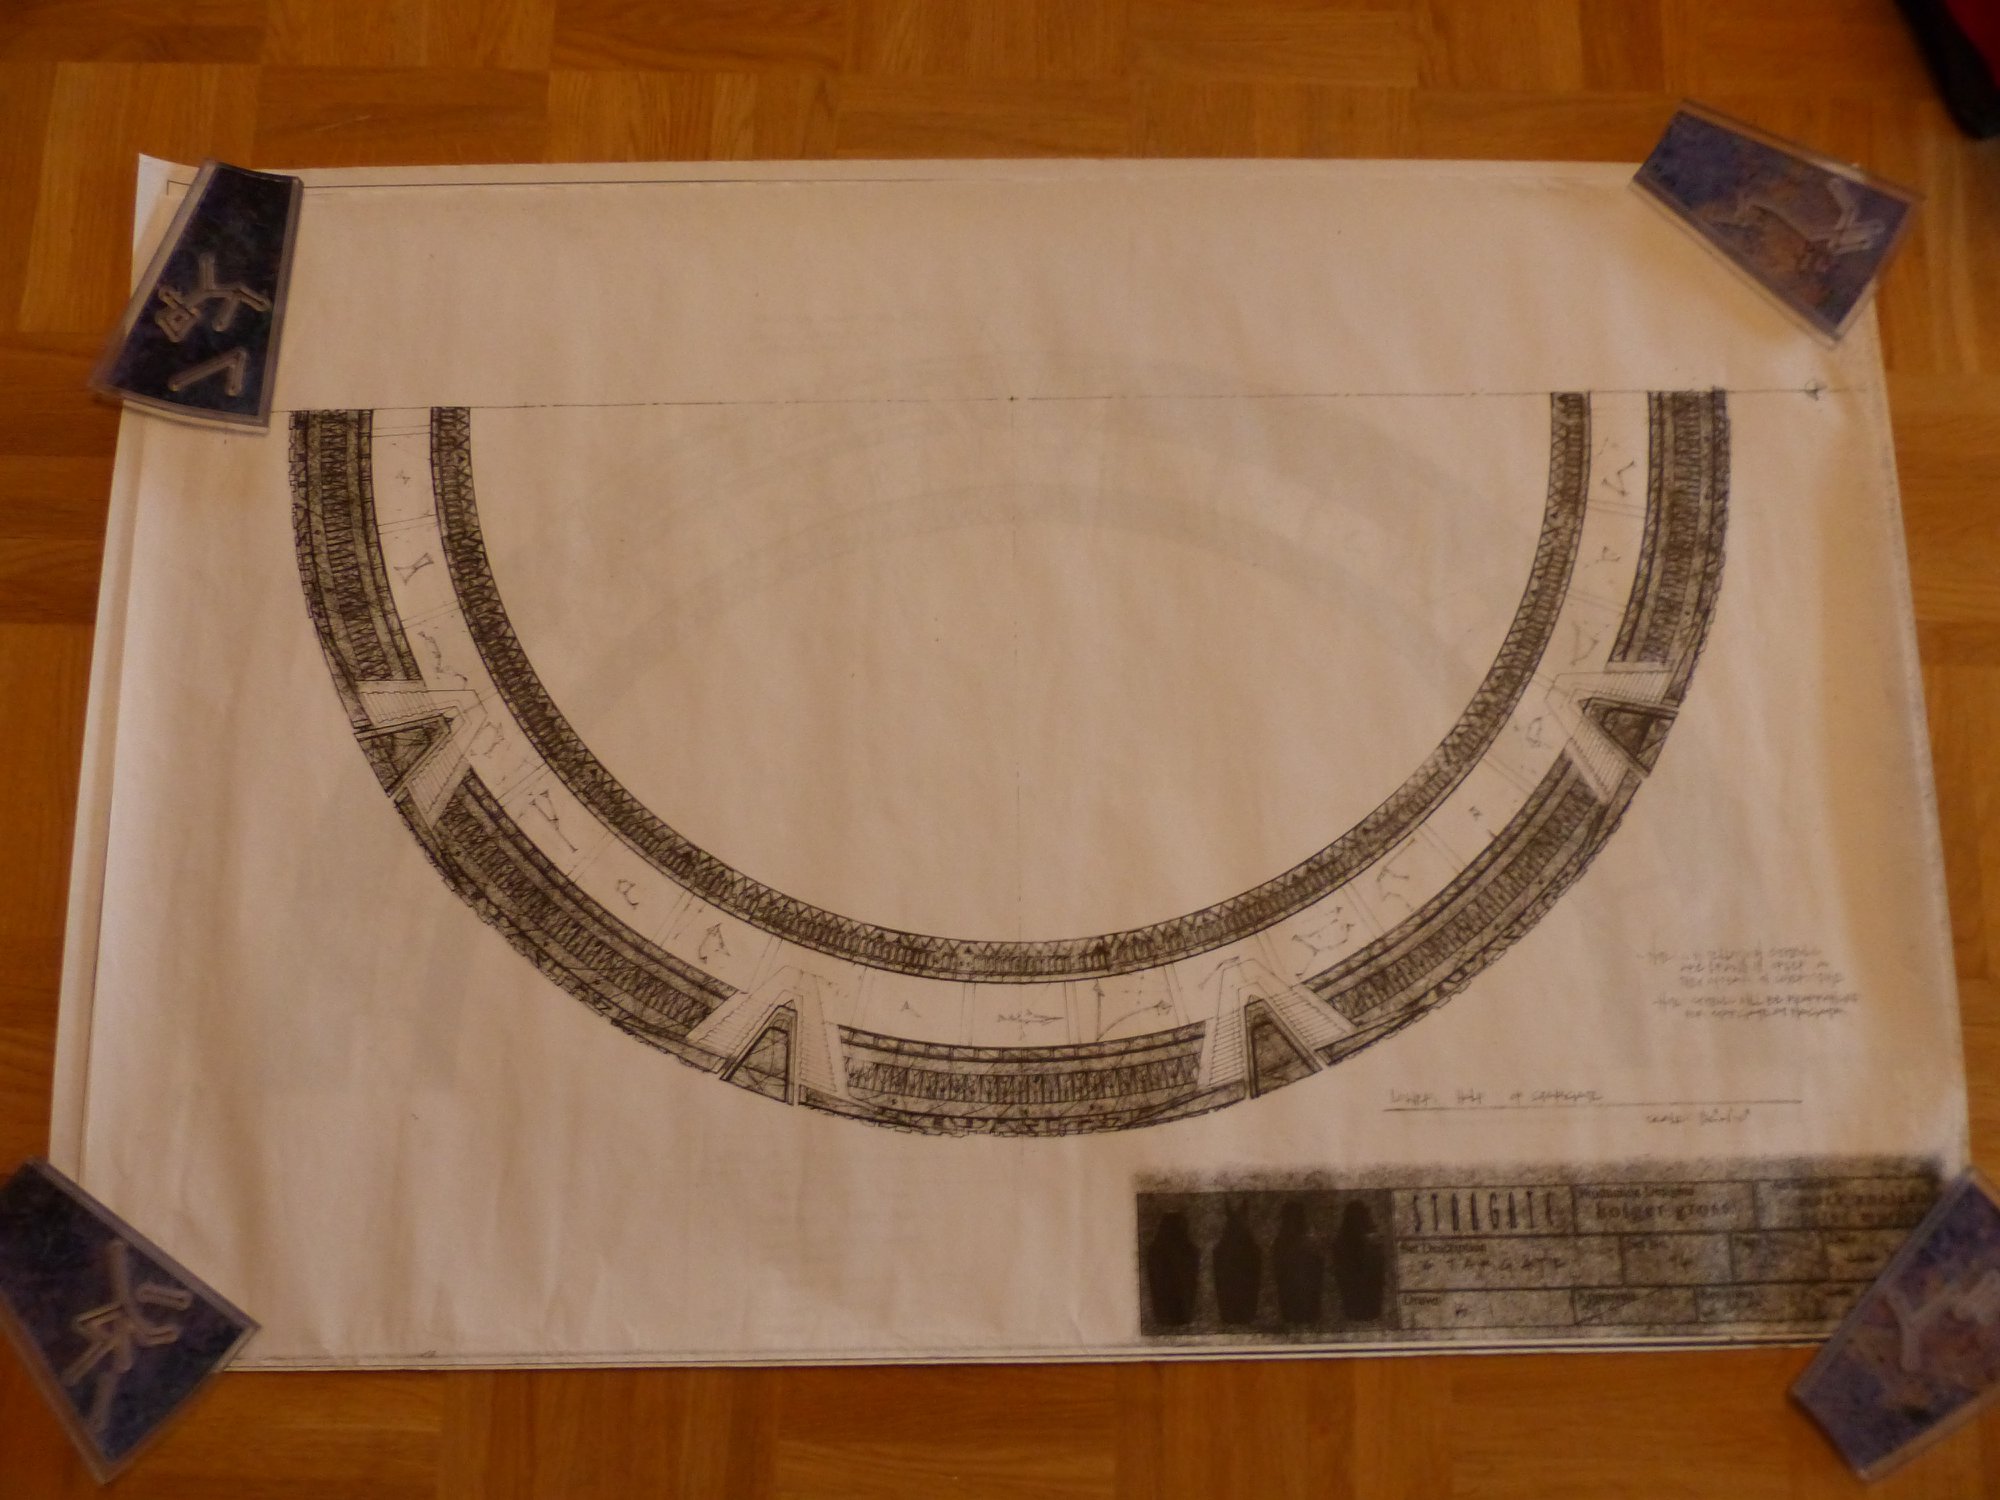
I’ll be illustrating this article with a mixture of screencaps, production documents, and photos of the original setpieces. The latter two groups are sourced from behind the scenes posts by production personnel, auction listings, and individual collectors, most notably, Les Enfants de MacGyver. If you’re collecting reference material for your own movie- or SG-1-style stargate, there are countless photos of their original stargate components, disassembled and close-up, on their Facebook page.
The first thing to know is that all these stargates are made of nine identical segments which join together in the middle of each of the nine chevrons. There’s also an animated inner ring that contains some number of symbols which move within the stargate when a destination address is being entered.
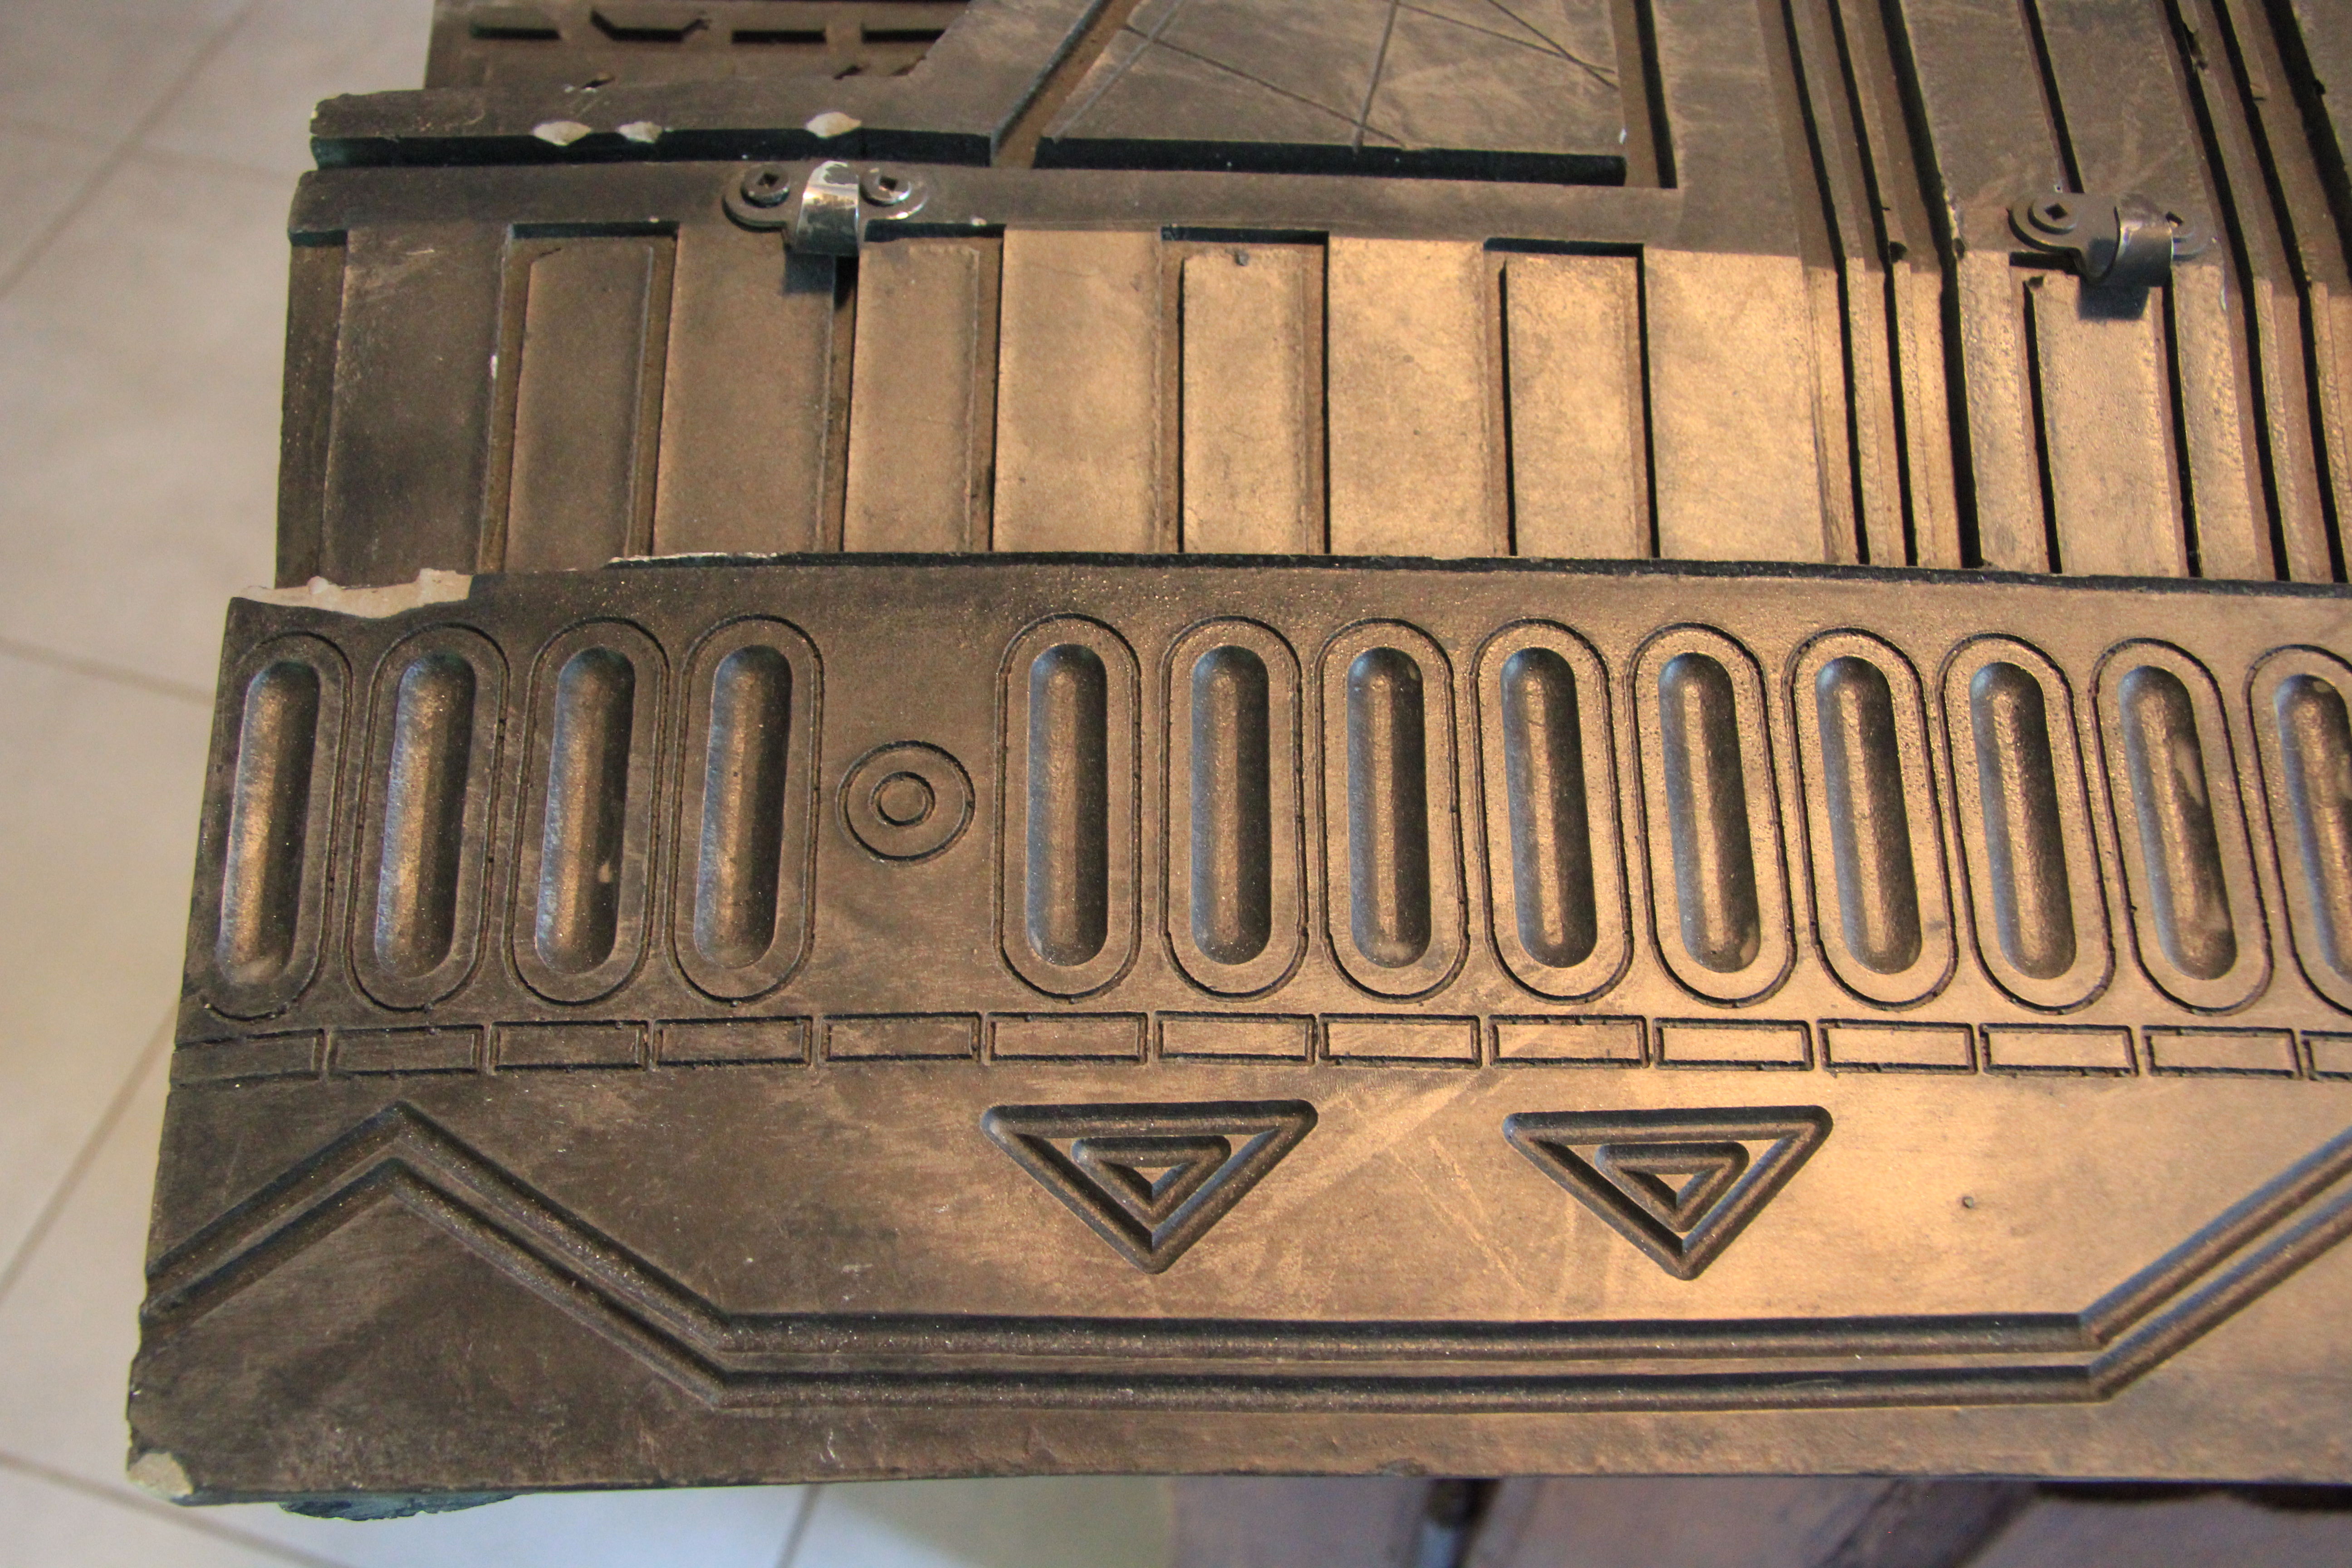
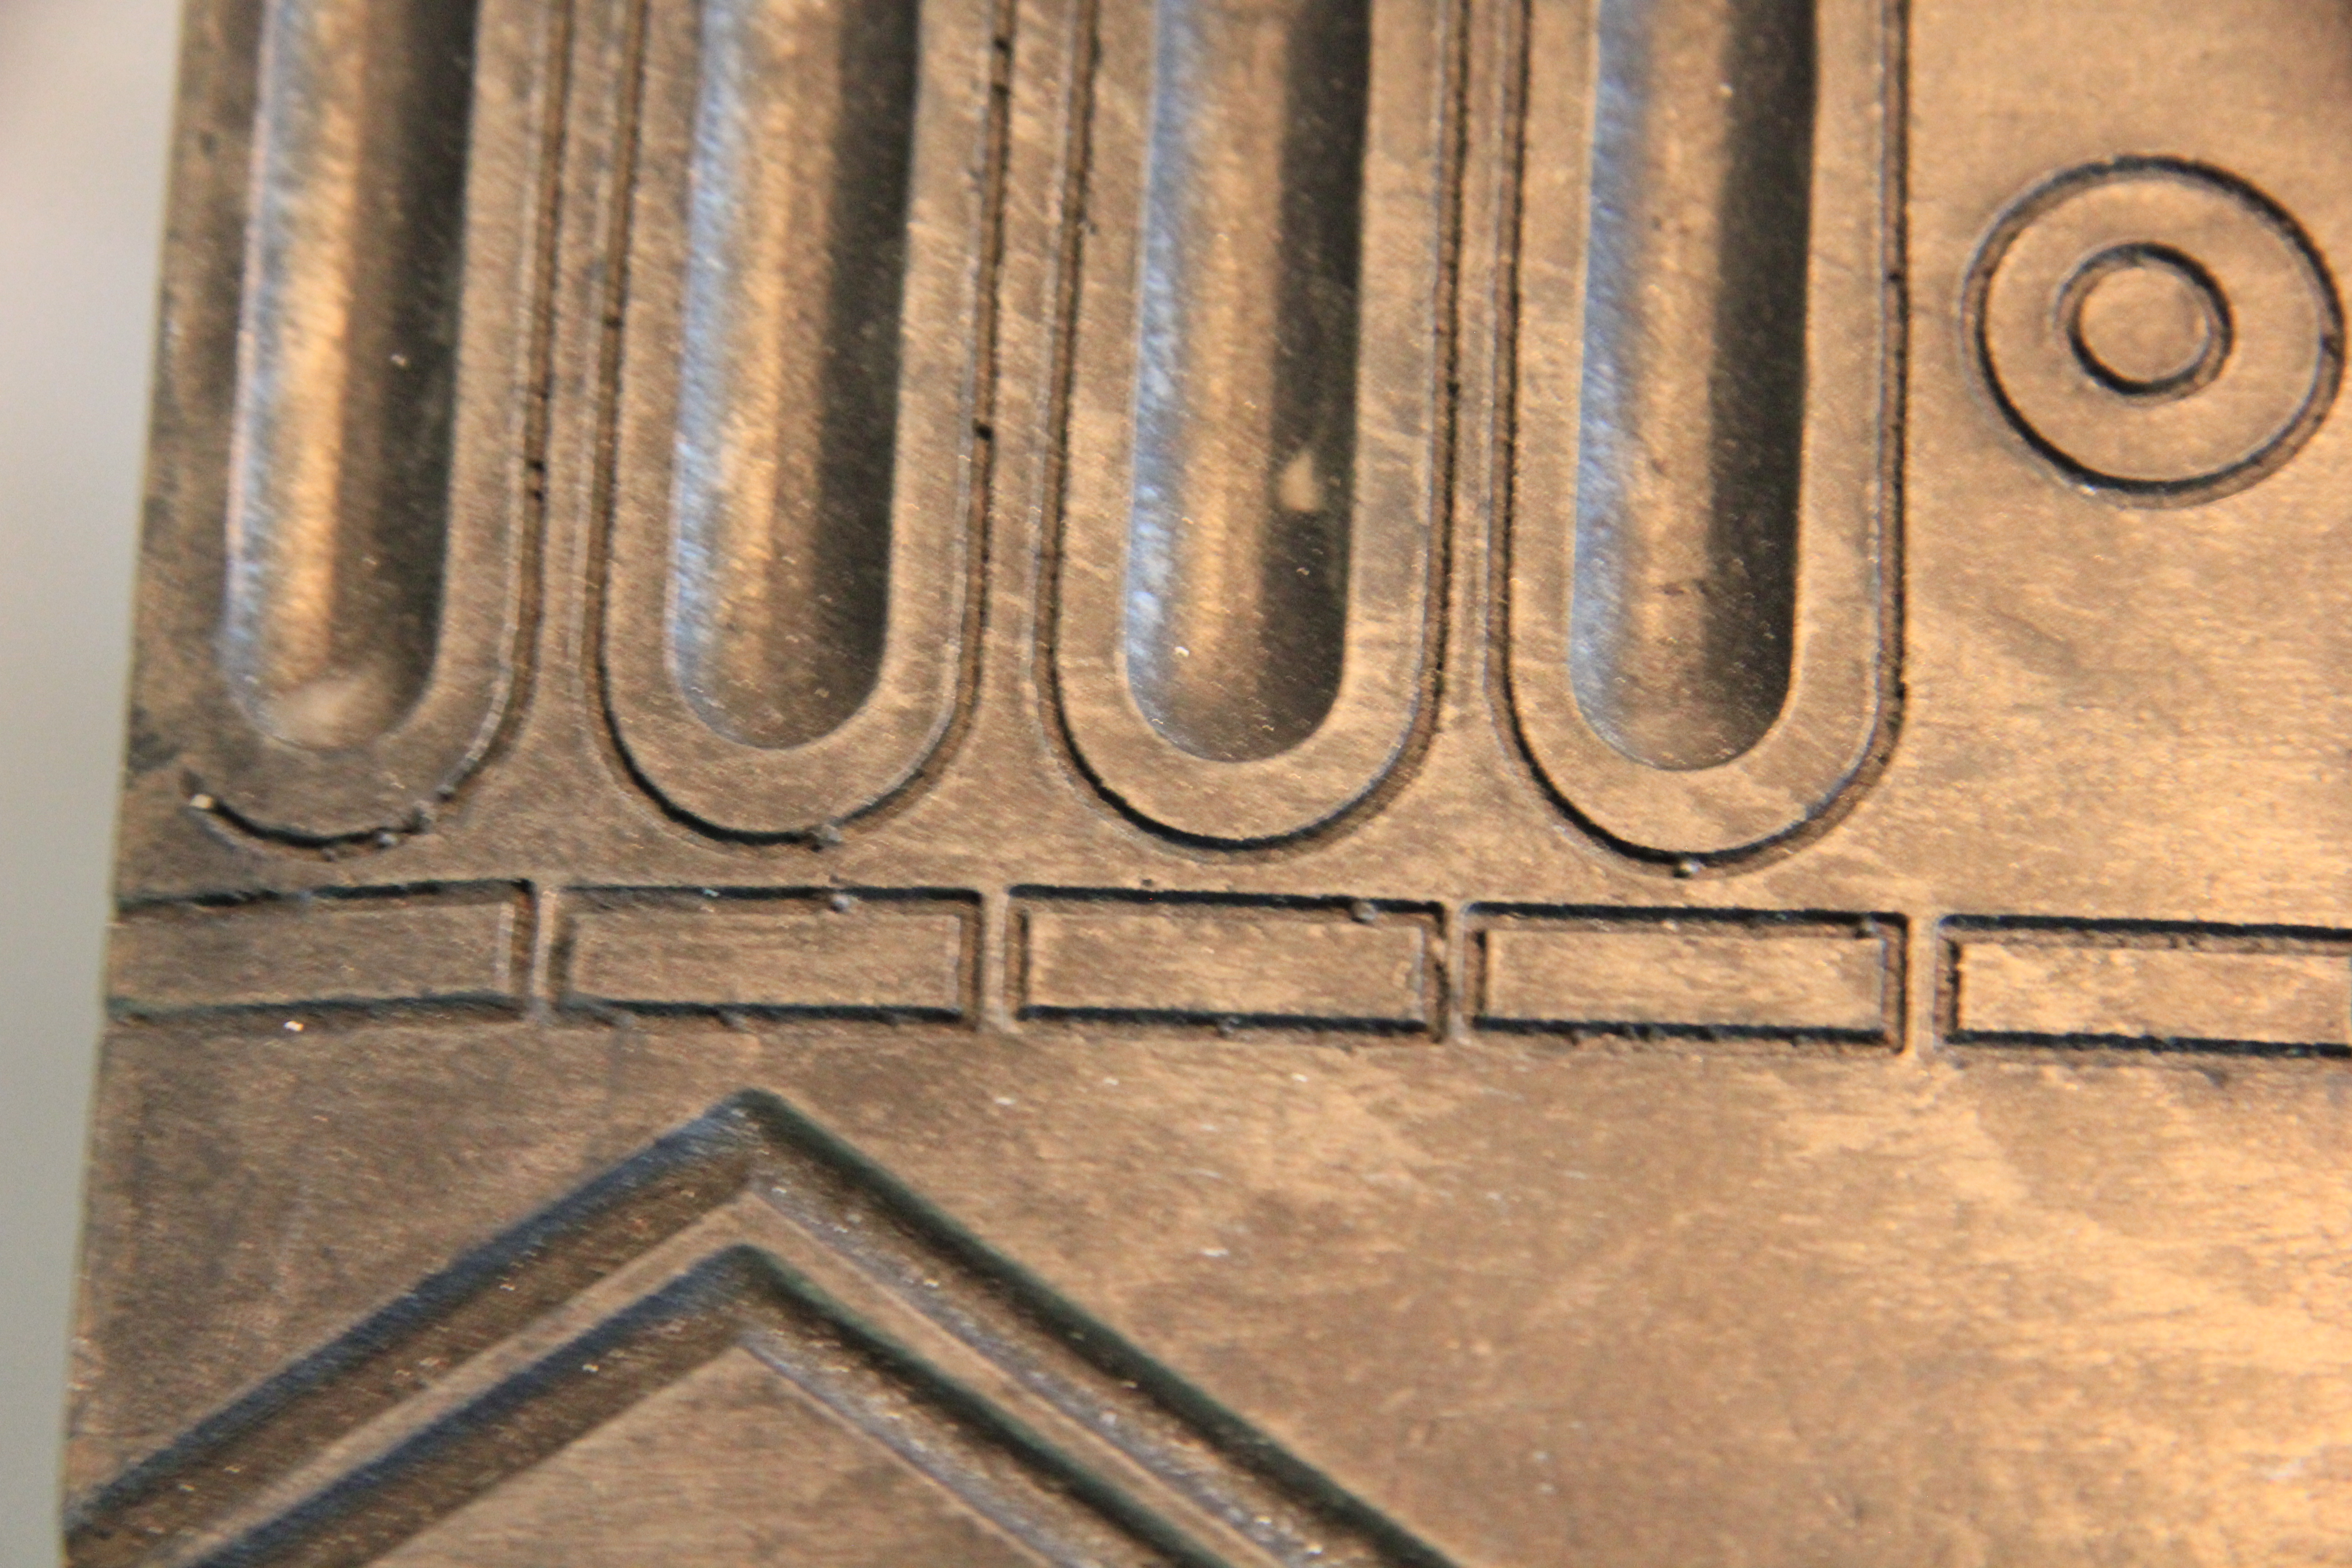
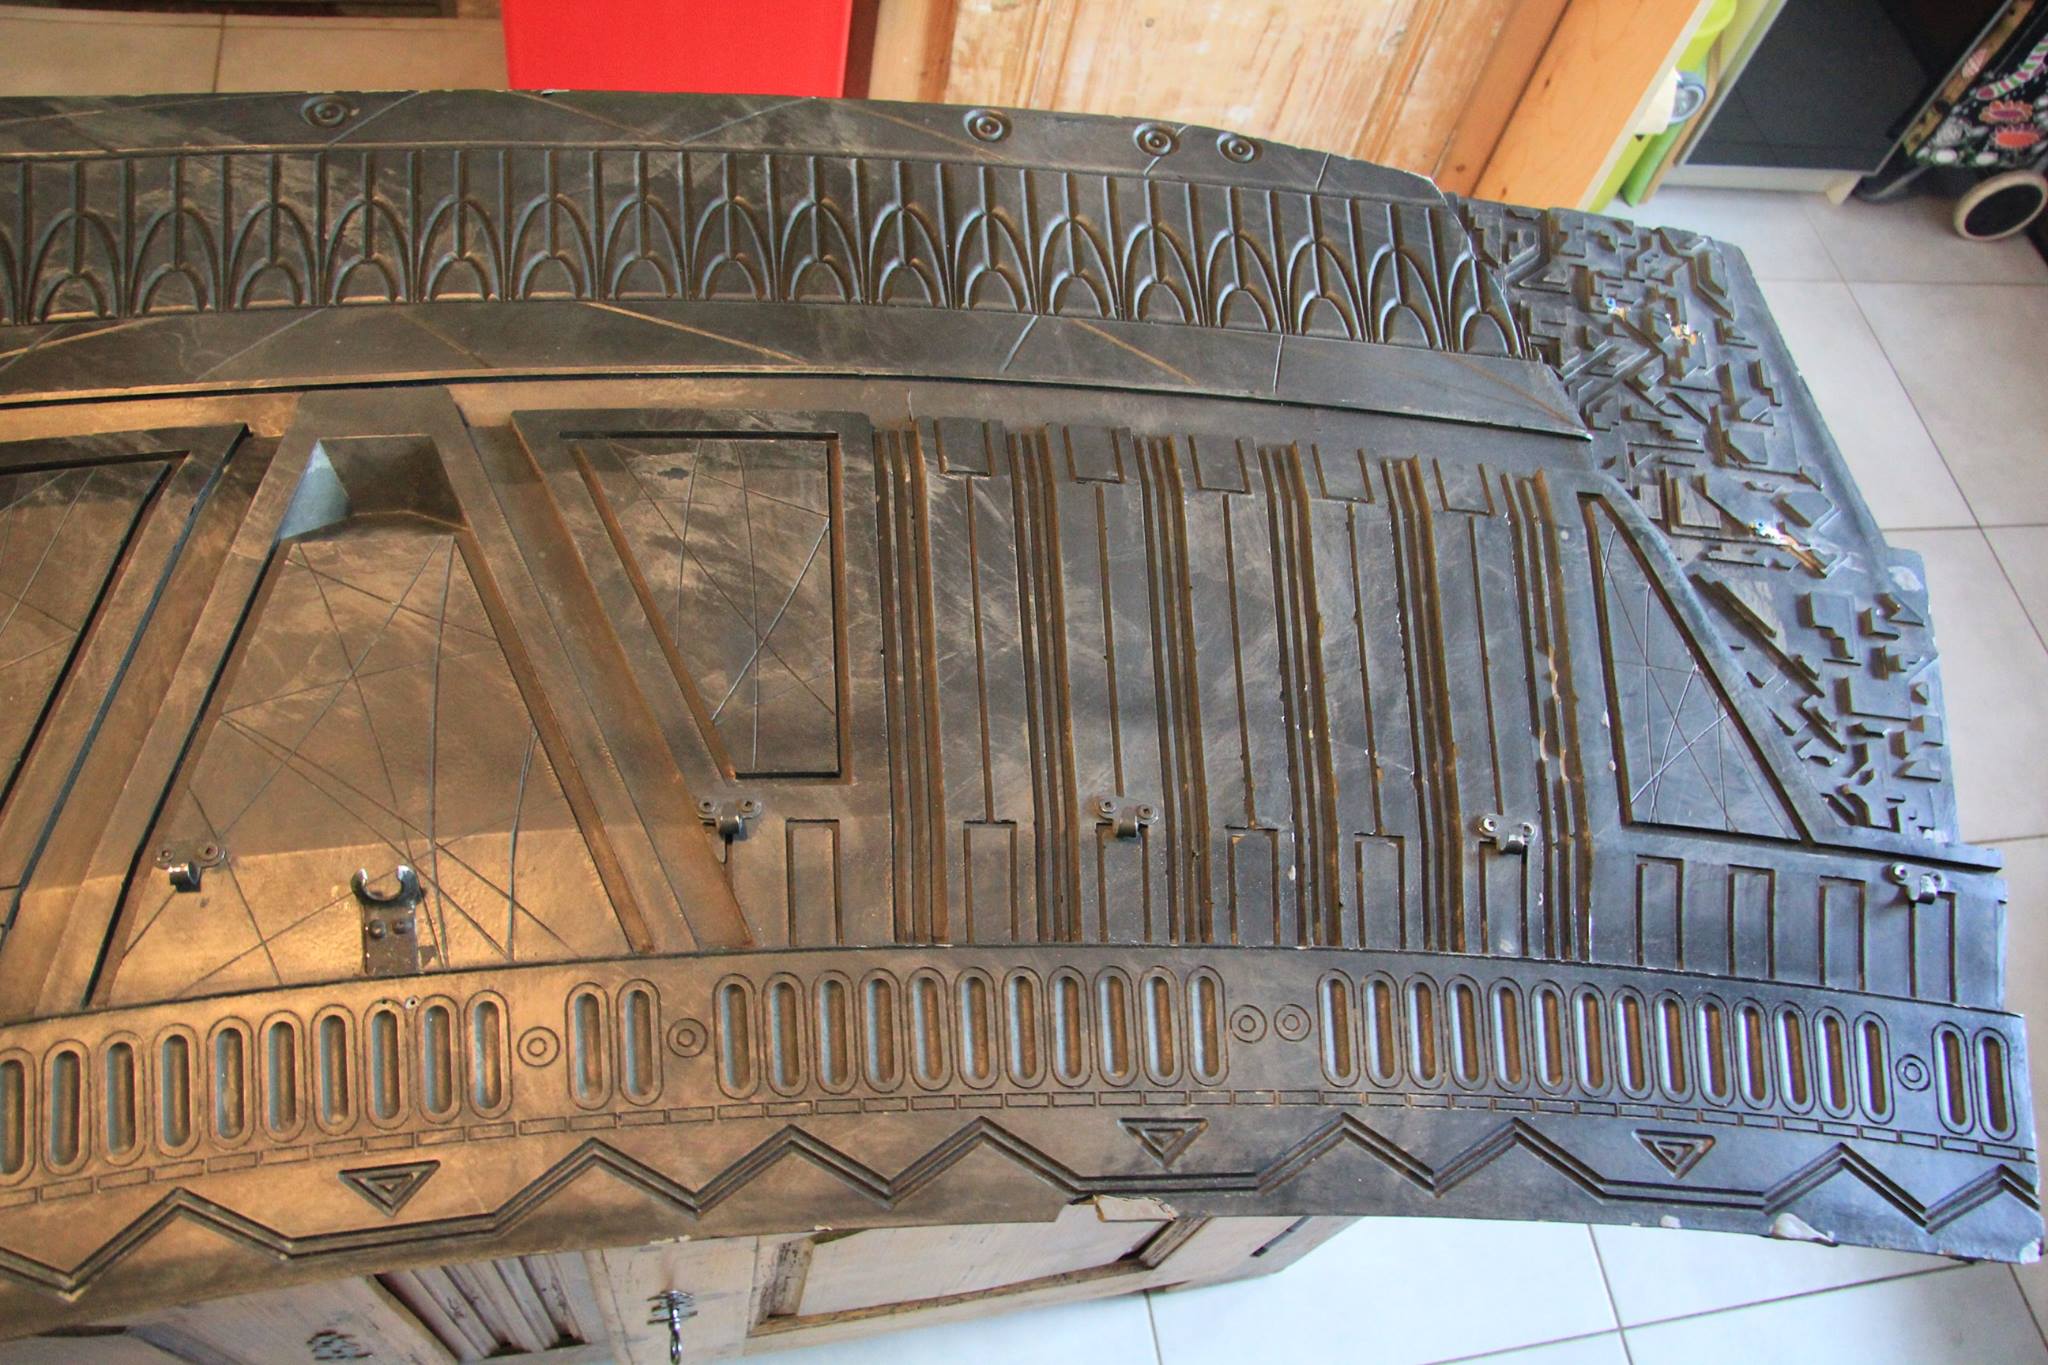
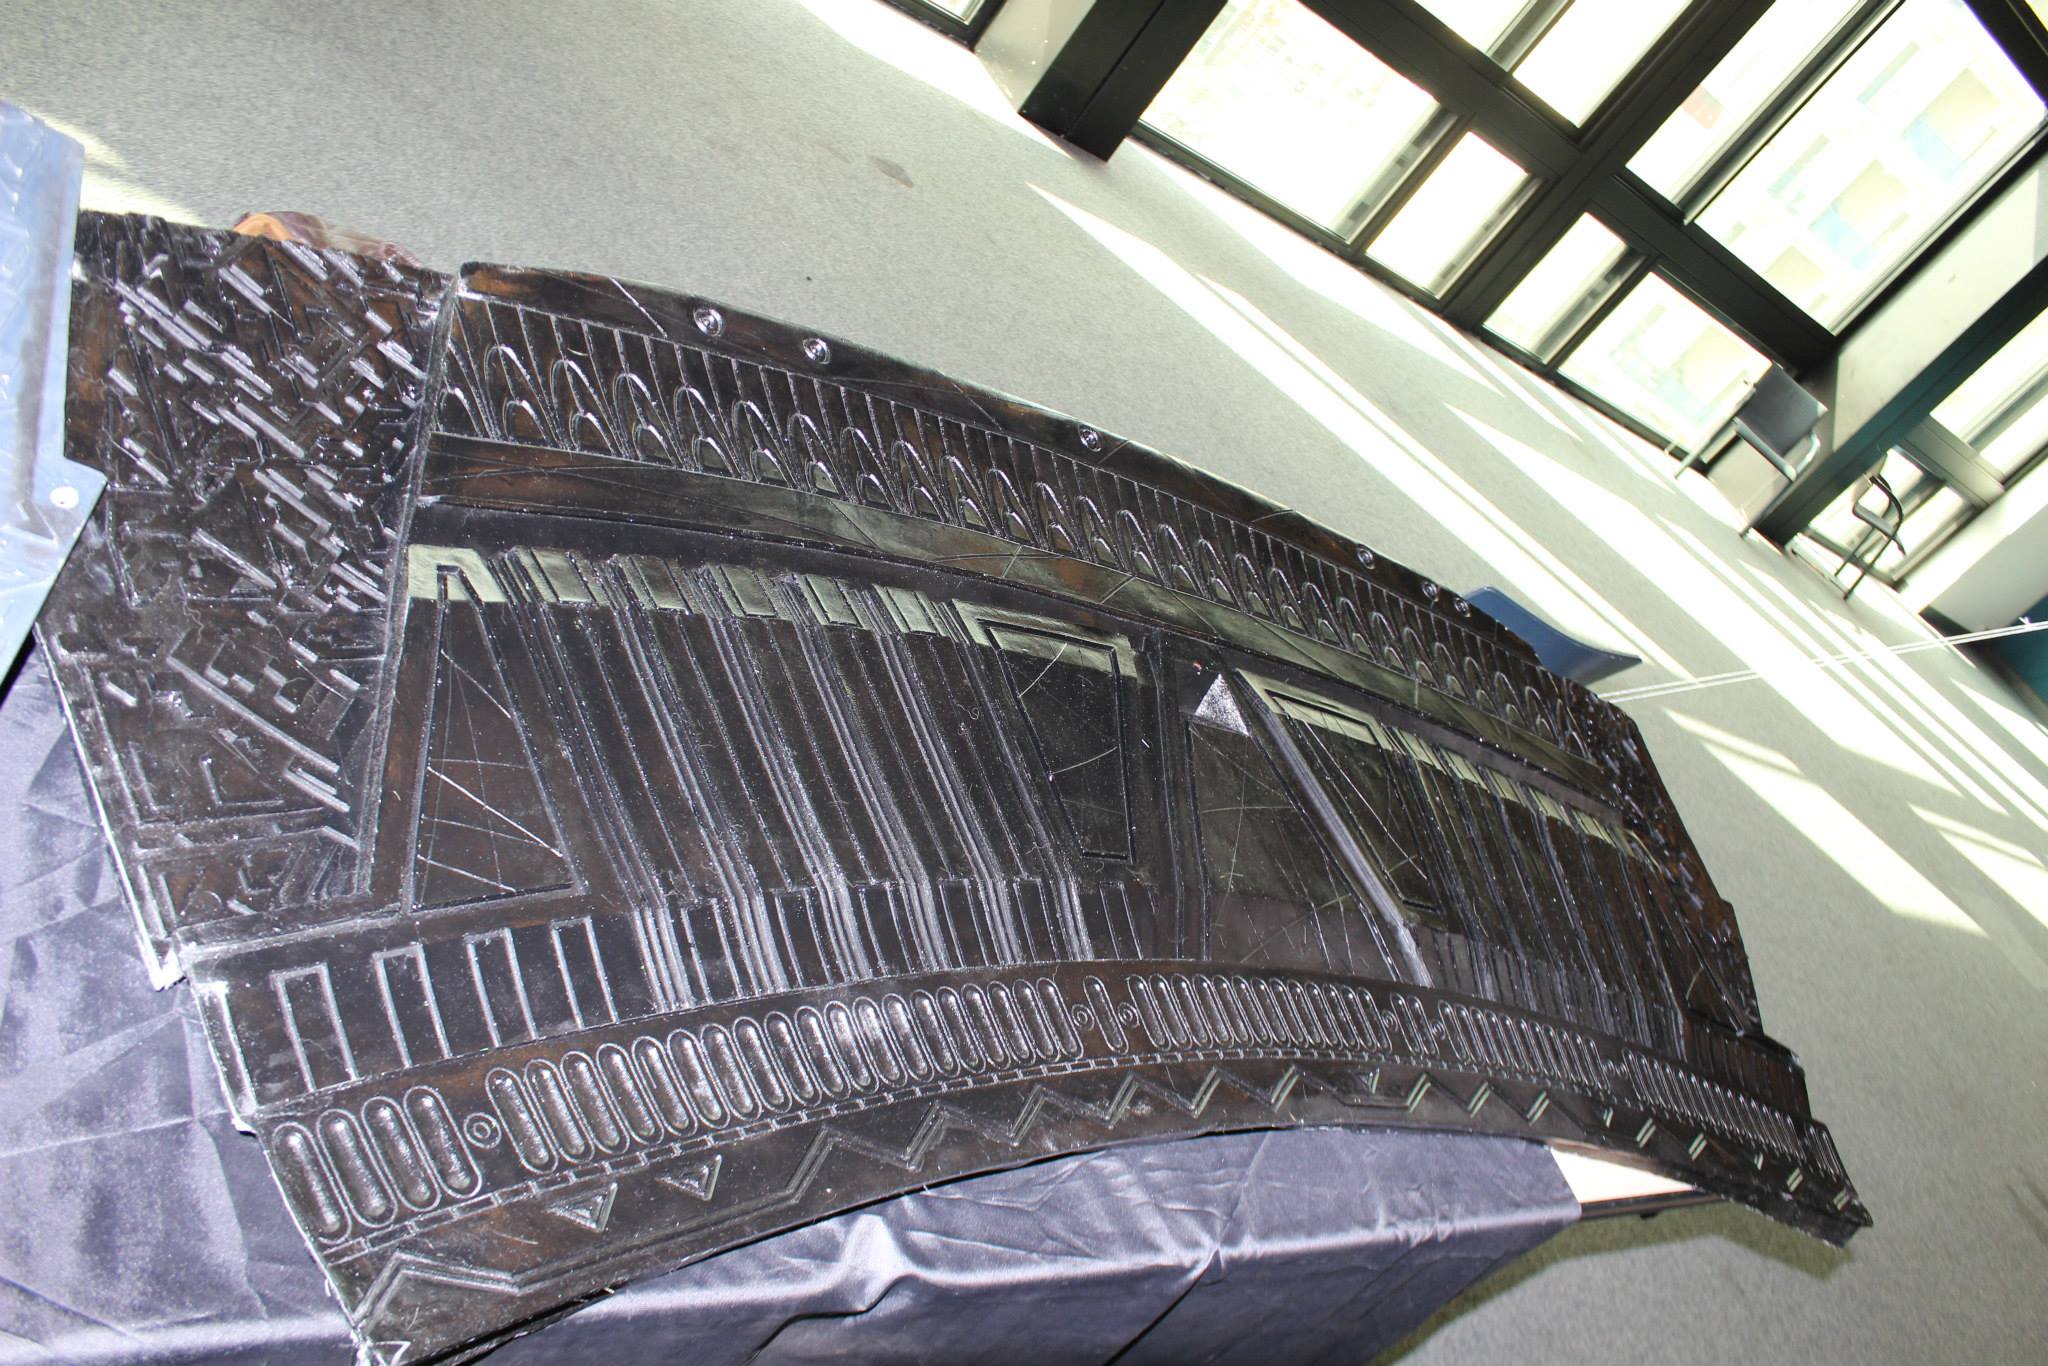
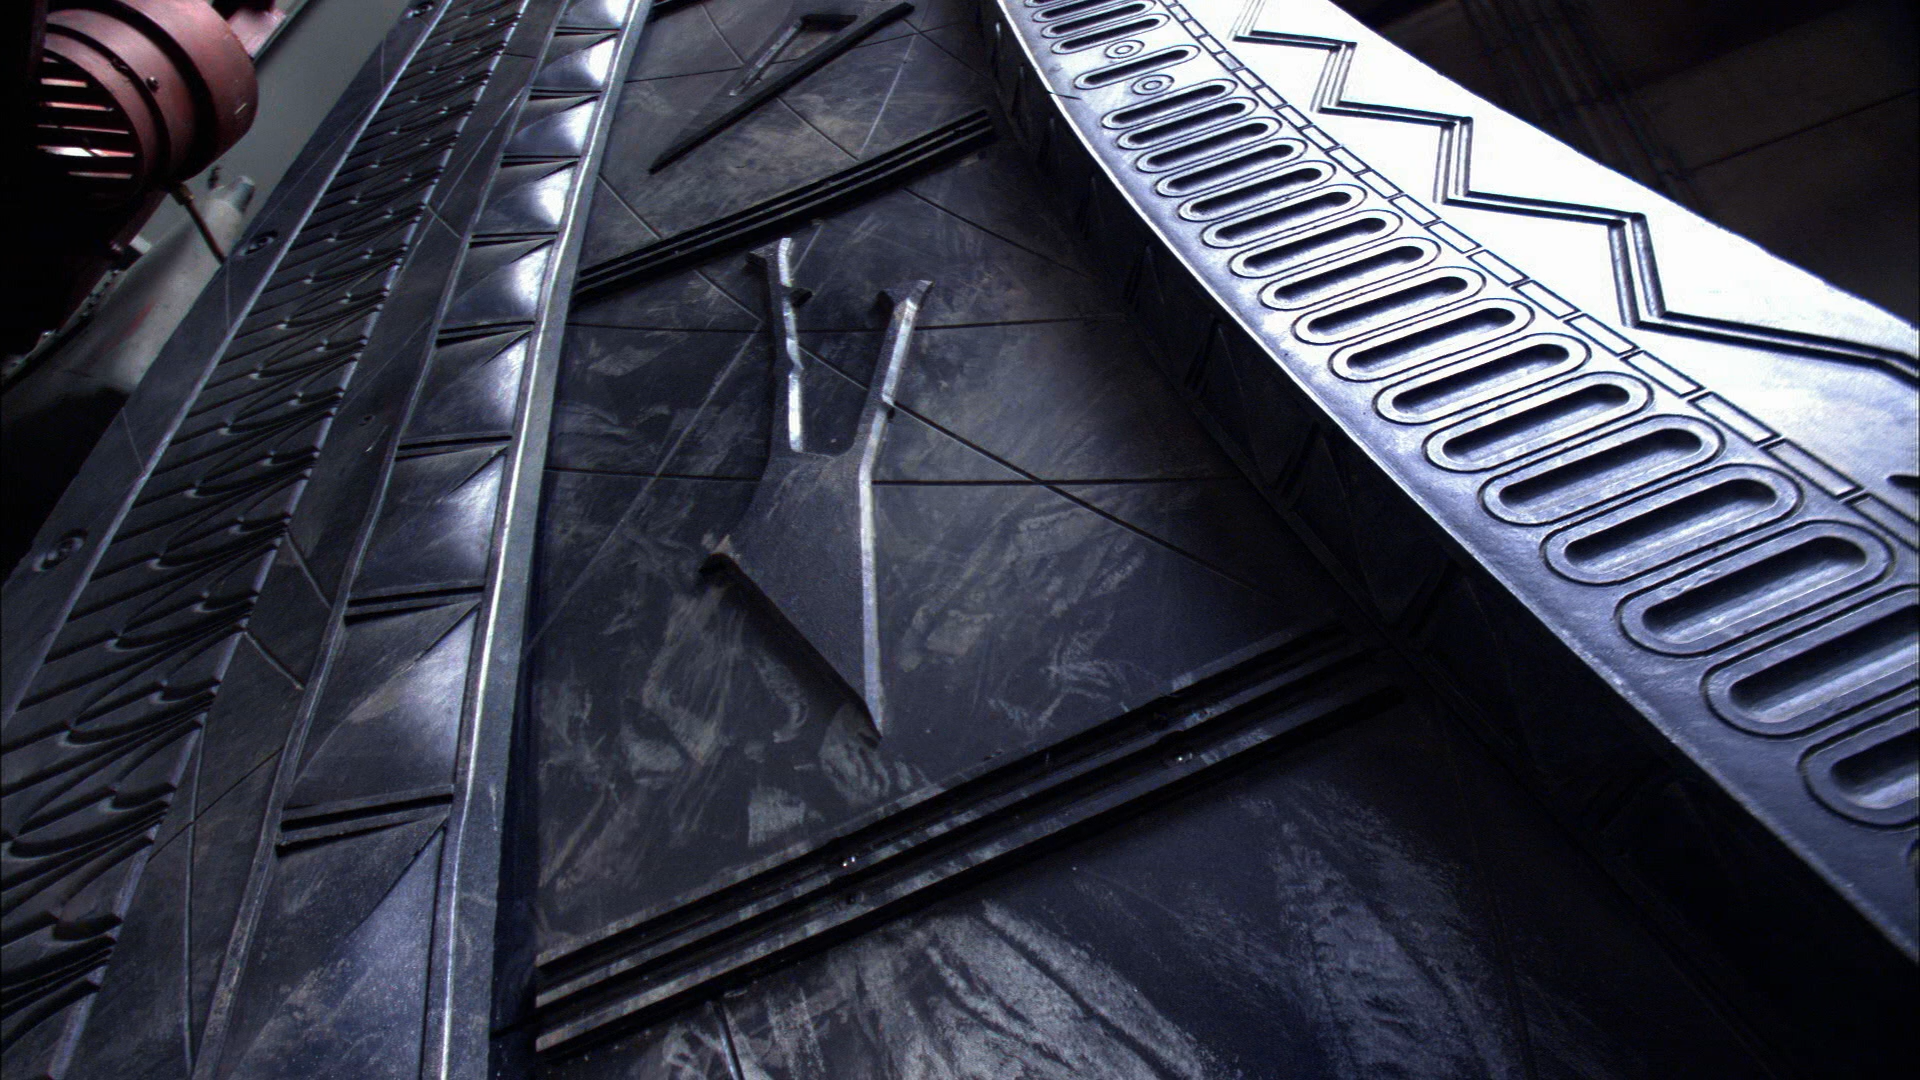
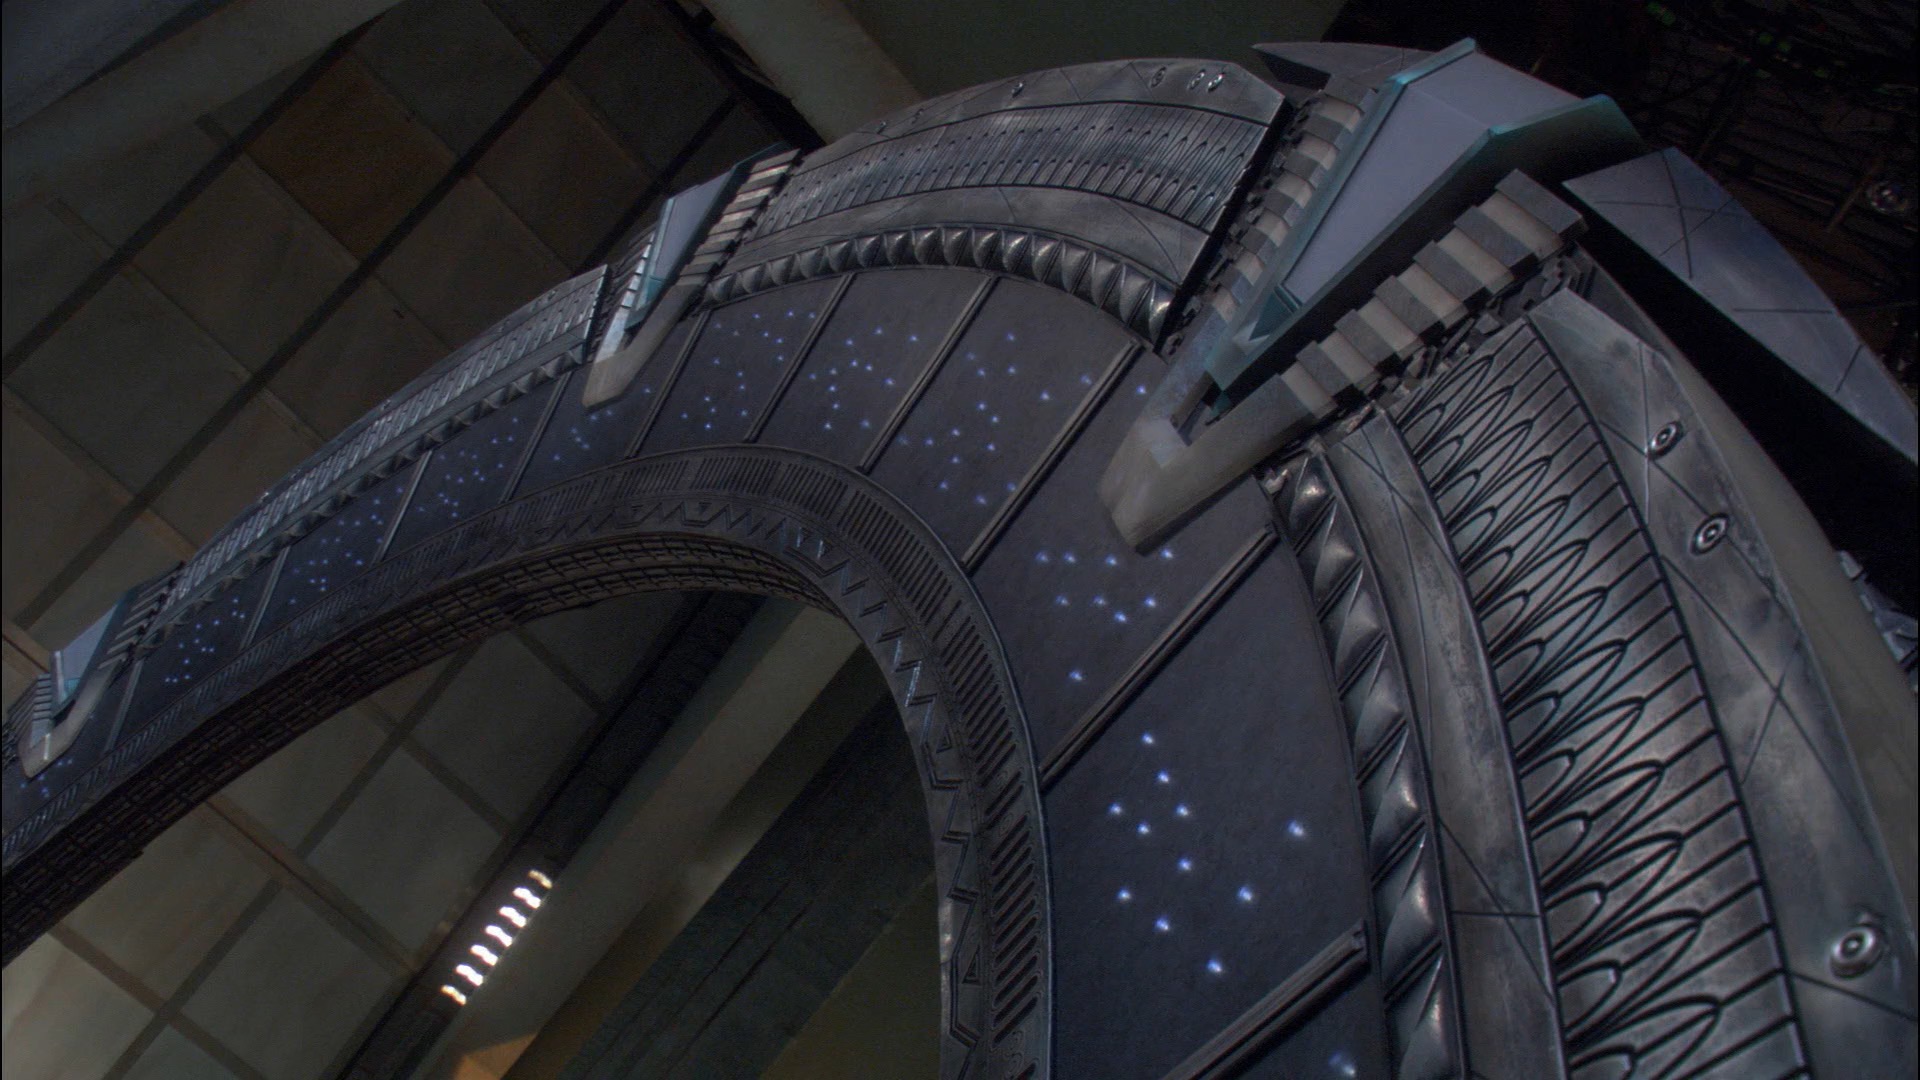
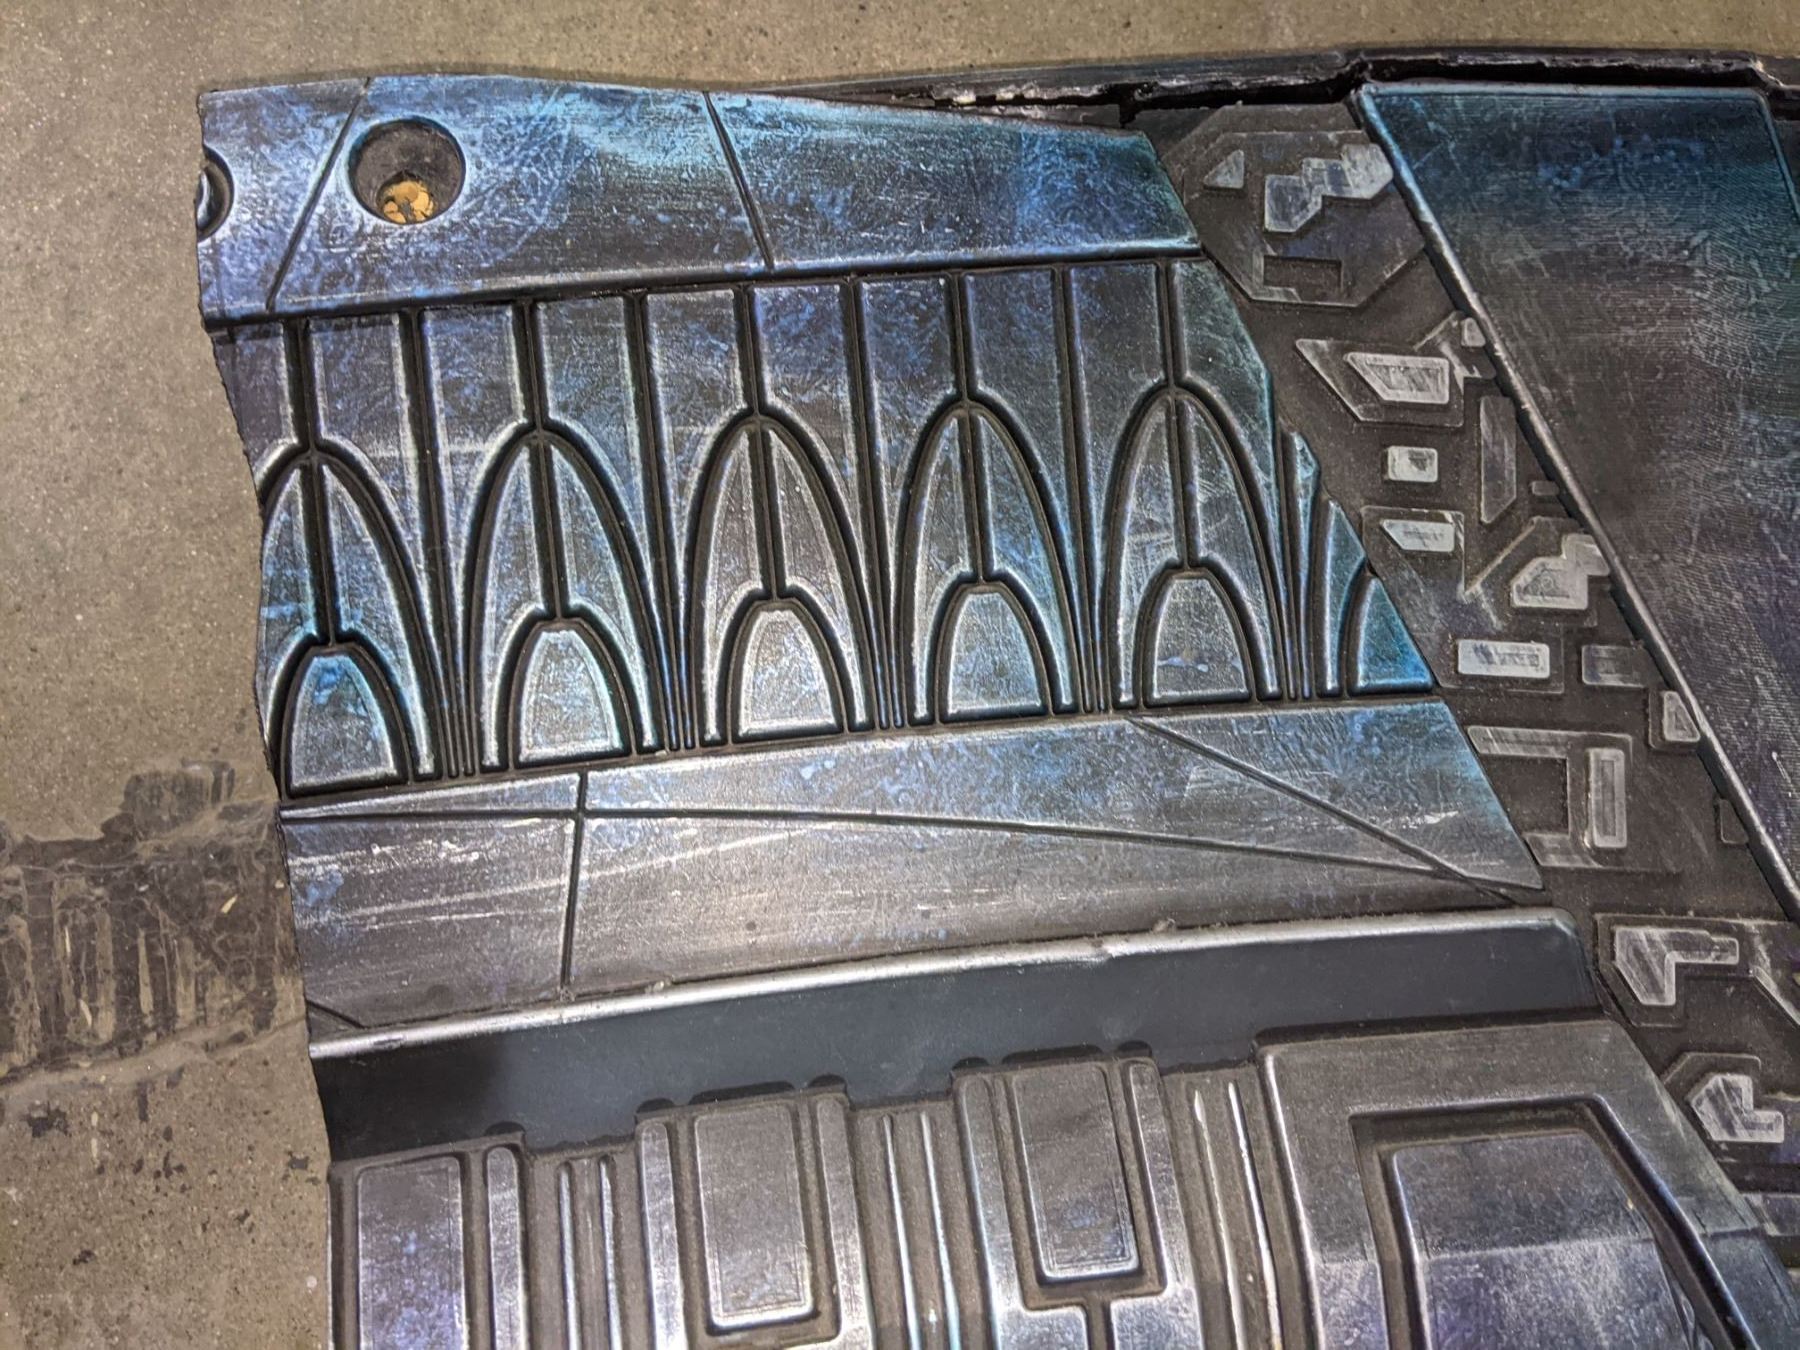
The front face has several sets of repeating details. At the top are six irregularly spaced “buttons.” Immediately below that is a track of “arches.” There’s a series of blocks below them, just above the inner ring. Each block has two interlocking segments with an S-shaped seam between them. On the movie and SG-1 gates, there’s a set of smaller blocks on the bottom edge of the inner ring.
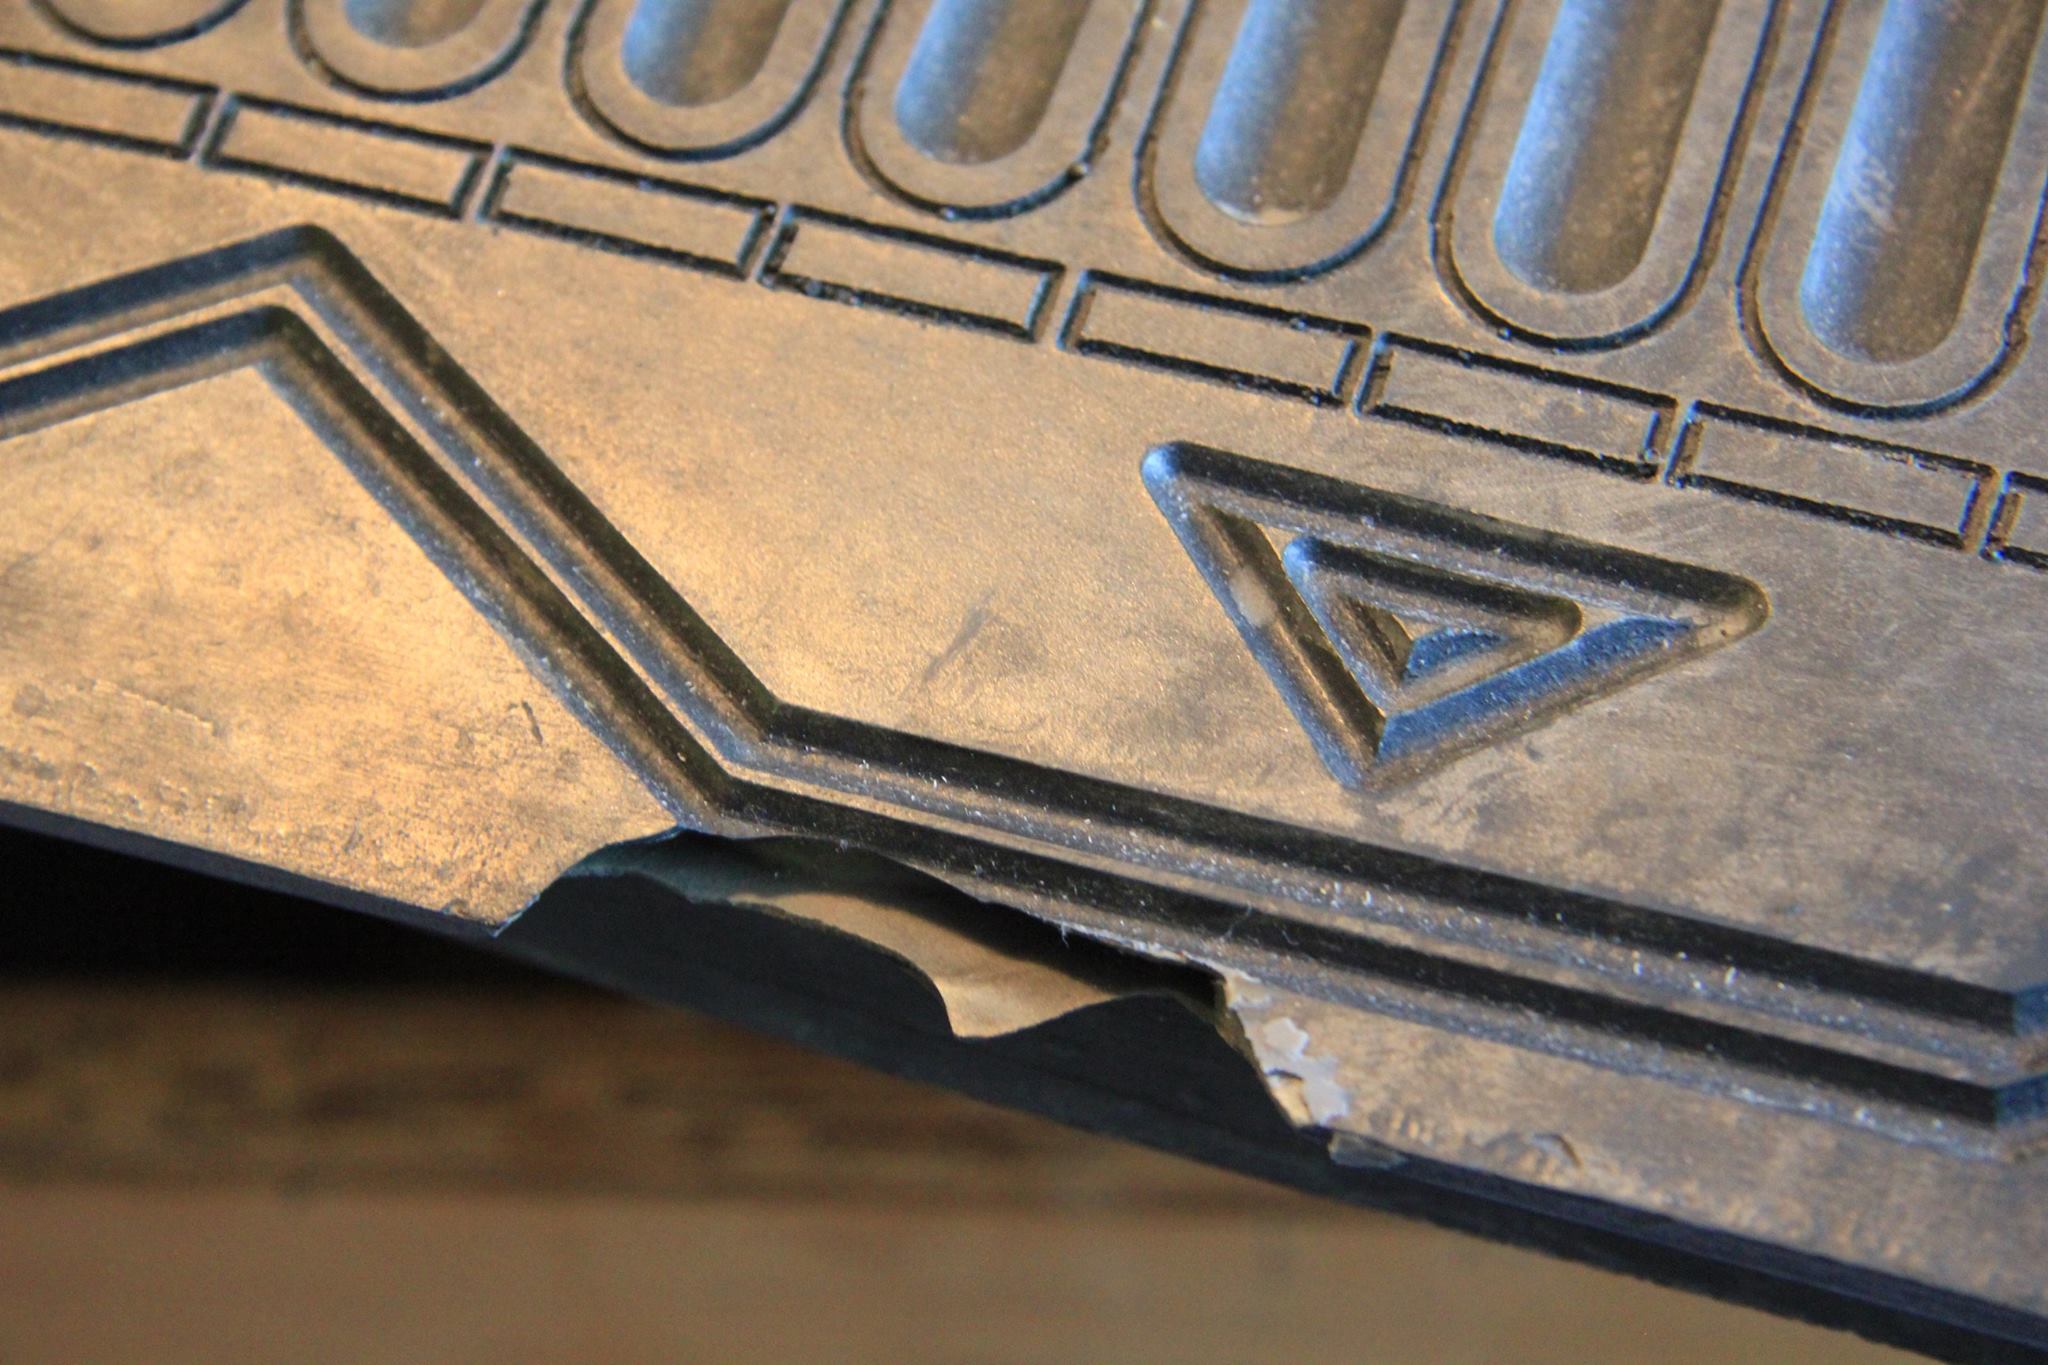
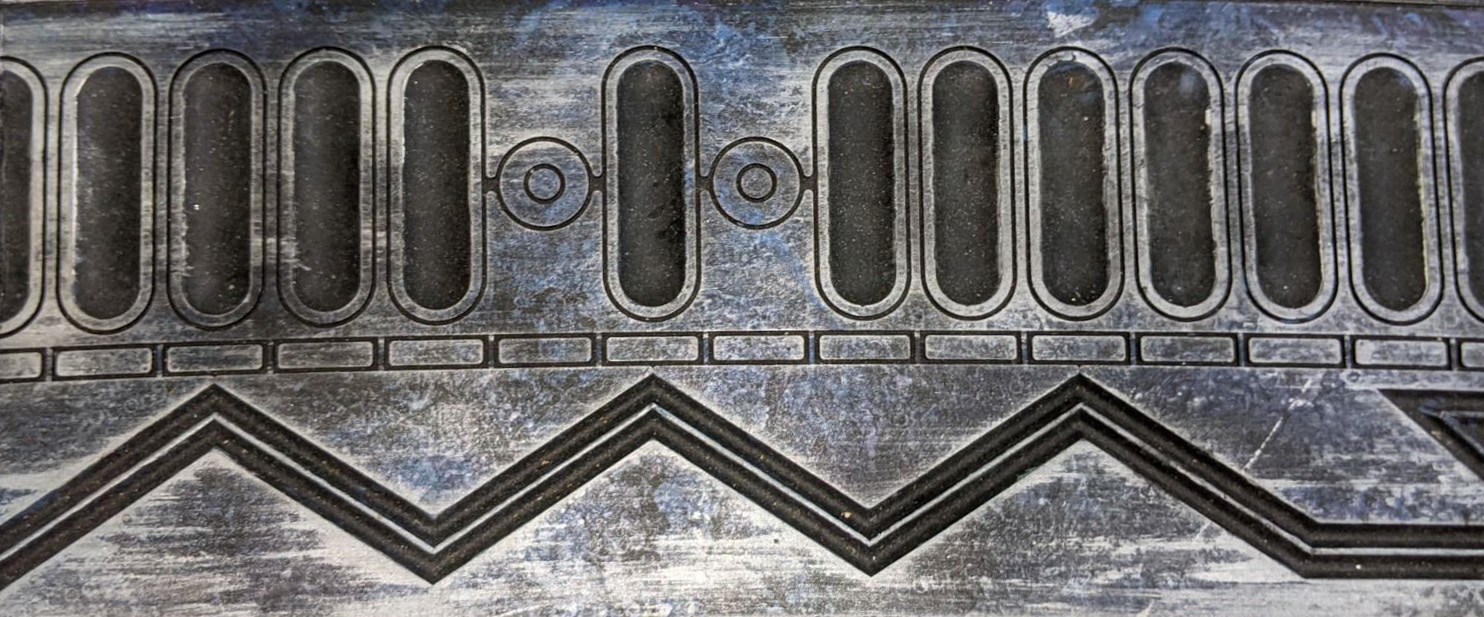
Below that are three tracks of engraved details. The top is a series of pill-shapes in clusters separated by circular dividers. Below that is a simple set of engraved rectangles, and below those are a pair of engraved lines that go around the inner rim in a zig-zag pattern, offset with occasional horizontal segments.
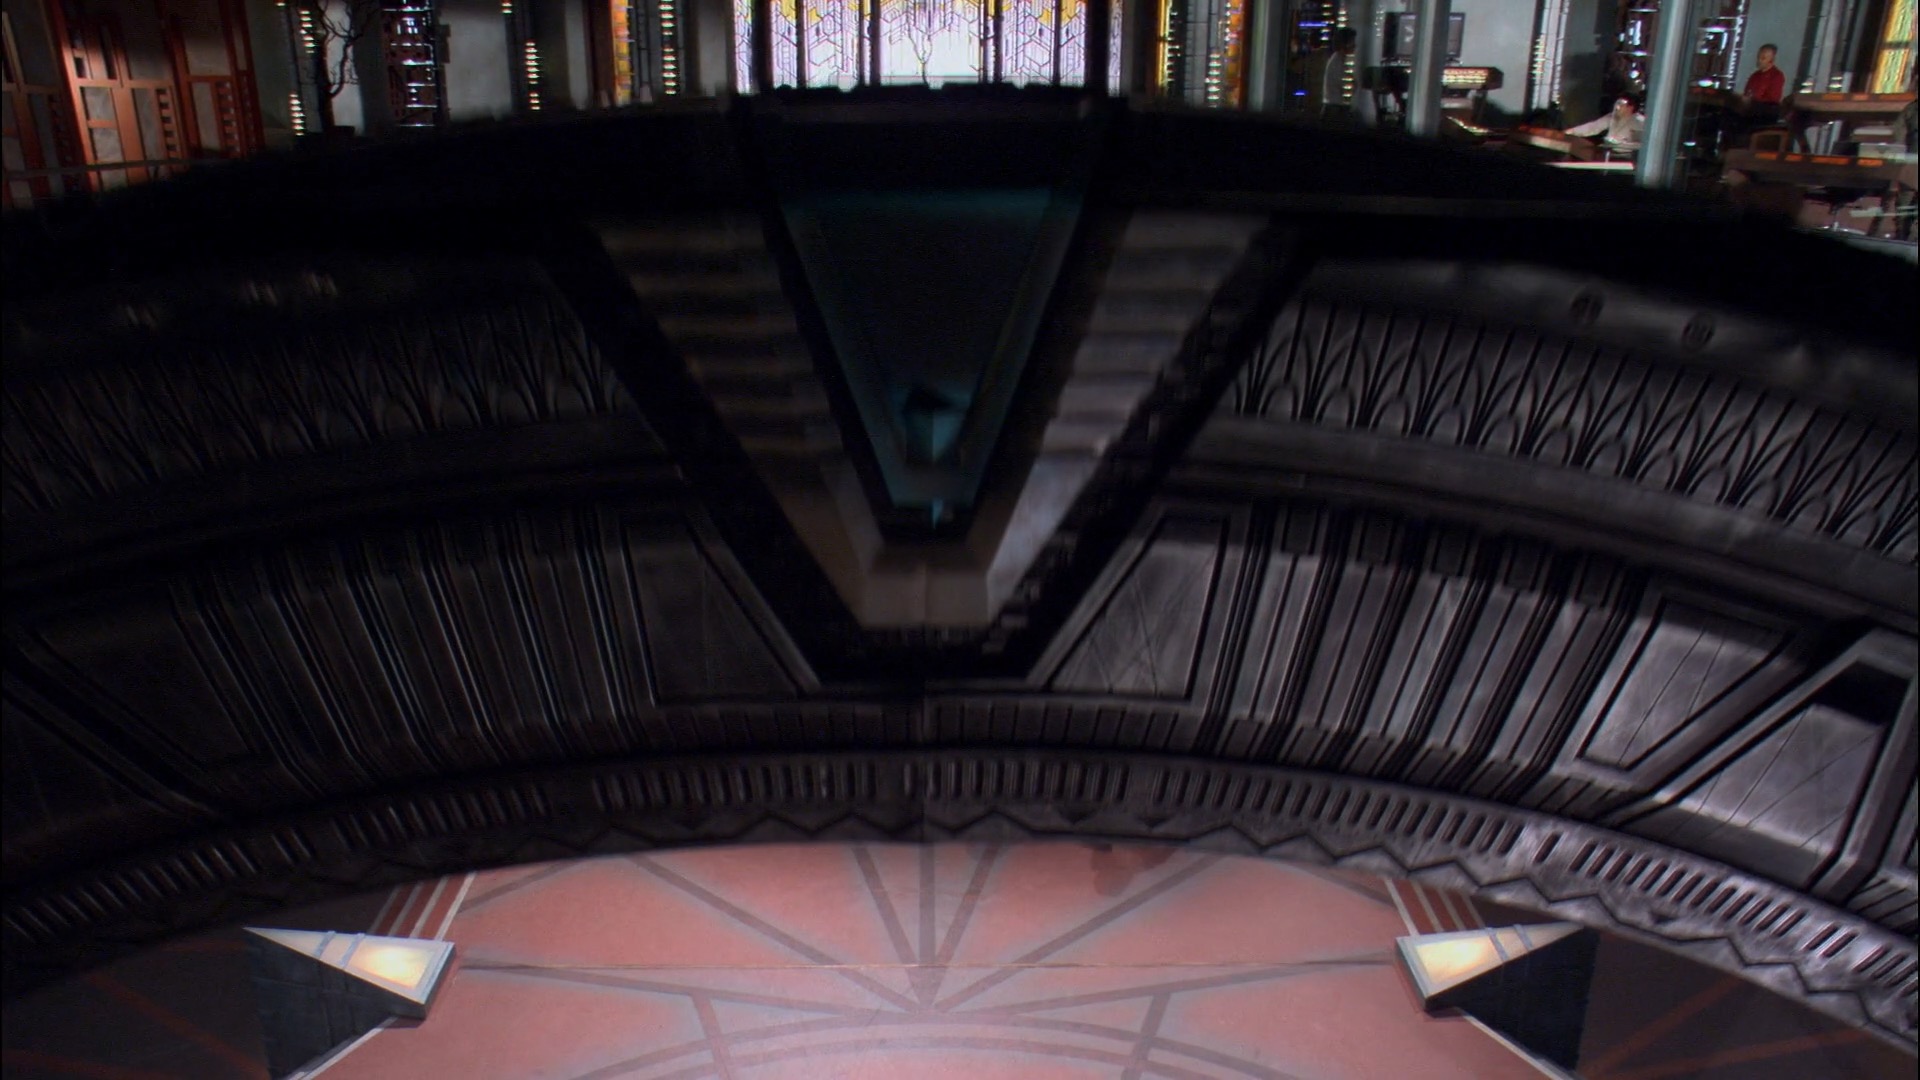
The inner rim has regularly spaced “emitters” which consist of three long greebles.

The rear face is similar to the front face, but omits the S-blocks, and the inner ring is replaced with a sort of conduit. The outer rim has an extension around the middle which is covered in an elaborate mosaic pattern.
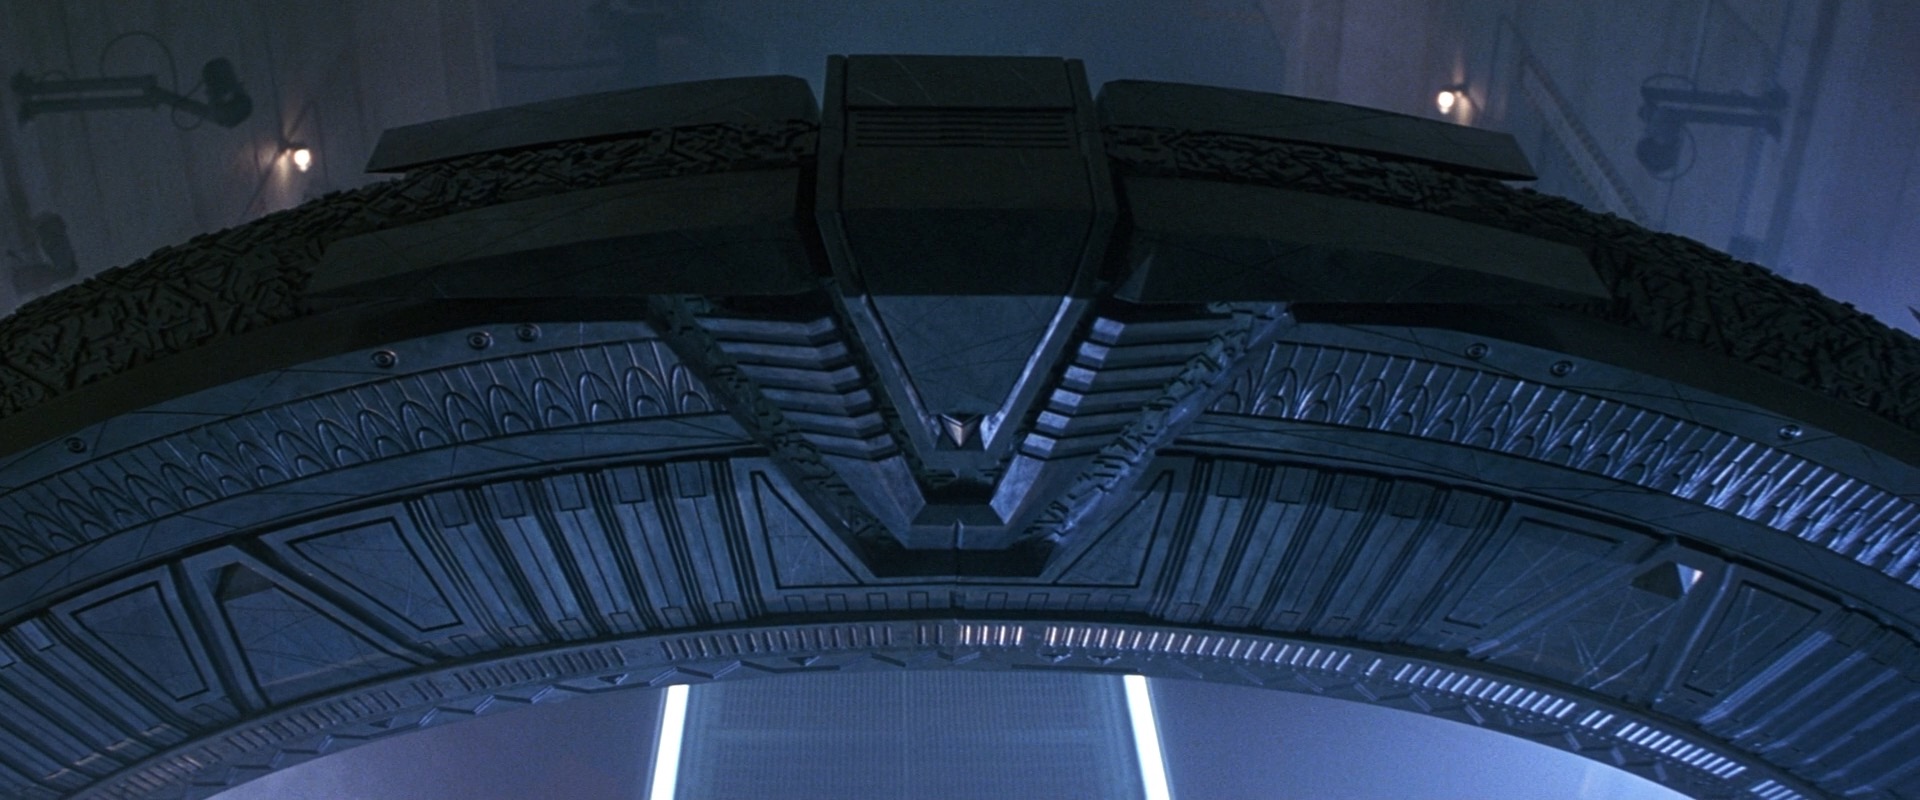
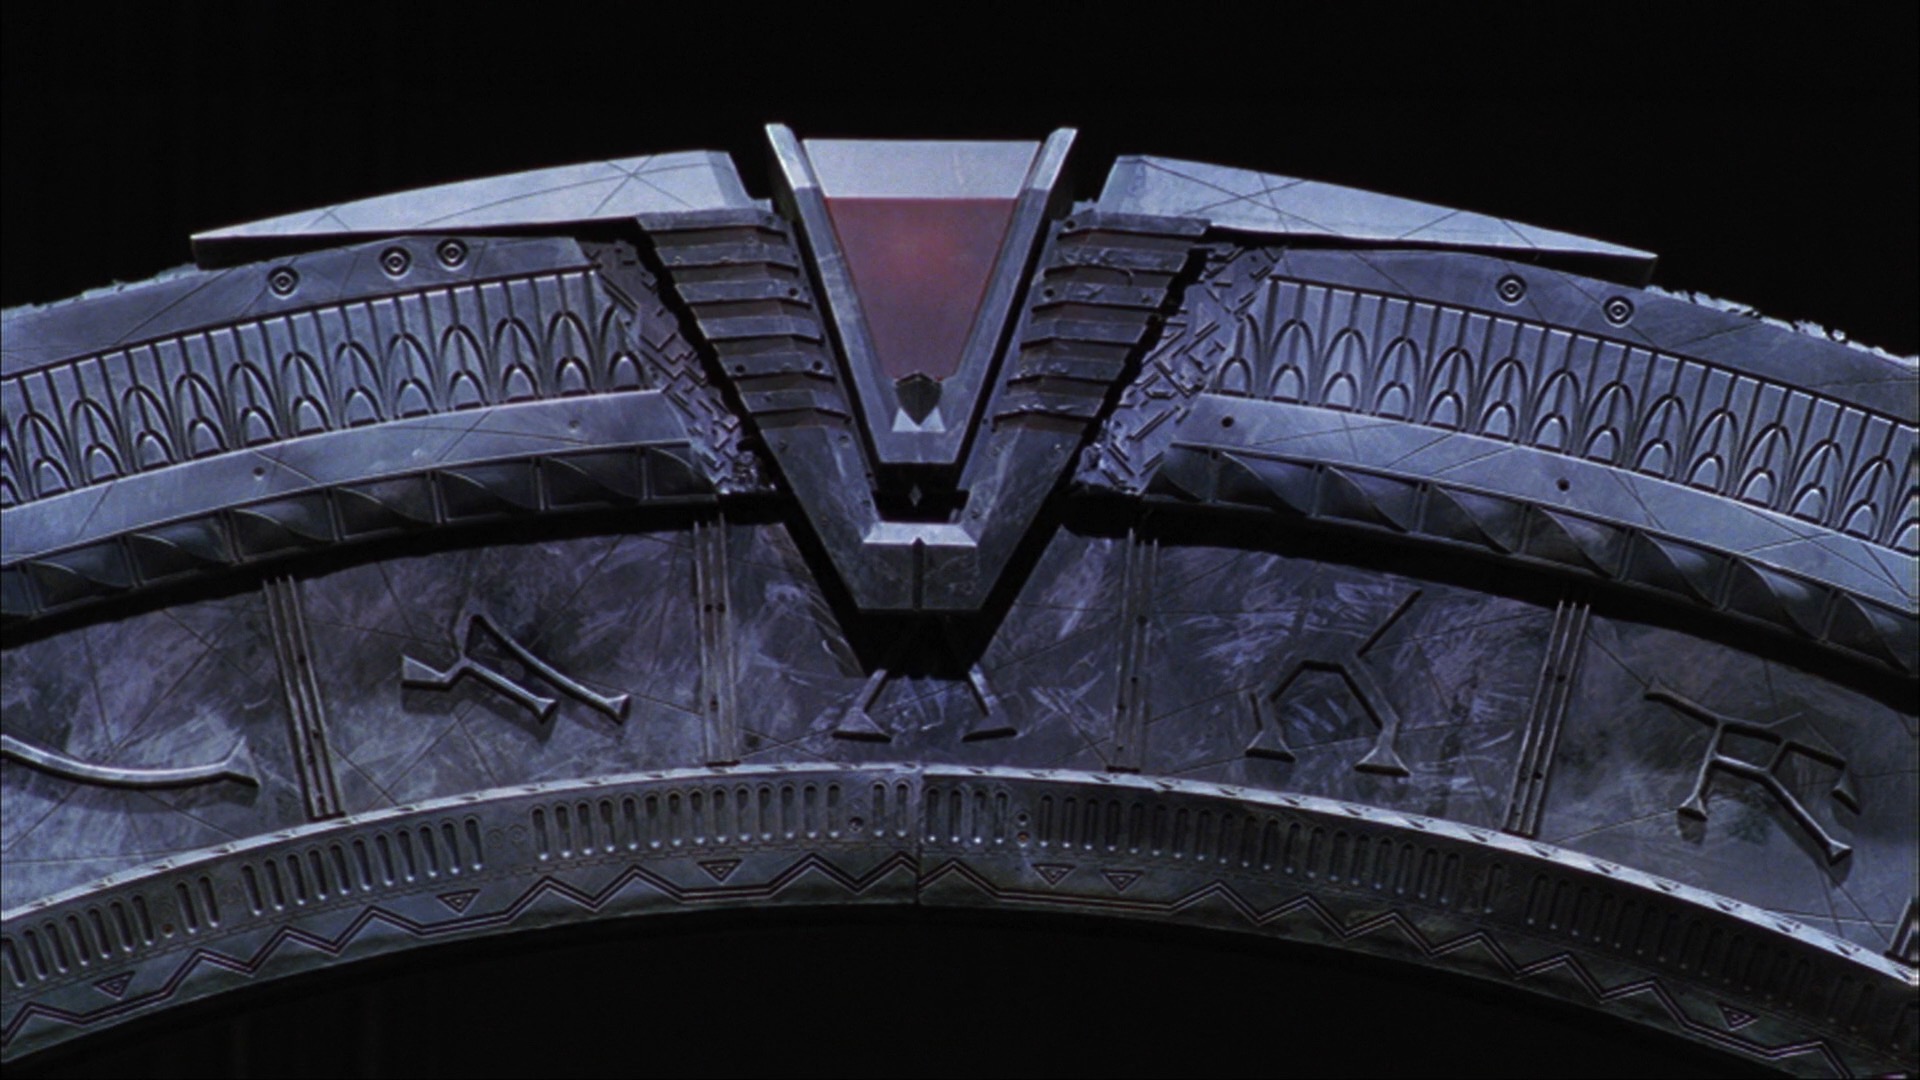
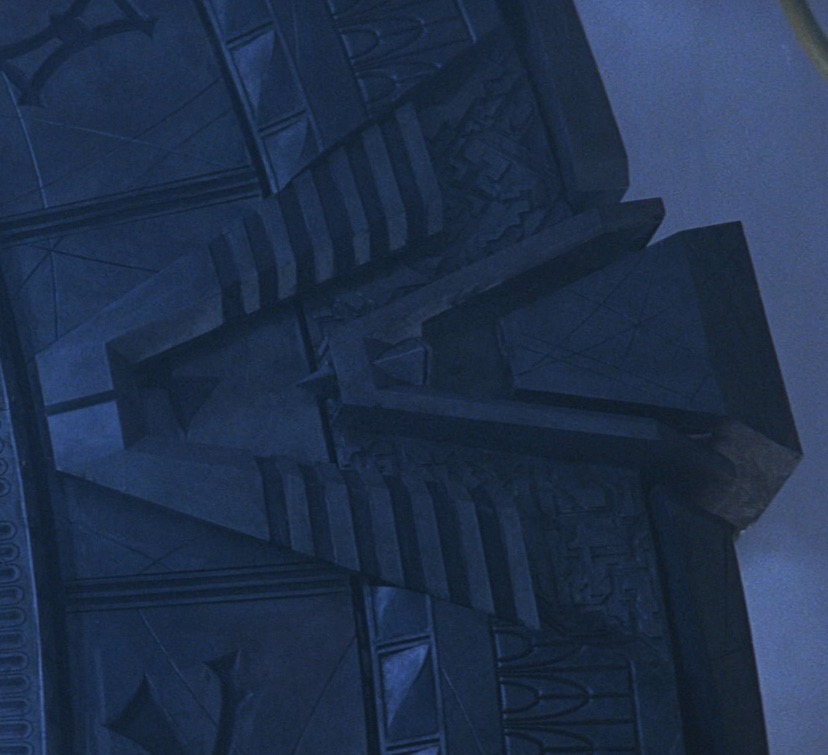
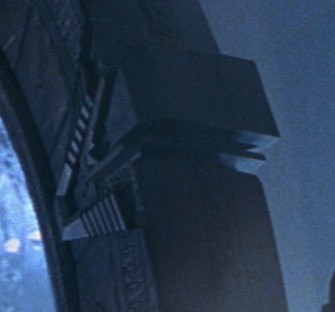
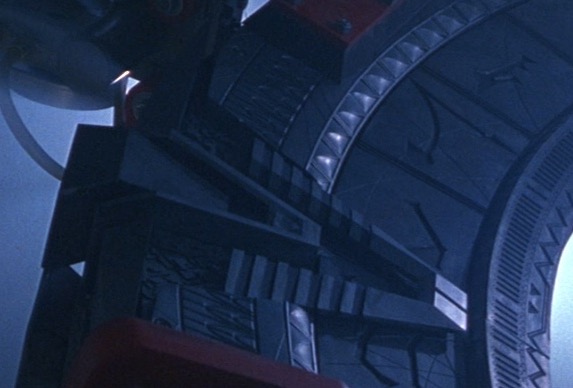
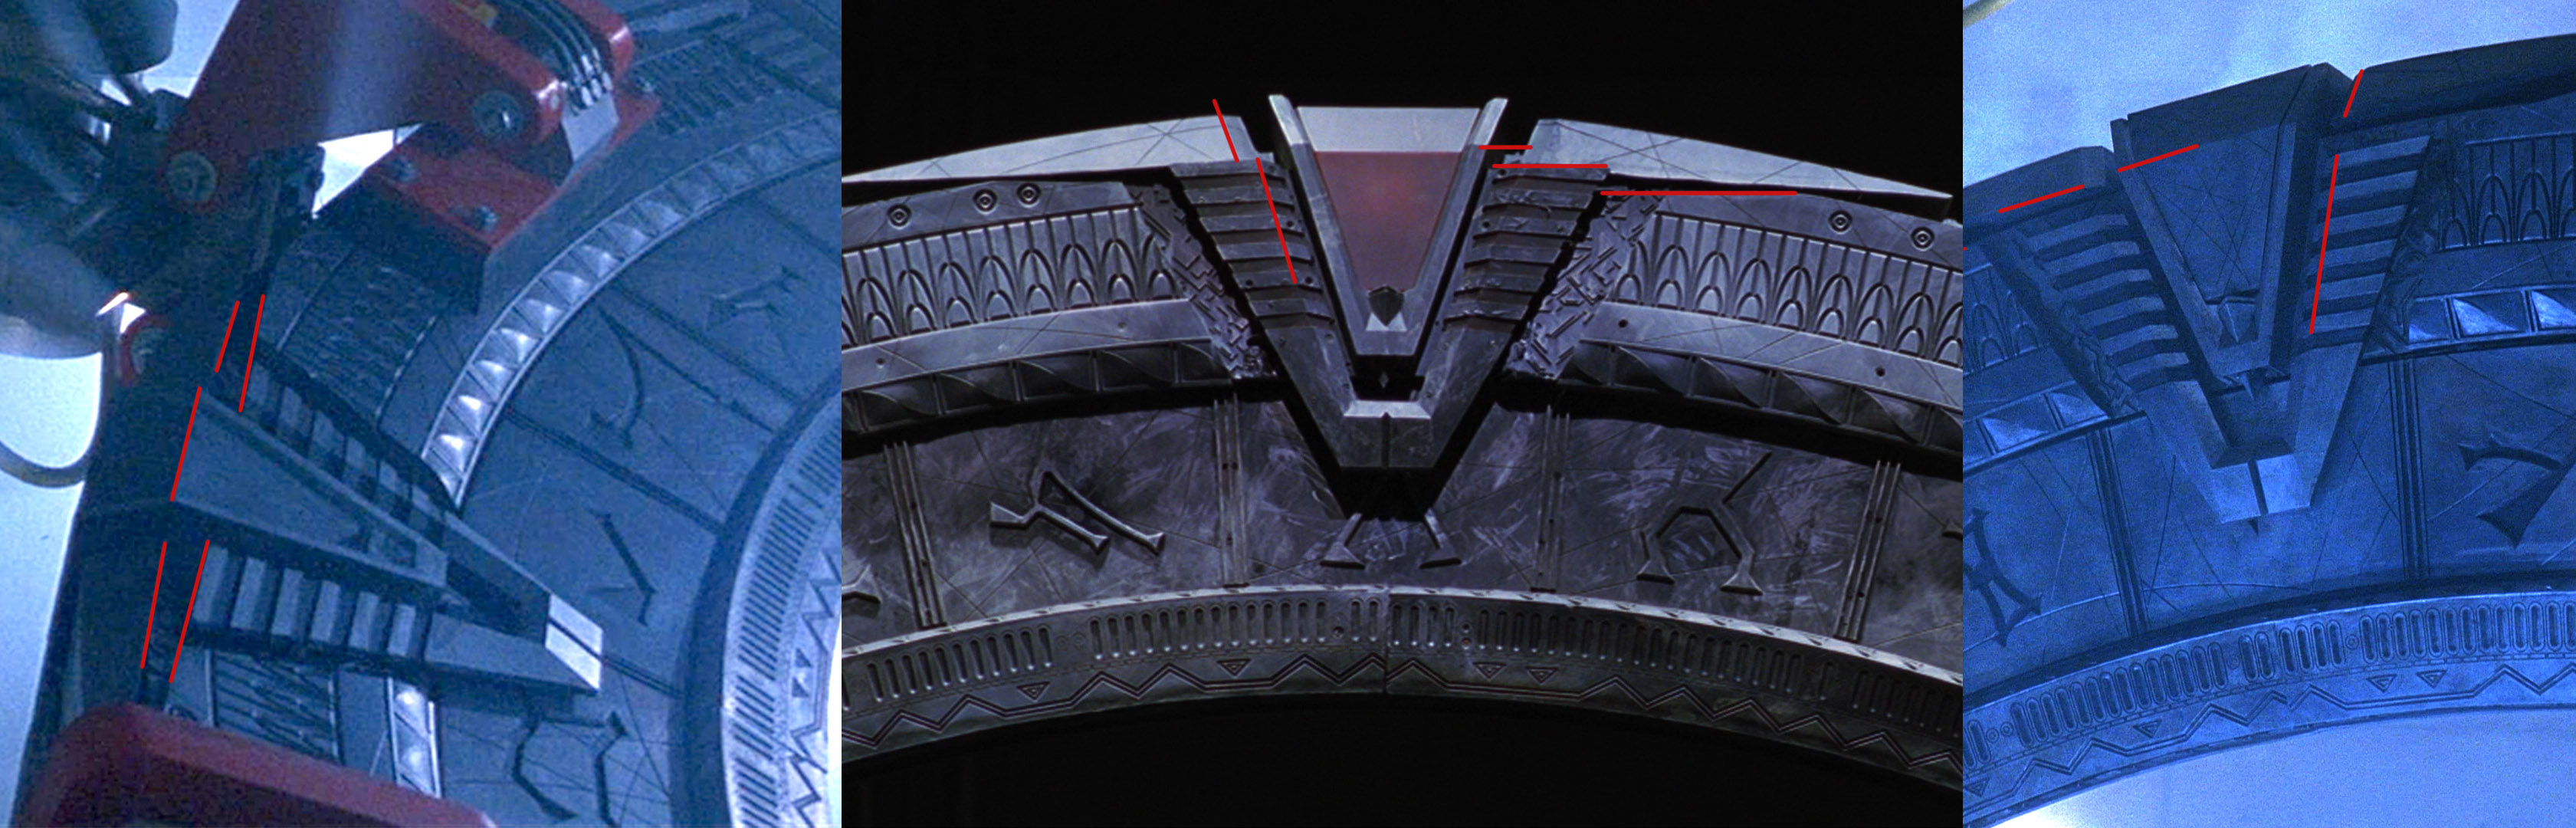
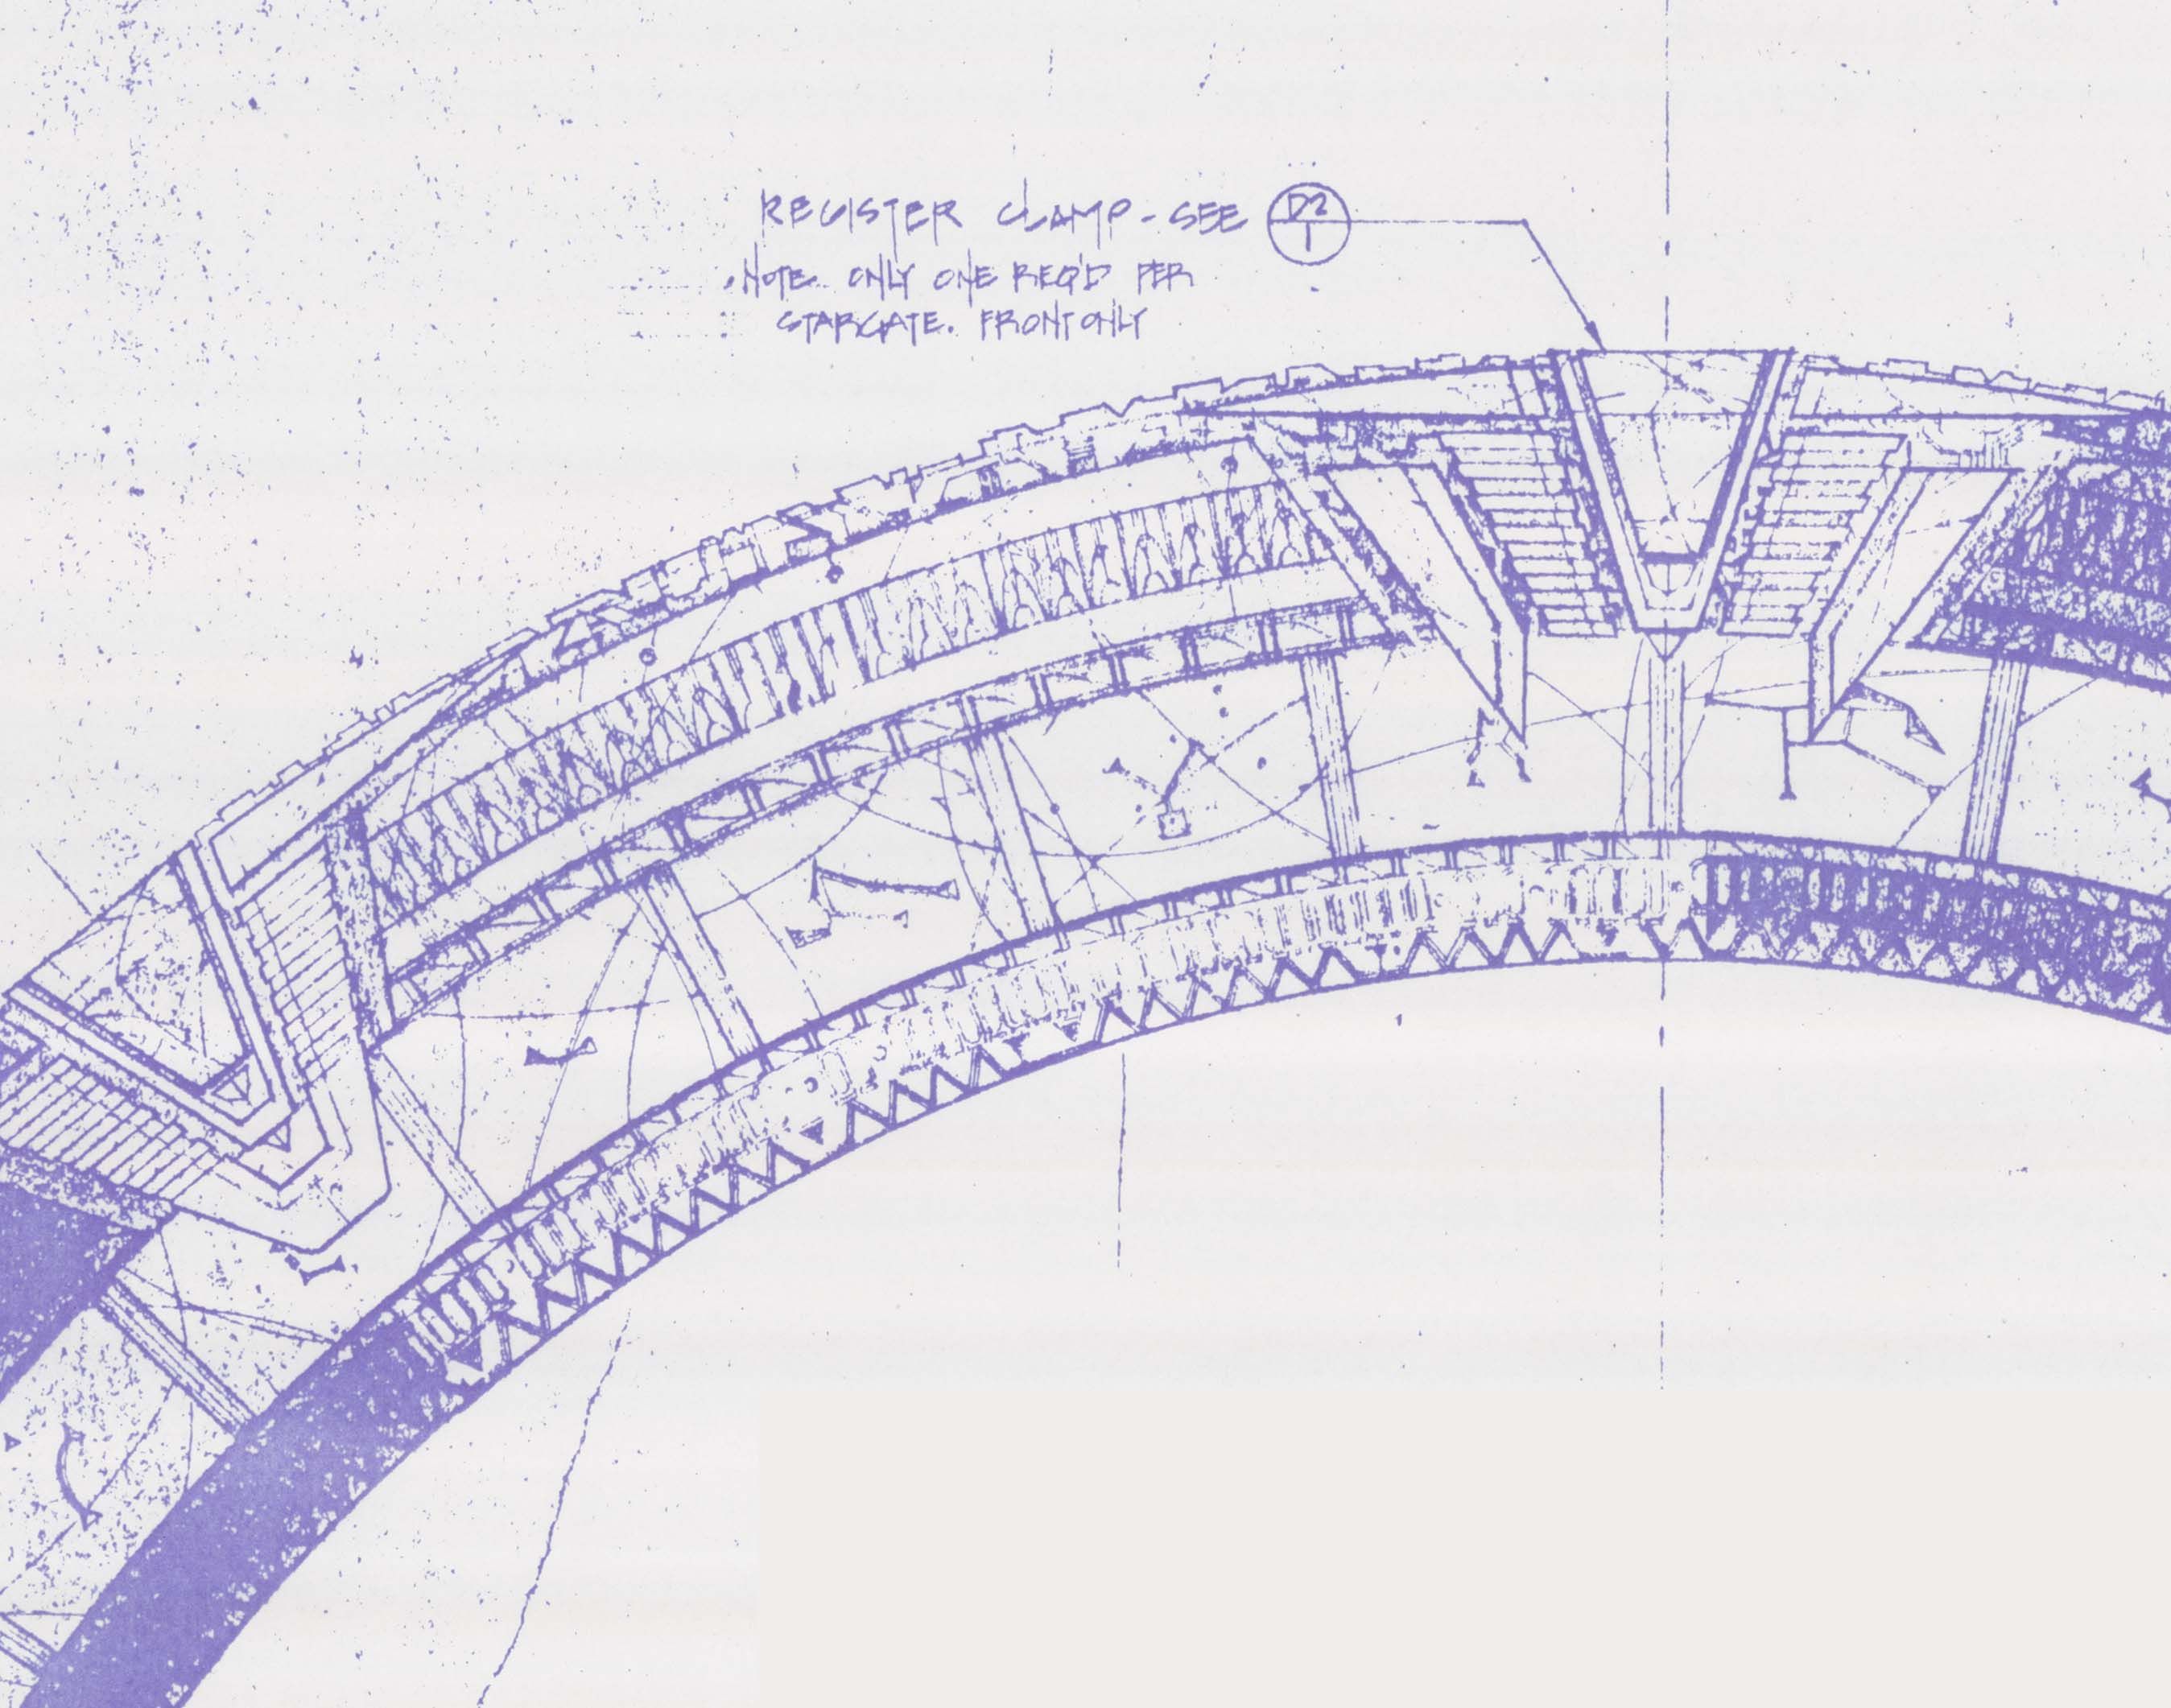
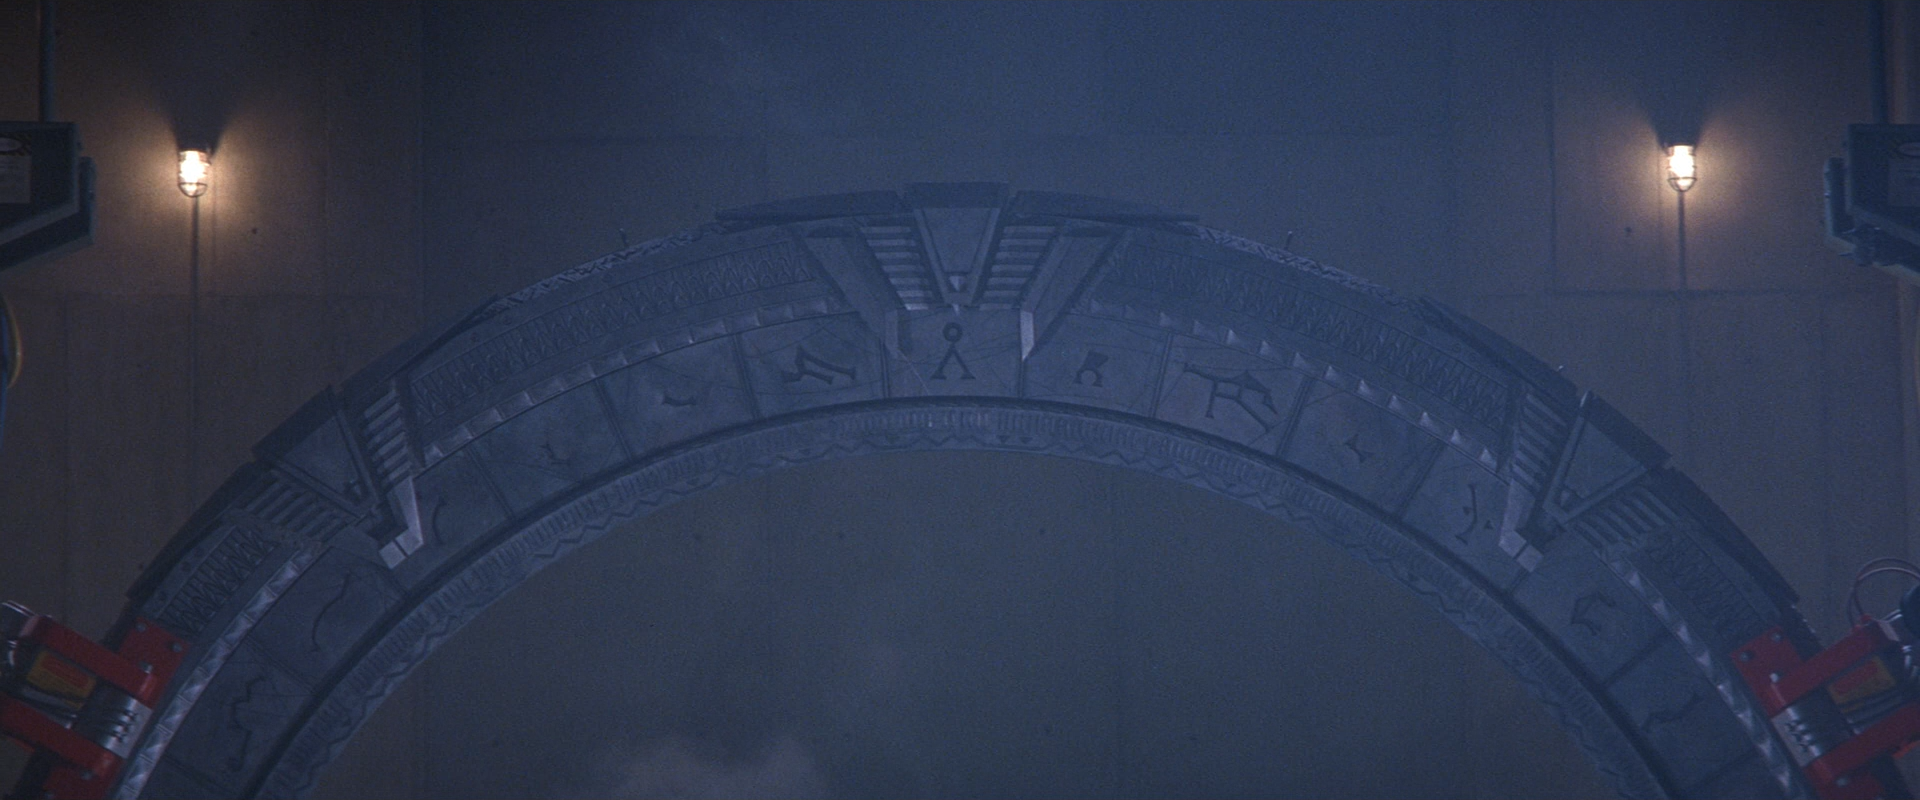
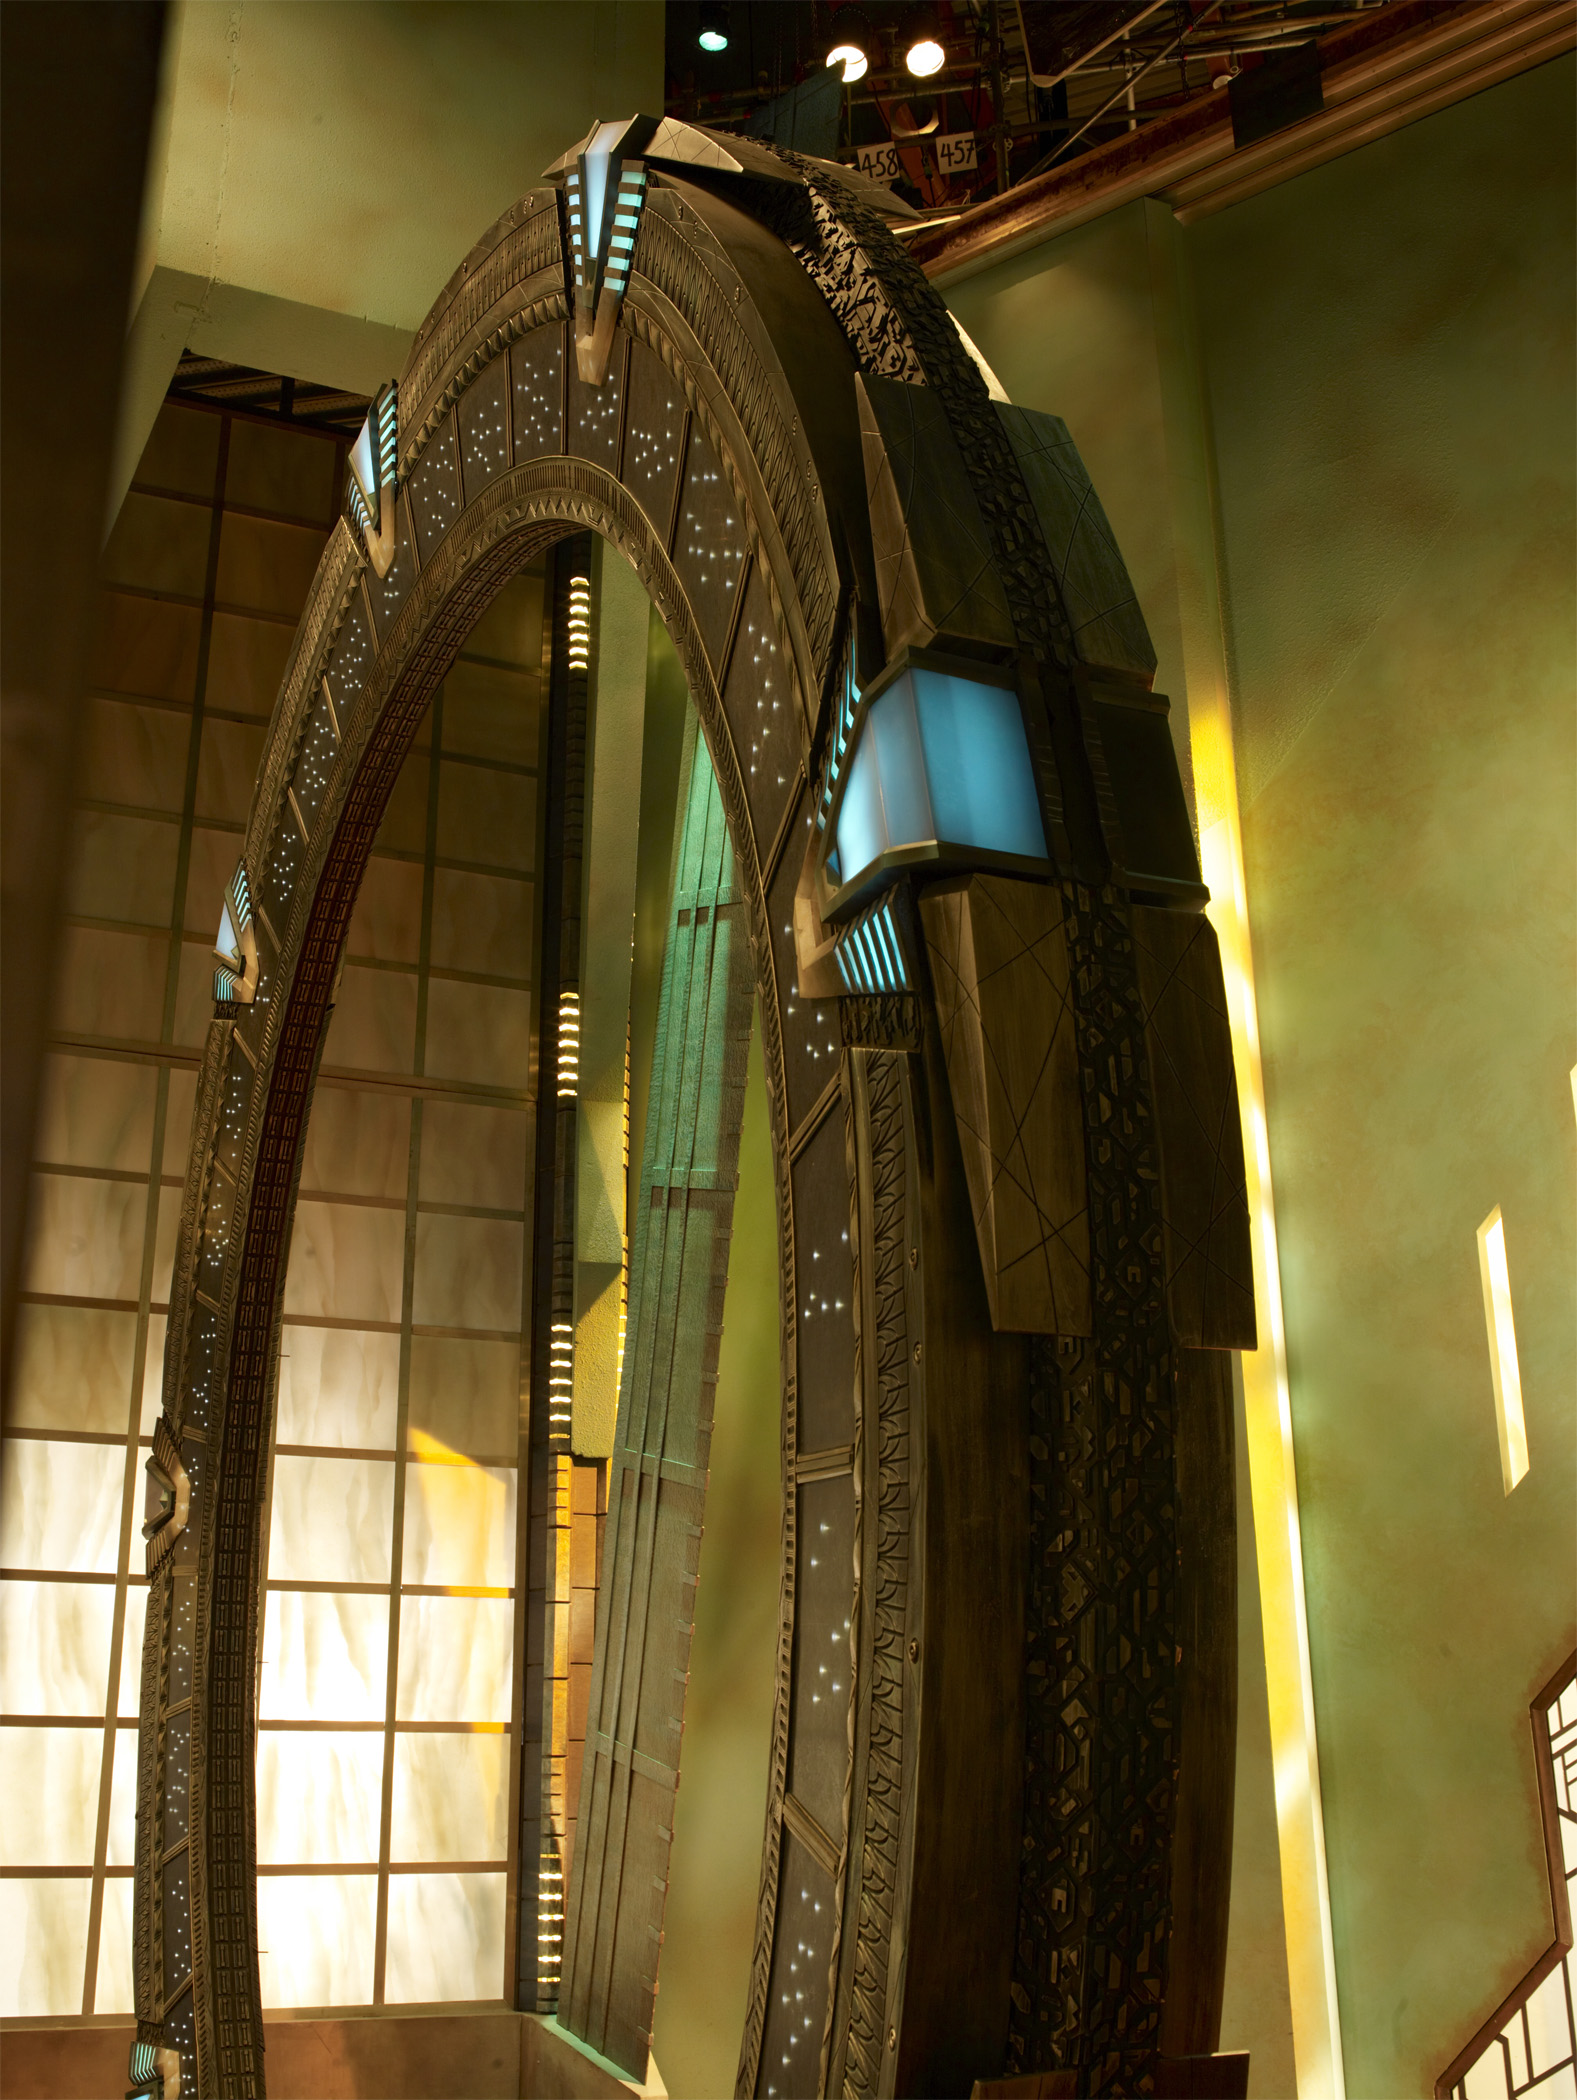
There are nine chevrons equidistantly positioned around the ring. Each chevron consists of a clamp which is set inside a slot. The slot also has a mosaic pattern inside it. Above the chevron is a jewel1I call to the jewel the “Chevron Block” in my models, and the clamp simply the “Chevron,” but I’m using terminology from the production of the film for clarity in this article, rather than having the words “chevron” and “block” refer to multiple objects. Above the jewel, level with the rim, are four “wings.”
The stargate’s outer diameter is exactly 20 feet. The ring itself is 2.5 feet thick, making the inner diameter 15 feet. Since you’ll probably be building out from the centerpoint using lathe and array tools in a 3D program, here are those figures as radii:
Outer radius: 10 feet / 3.048 meters
Inner radius: 7.5 feet / 2.286 meters
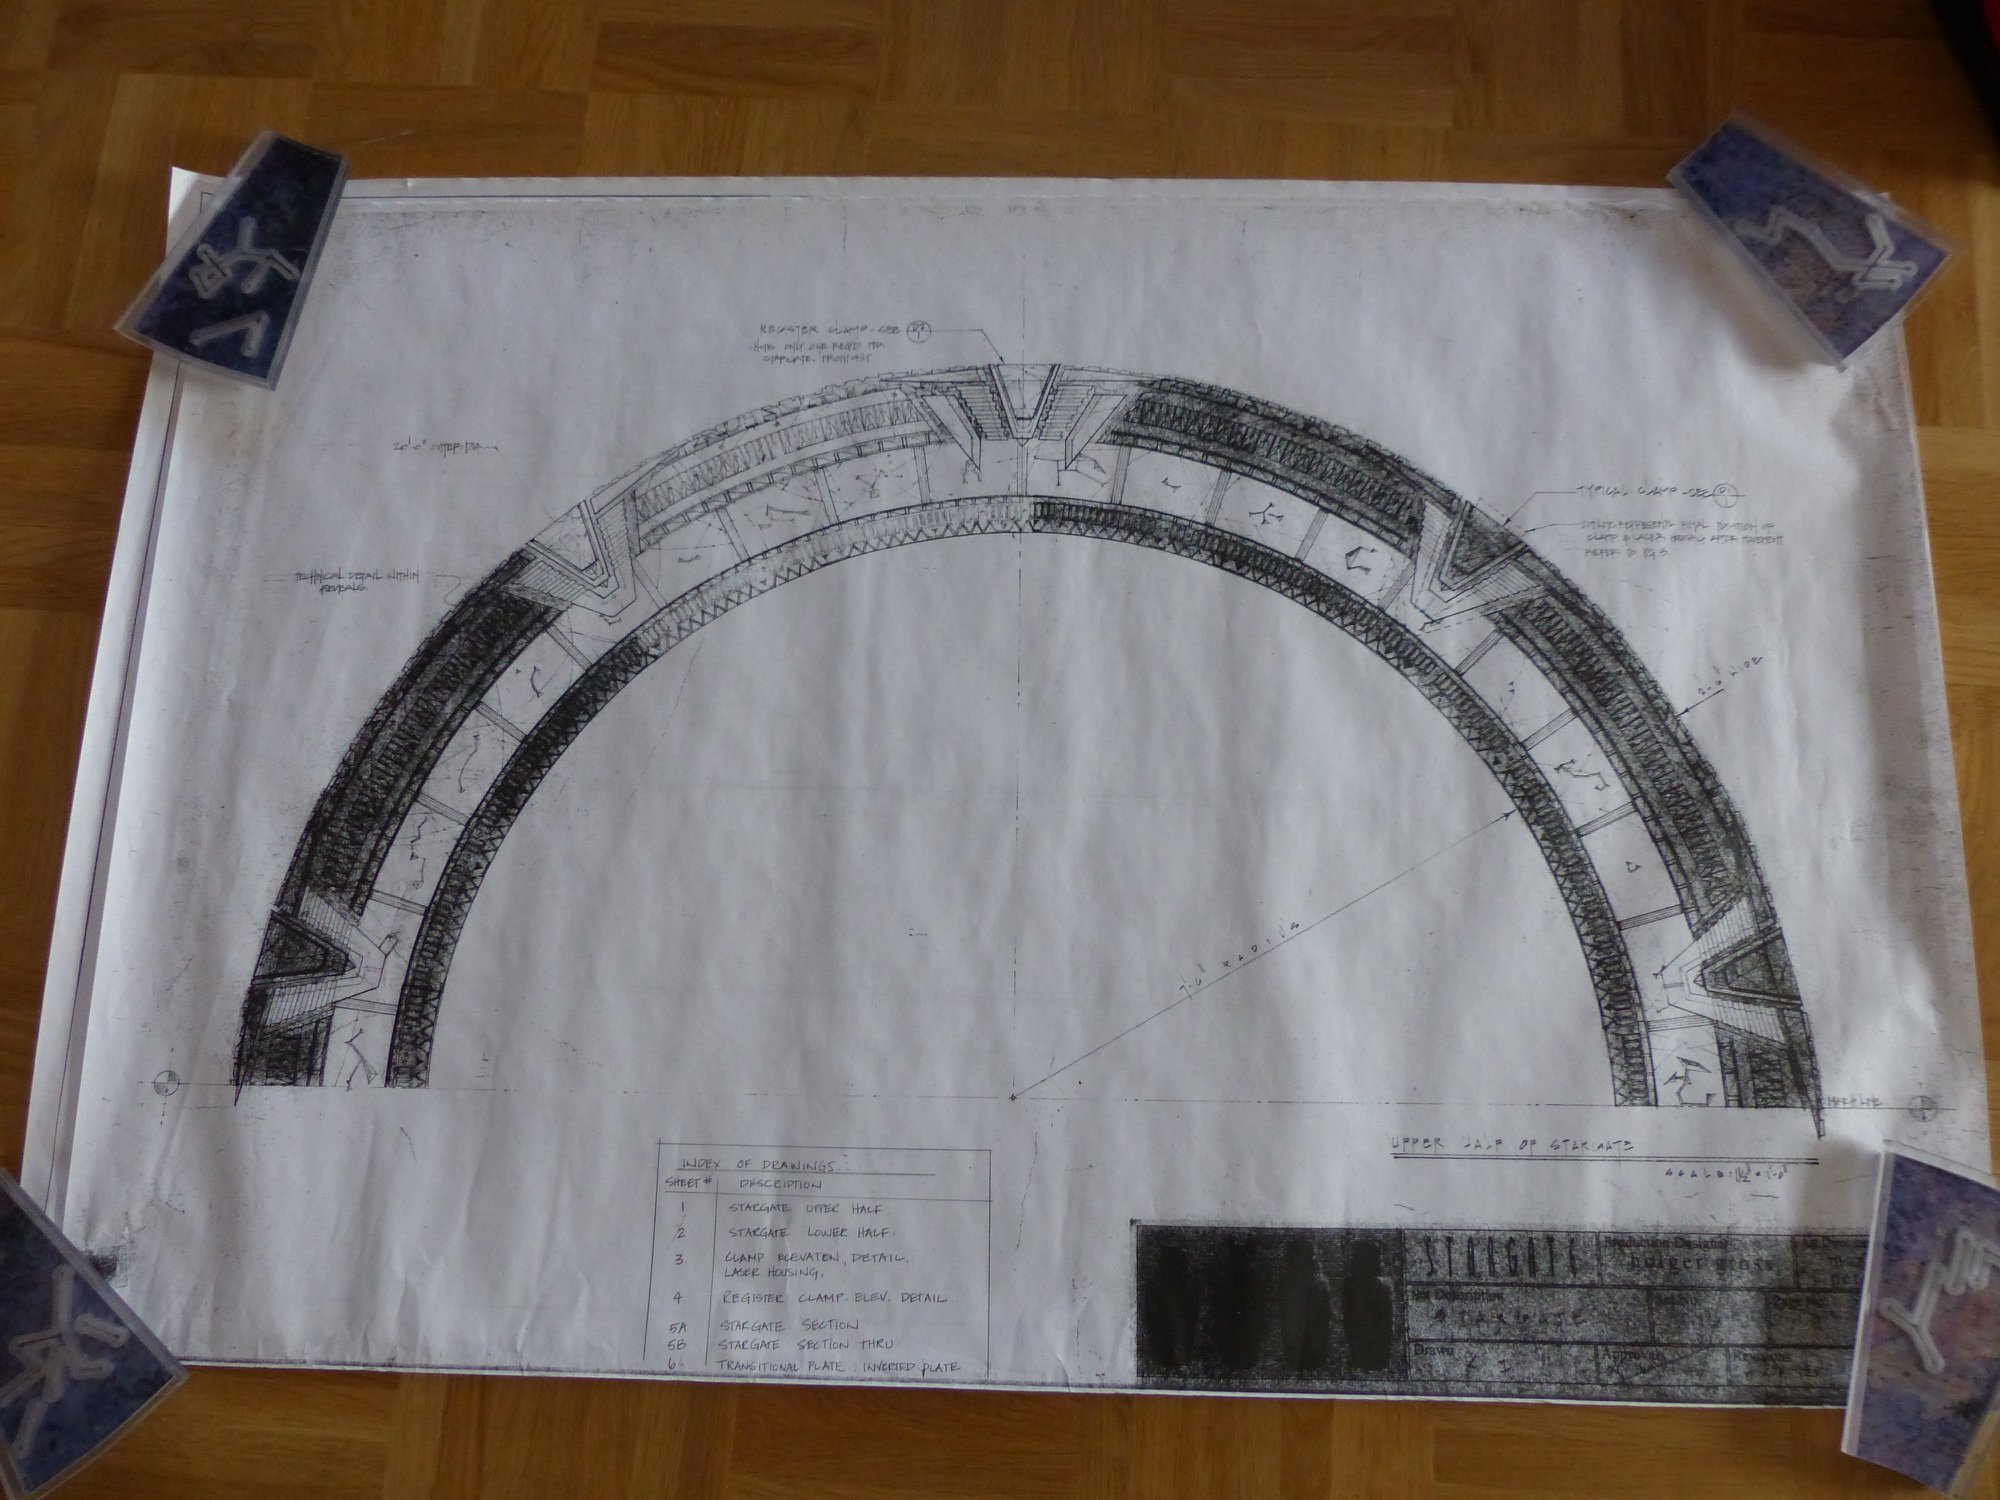
The first two stargates were ultimately hand-constructed, and may not exactly match the designed measurements, so I’m going to avoid any further figures, and explain the sizes of all the elements in relative terms.
Movie/SG-1 General design elements
The SG-1 stargate was a recreation of the original movie prop. The main sections were cast from recovered setpieces from the movie, so many components are identical (give or take some wear-and-tear and unconcealed construction seams that weren’t visible on SD television). However, there were some differences, both willful and not. We’ll begin by focusing on the aspects that the film and TV stargate had in common.
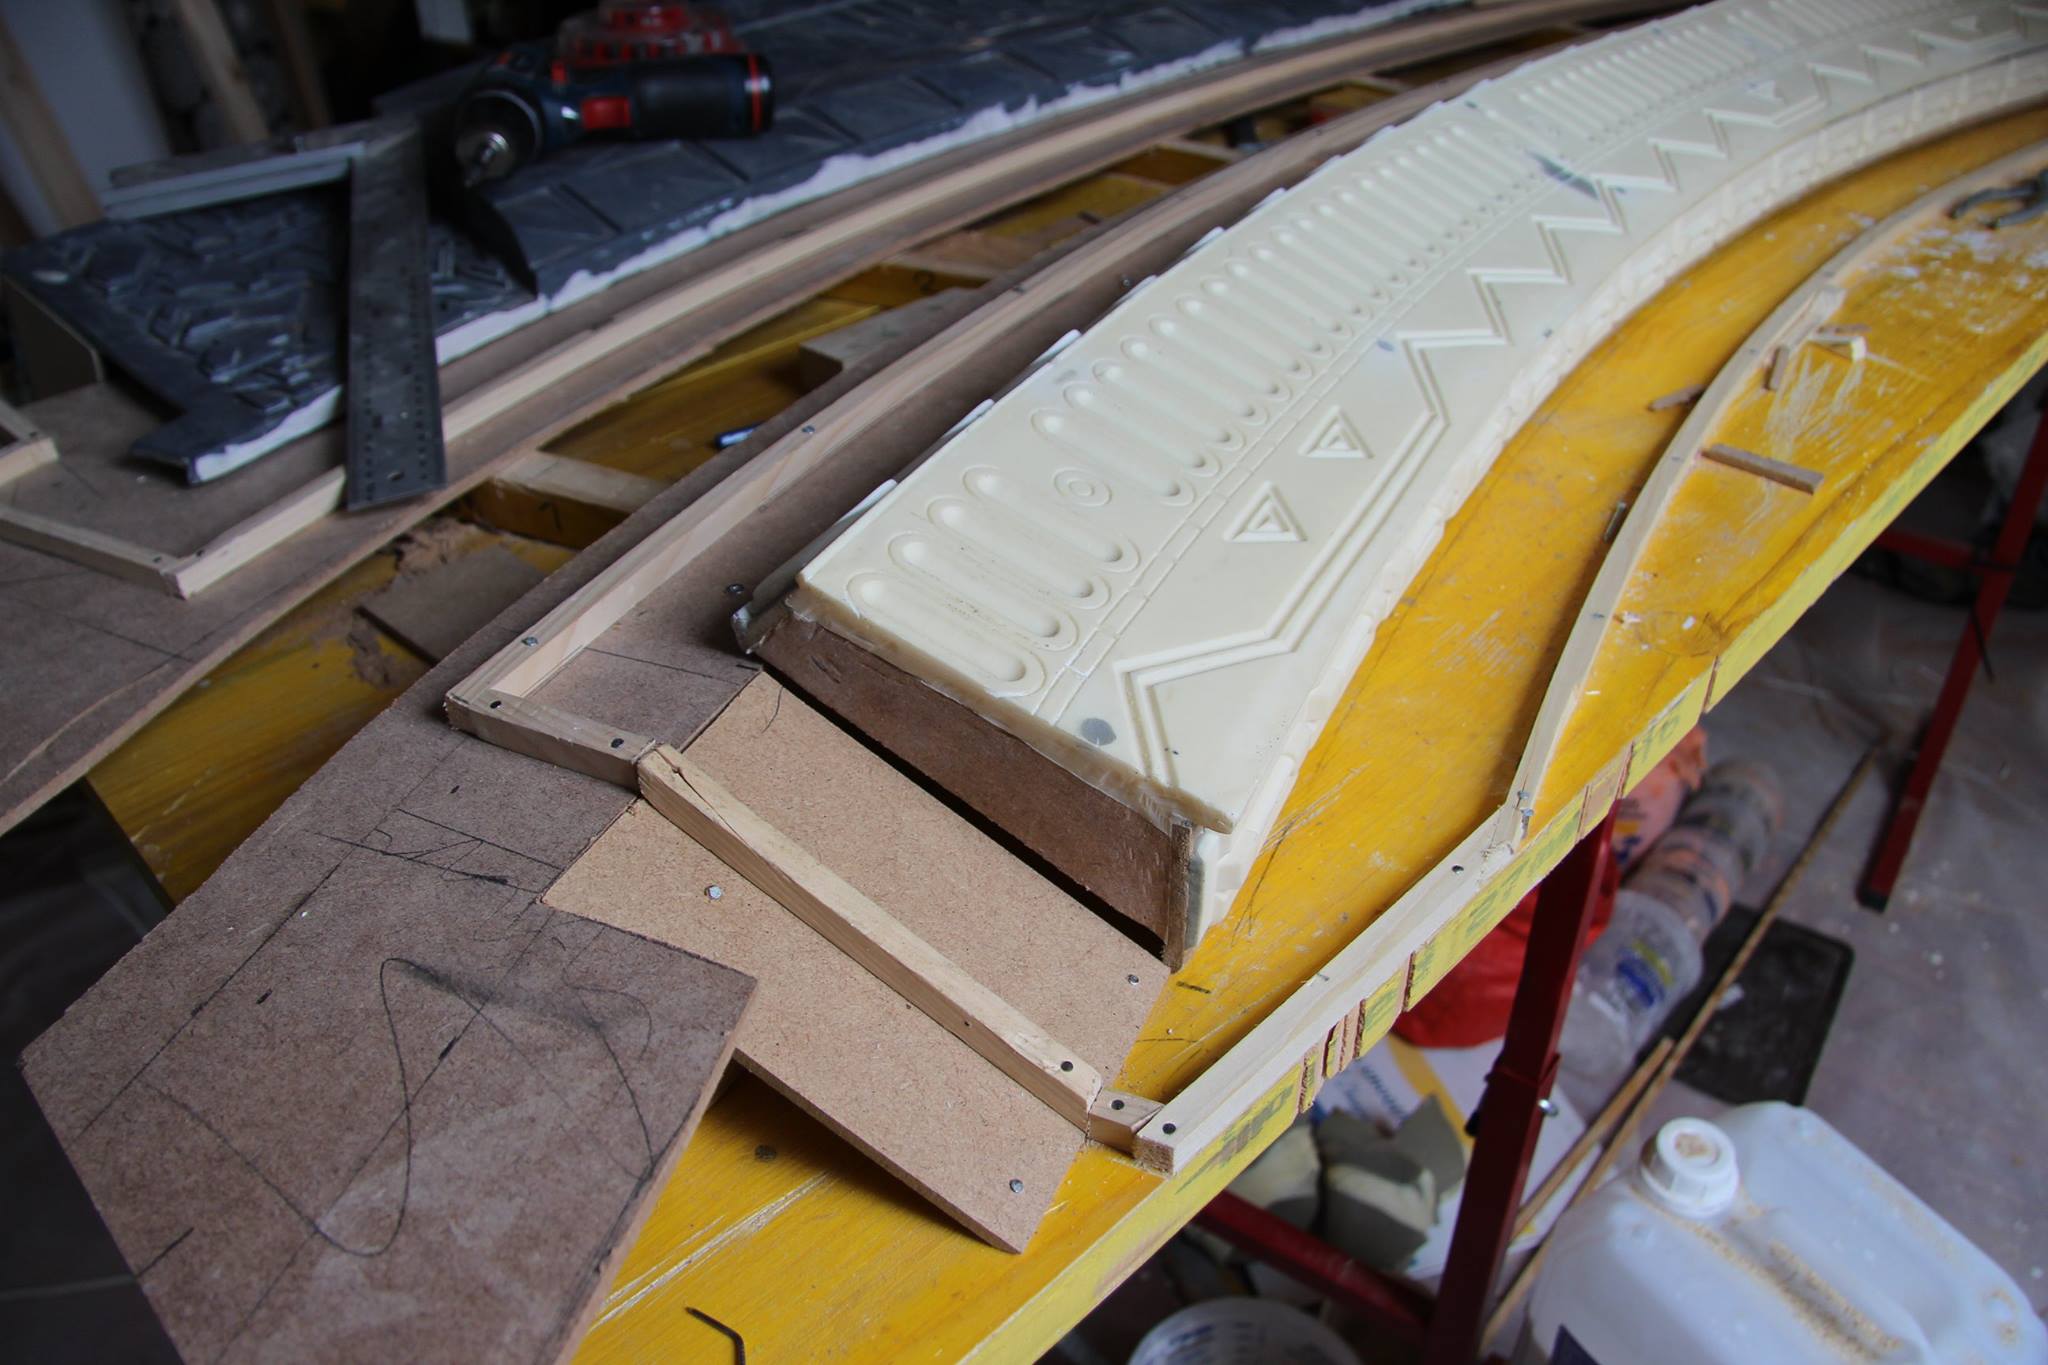
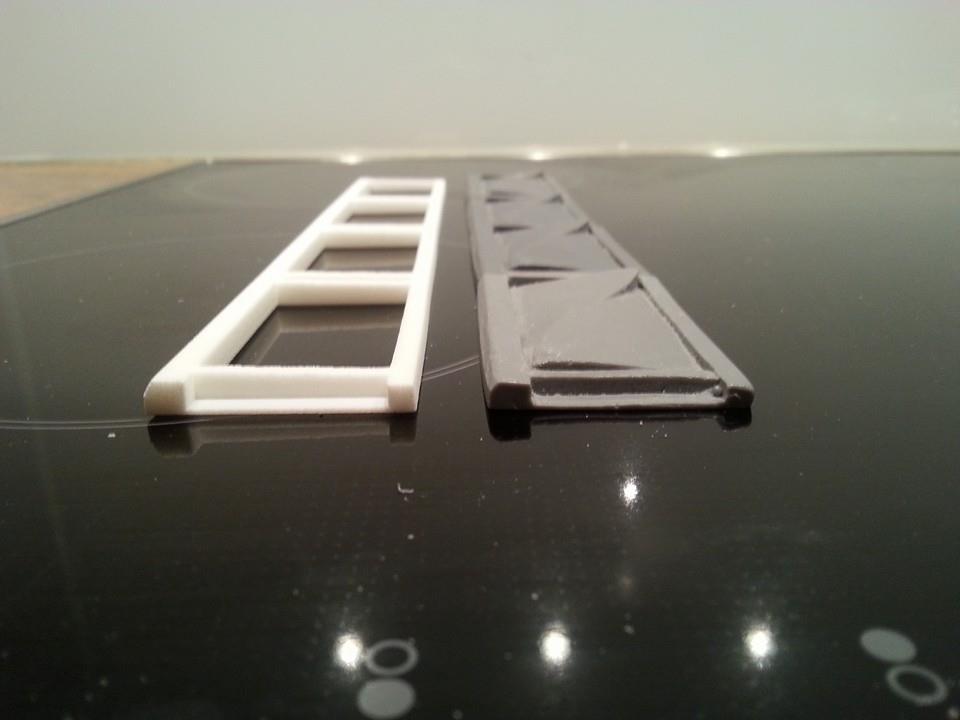
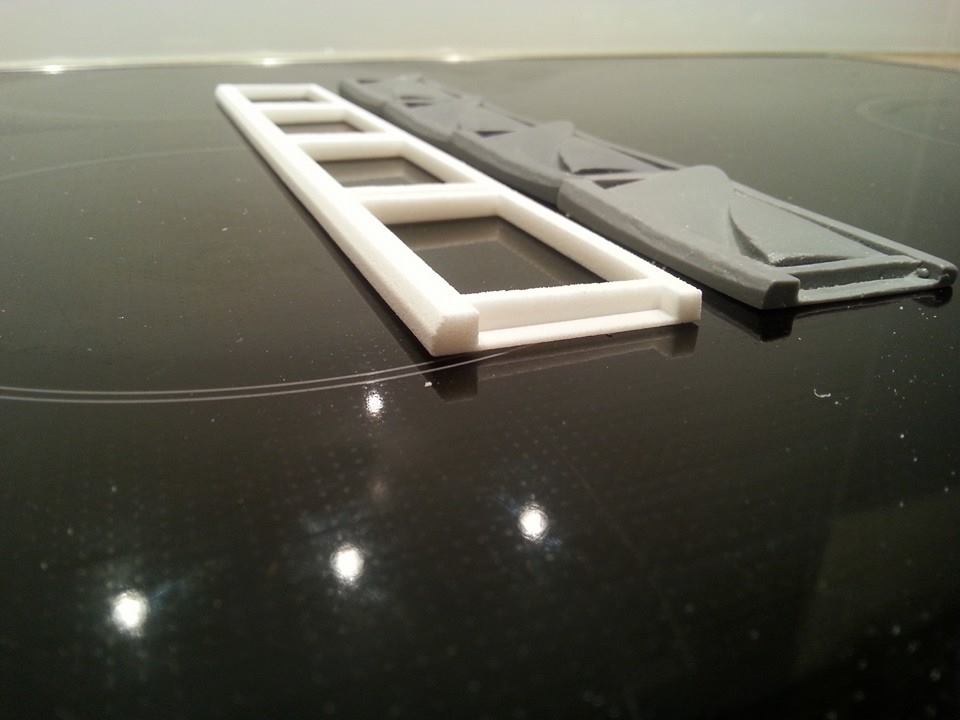
When 3D modeling, especially when dealing with an object with inset detail like the stargate, you’ll want to consider how the detailing interacts with your geometry. Luckily, the design of the stargate makes this simple; every engraved element along the inner edge aligns to the smallest element, the pattern of pills and dots as well as the engraved rectangles below them. There are 666 of these elements around the stargate (or 74 per segment), so when you lathe your stargate’s base shape, the number of sides should be some multiple of 666. I used 1,332 so each pill and dot would split cleanly down the middle; if any clean-up was required when modeling, I’d only have to do half of my prototype pill/dot and could mirror it.

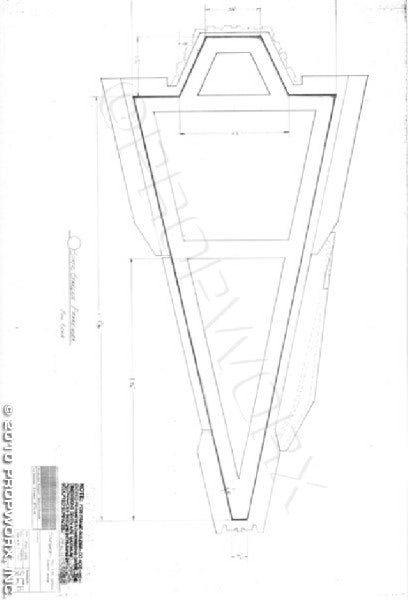
But what exactly are we lathing? We need a cross-section for the stargate. There are some low-resolution scans of production diagrams showing a section view of the main ring, but I don’t trust them. They tend to come out a bit skinny, and the ledge of small S-blocks under the inner ring should be nearly horizontal, not the small bend in the drawing. I’ll provide them, but leave it to you to adjust them to taste. I considered putting the cross-section of my own model, but this is meant to be a reference aid, not a tutorial, and if you just want to use my models, by all means, use my models. I release them as CC0 for a reason.

The patterns for the inner edge details are as follows, counting clockwise from the seam at the center of the chevron:
- Pills and dots:
- 4.19.1.13.2.11..14.2
- Triangles and lines:
- 1..6.3.2.2
The pattern of triangles and lines doesn’t perfectly fit the nine-fold symmetry of the stargate; one segment ends one “pill” after the upward point of a triangle, and the next begins one “pill” after the downward point of a triangle.
I addressed this on my version by shortening the double-length horizontal segment near the seam by three “pills” so the triangles would match. You could also duplicate the mismatch. The Atlantis stargate corrected the error in a different way, which I’ll describe later.

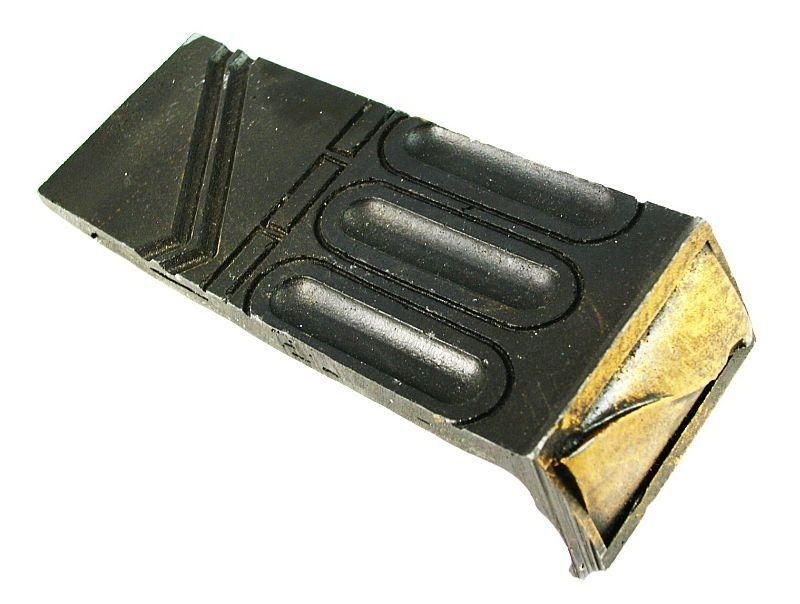
There are 27 small S-blocks below the inner ring.
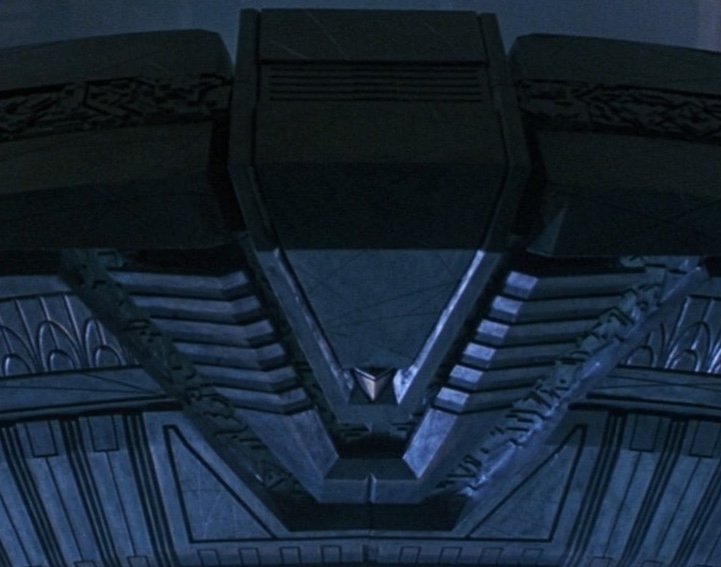
Now we get to the complicated part: The large S-blocks and arches above the inner ring are interrupted by the chevron slots, so we can’t simply count how many there are, we have to make an estimation. I’ll leave that to you. There are also six irregularly spaced “buttons” above the line of arches.
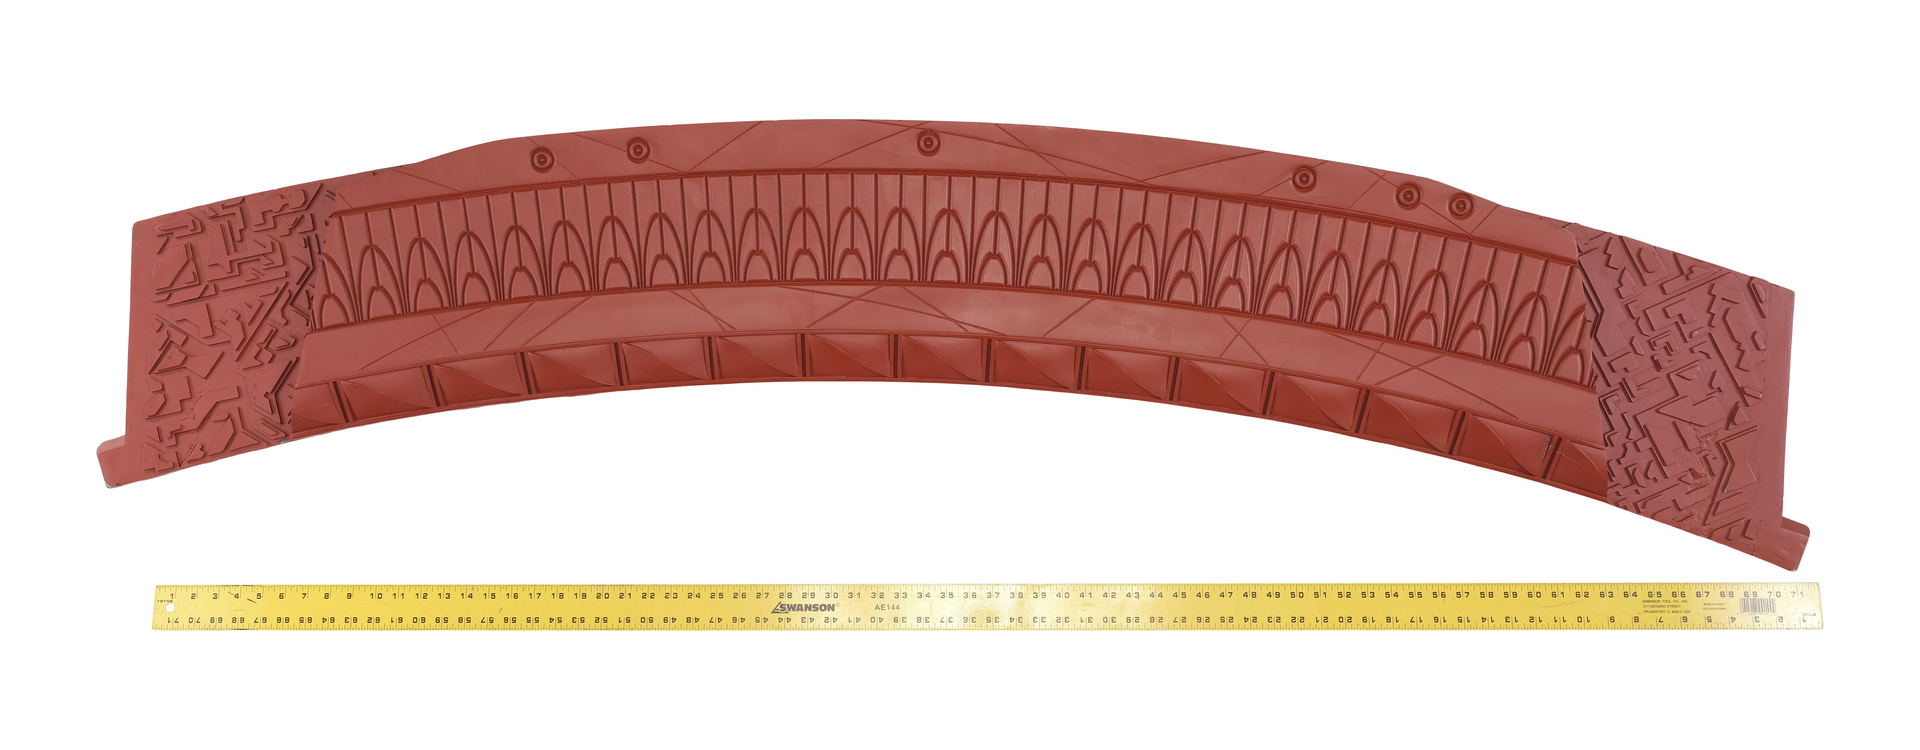
There are 19 emitters per segment (171 total) running along the inner ring. The track of emitters is inset, bordered by a “lip” extending over from the front and rear faces.
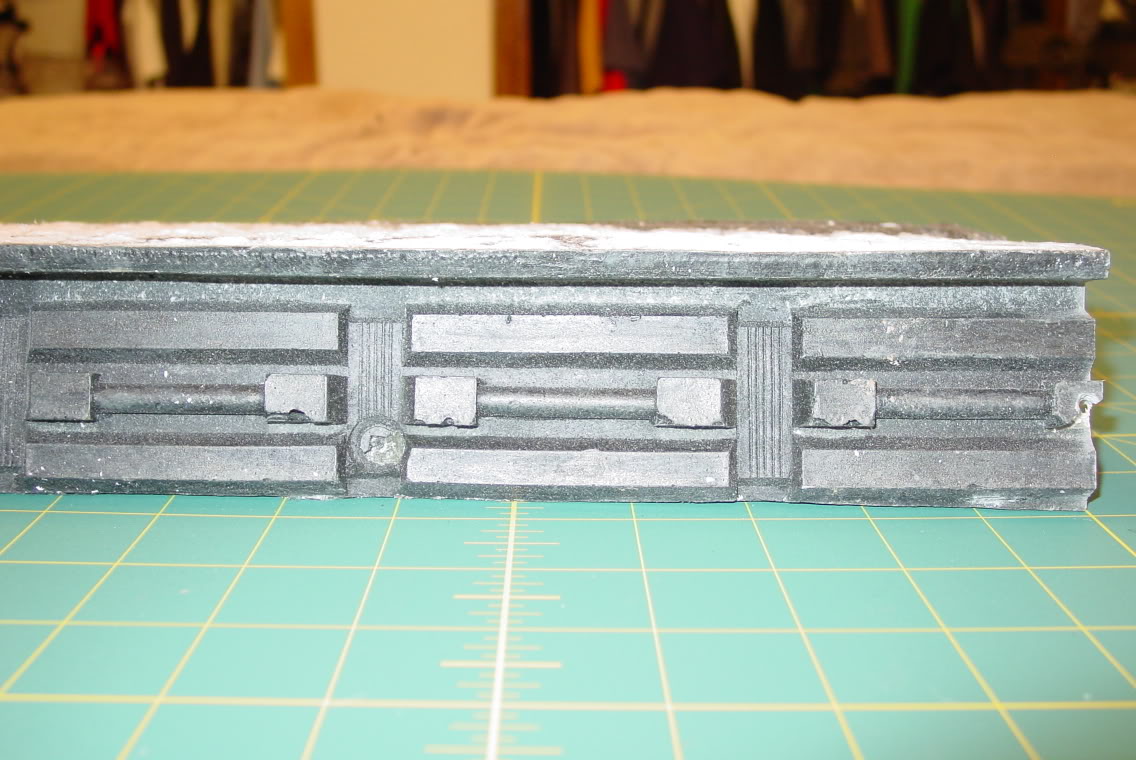
The rear face of the ring is nearly identical to the front to the front. The main difference is that both lines of S-Blocks are eliminated, but the patterns of all the details is unchanged. That means you’ll want to rotate your front face 180° to get the rear face; mirroring it will reverse the detailing, which is incorrect.

The rear version of the inner ring is a kind of conduit. There’s a wide segment around the chevron, then five narrow segments, another wide segment between the chevrons, then another five narrow ones.
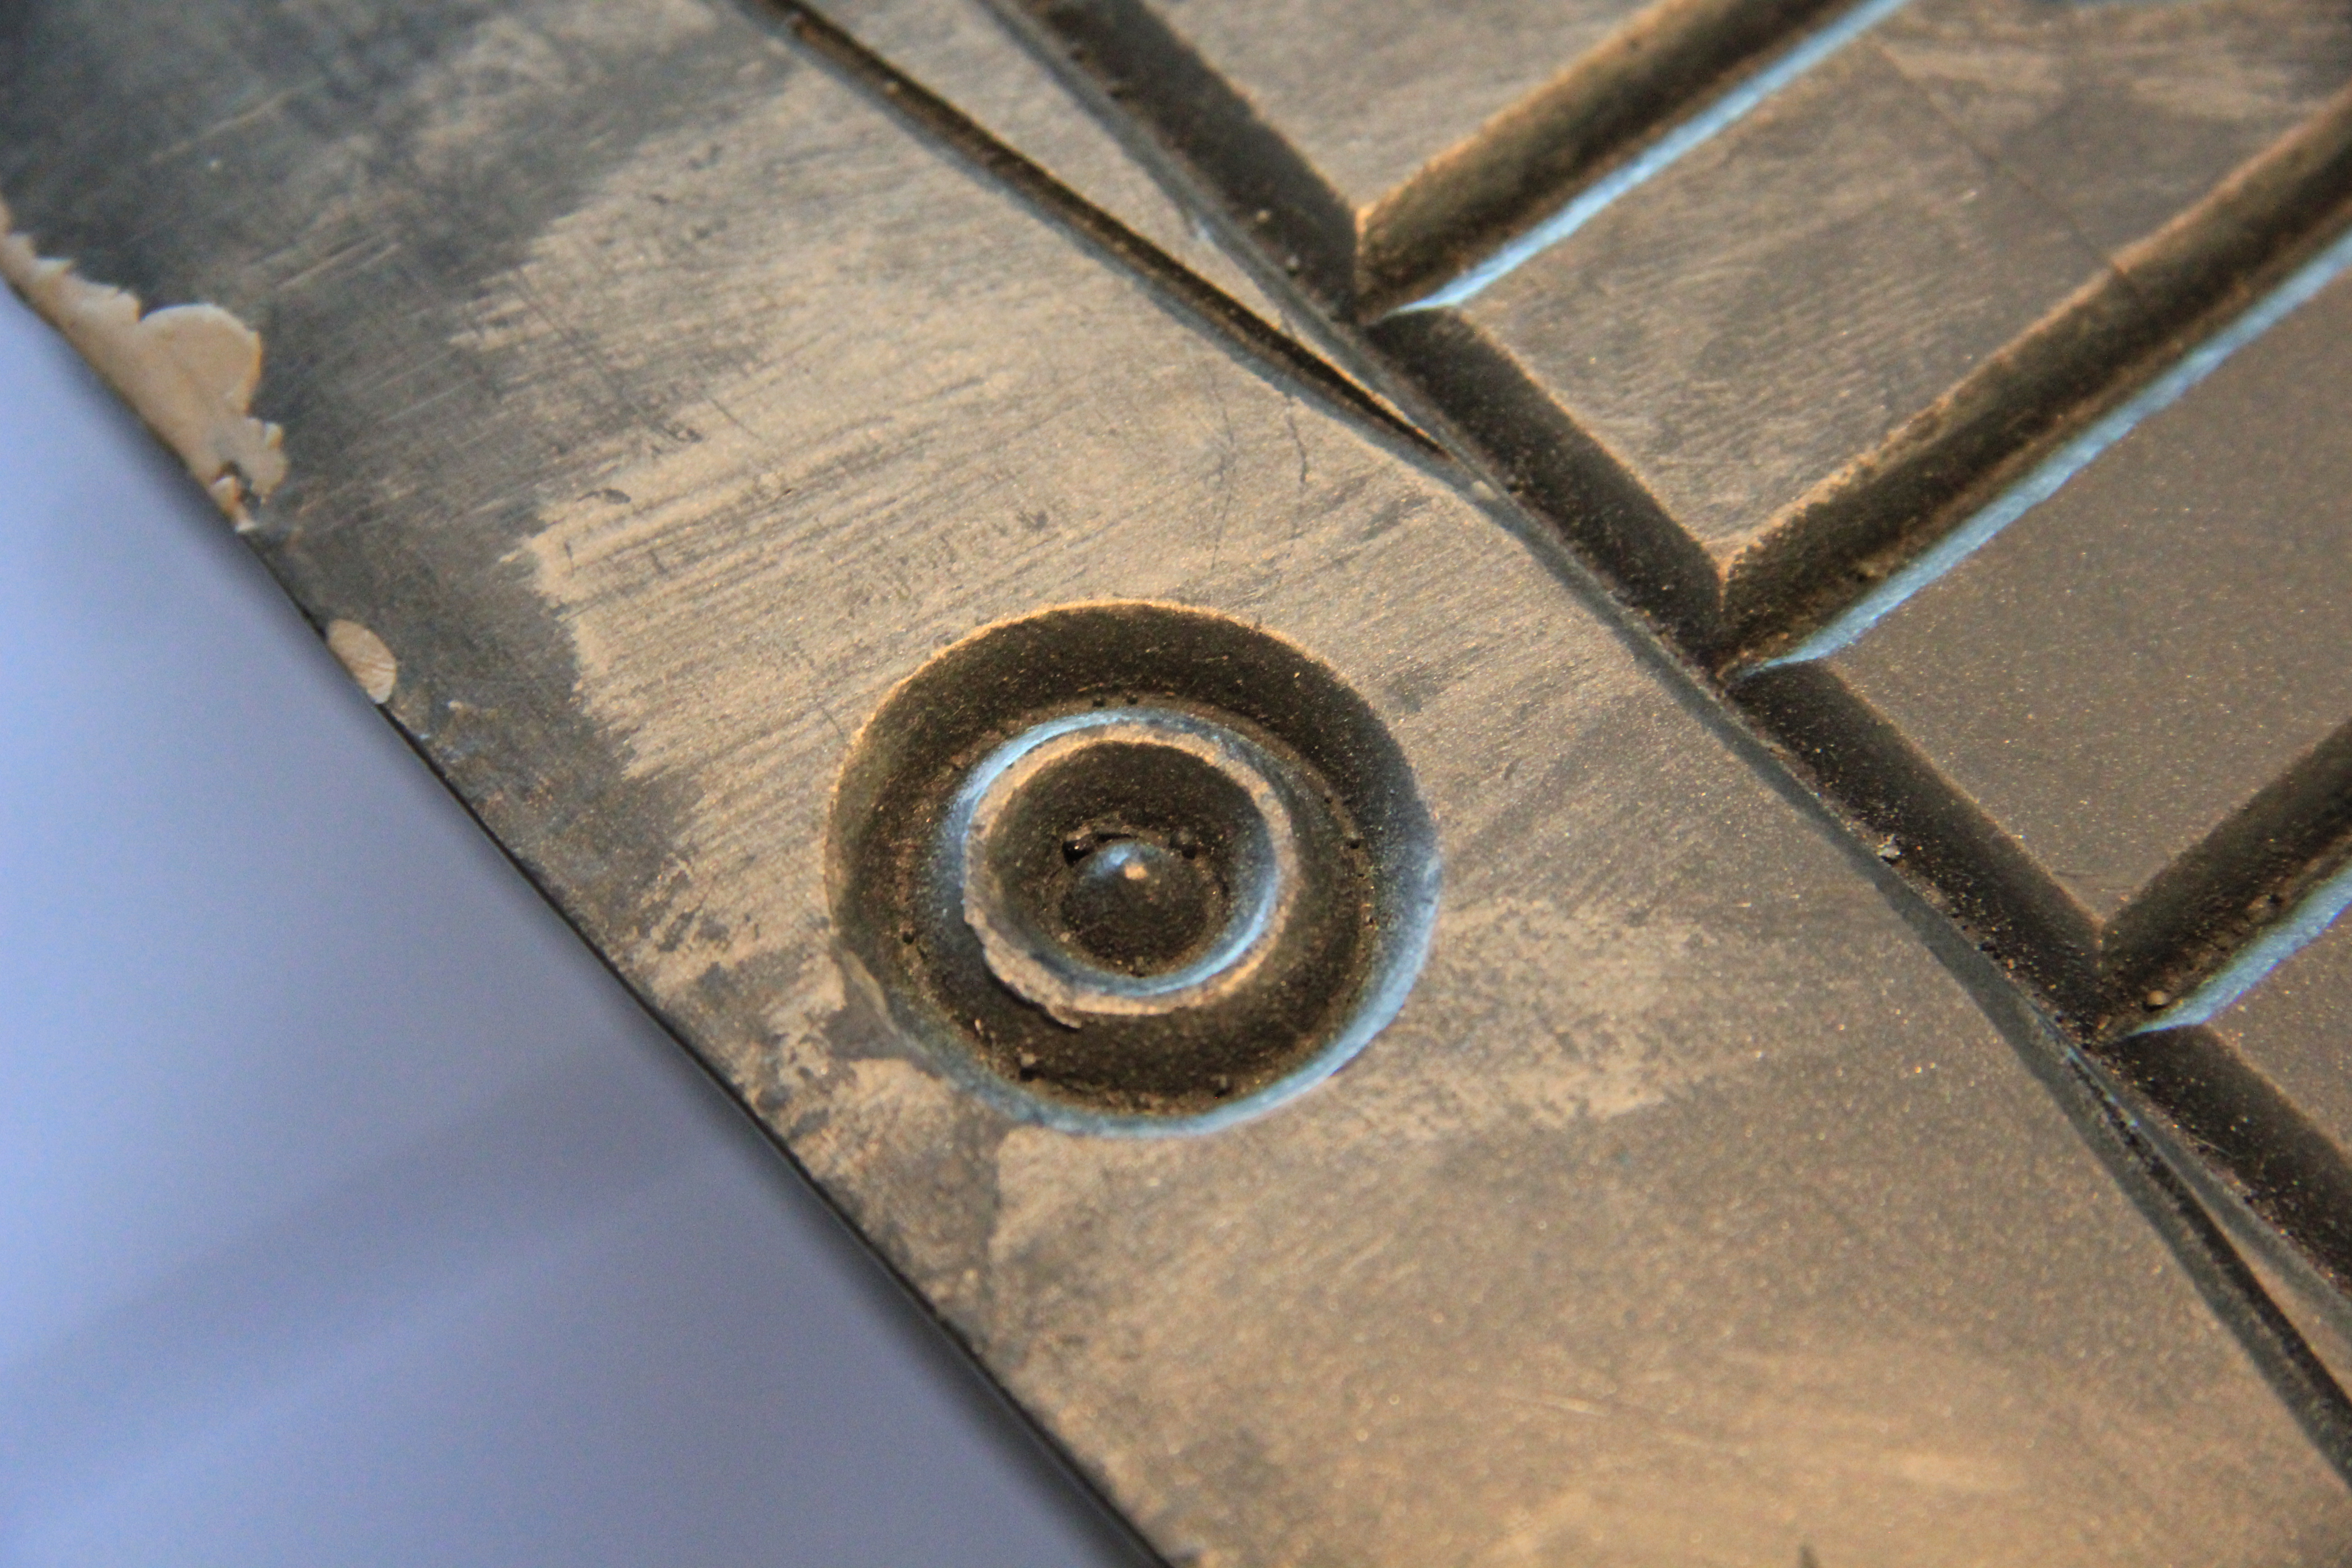
The chevron slots have a multilevel mosaic pattern on them. This is pretty hard to see in the episodes because of the chevrons on top of them, but luckily, the stargates used on the show were disassembled for auction, so there are many photos showing the entire pattern. The patterns are asymmetrical, and unique on the front and back of the stargate.
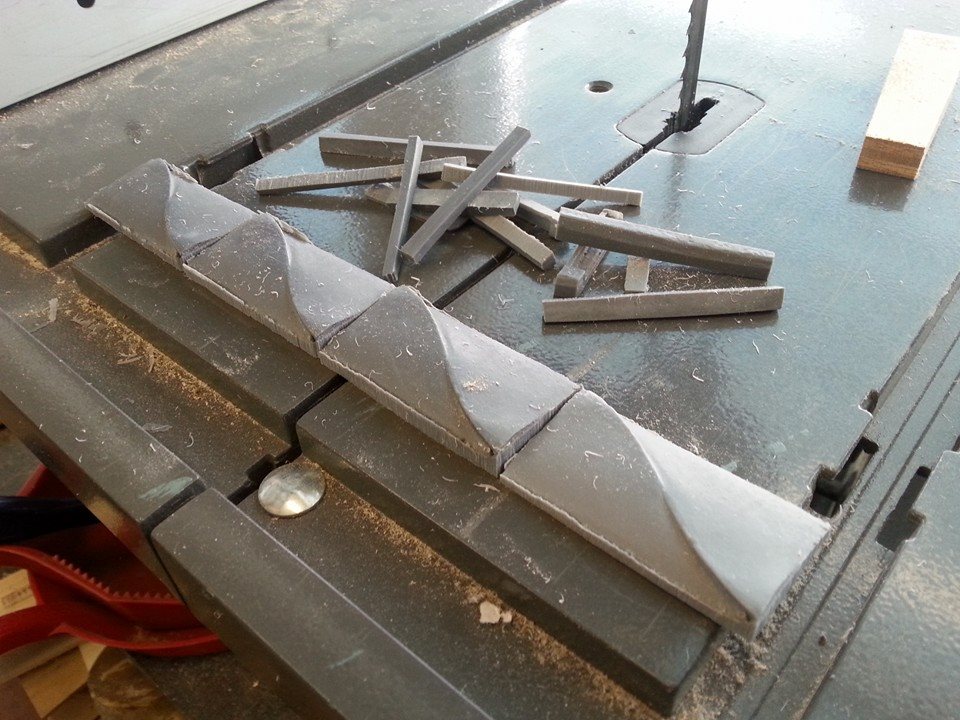
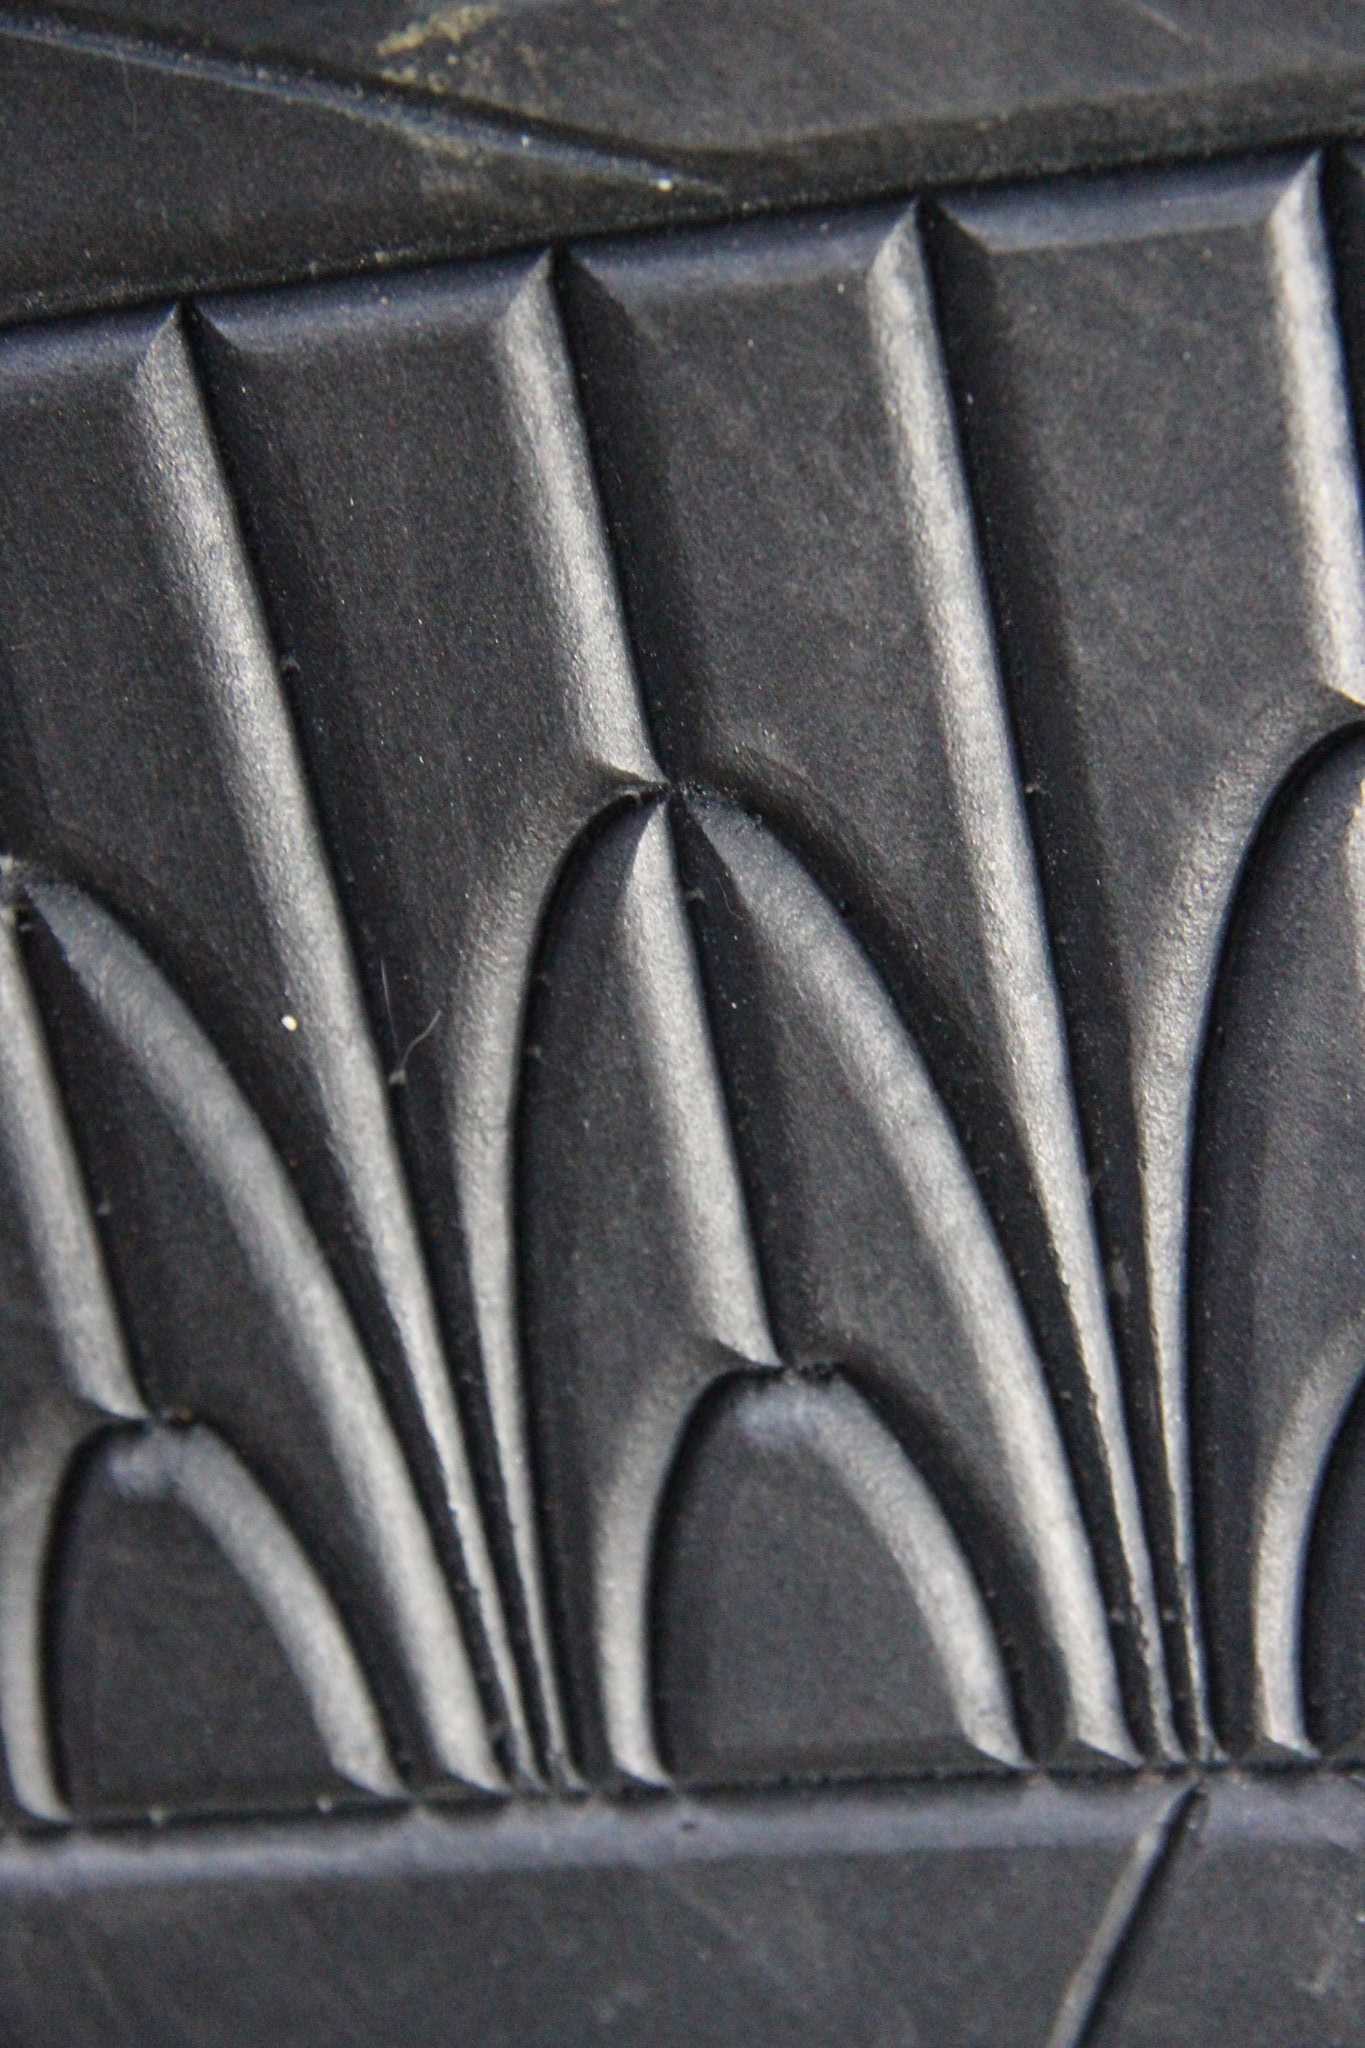
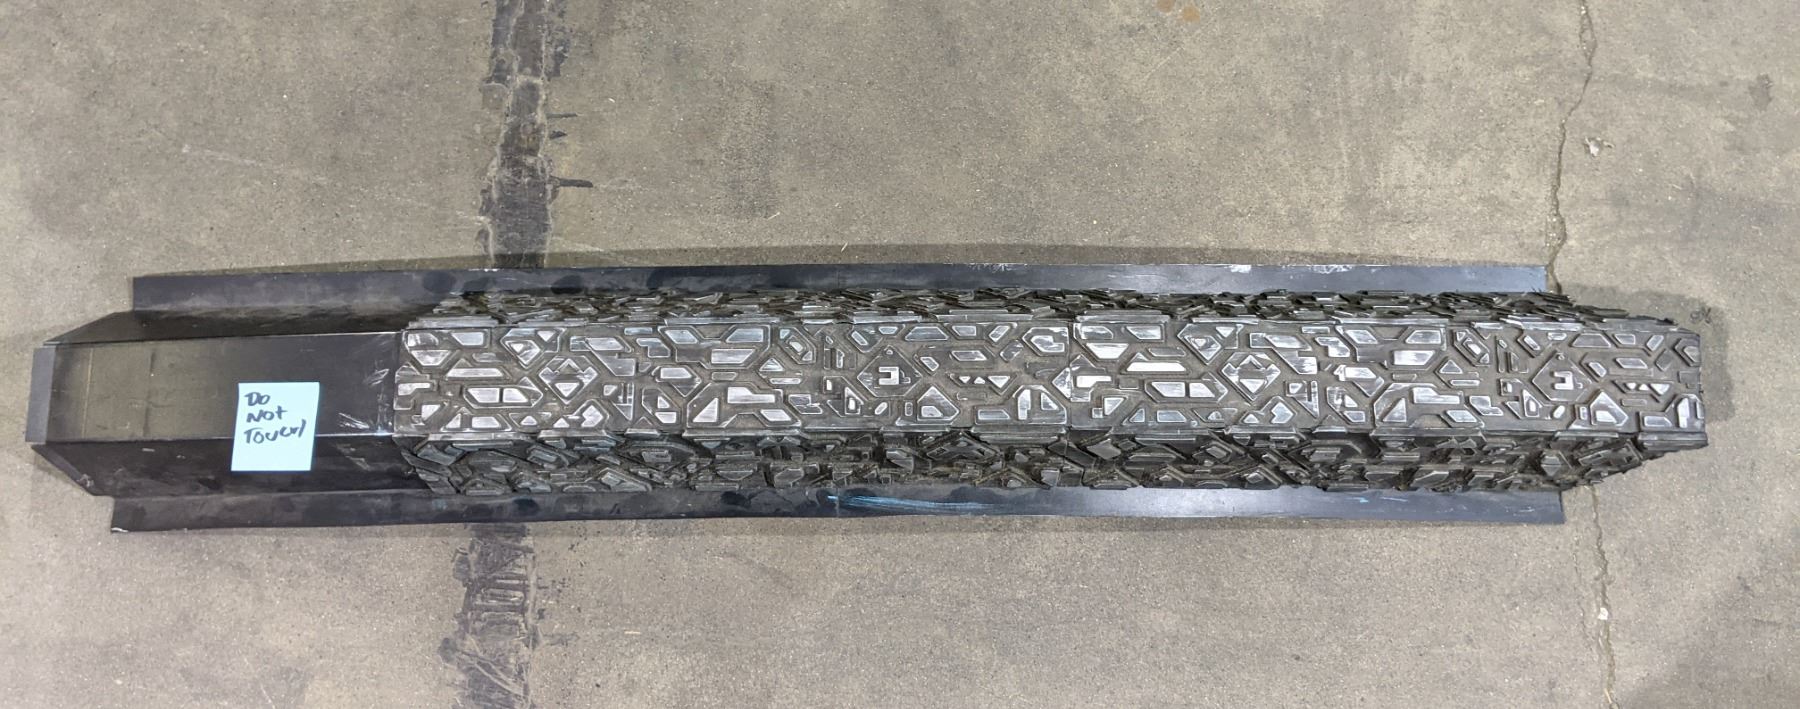
The raised rim of the stargate has a similar mosaic pattern. This is going to be the most tedious part of the stargate to replicate, I’m just telling you now, and the only way to do it is one little bit at a time, finding every picture of an unattached rim segment on the EMG Facebook page, eyeballing proportions, and hoping things don’t start running into each other where they aren’t supposed to. I know I said I didn’t want to put in my own imperfect guesswork here, but I’m going to make an exception because unless you have physical access to an authentic rim segment, the amount of work you’ll have to put in will not lead to a corresponding improvement in quality.
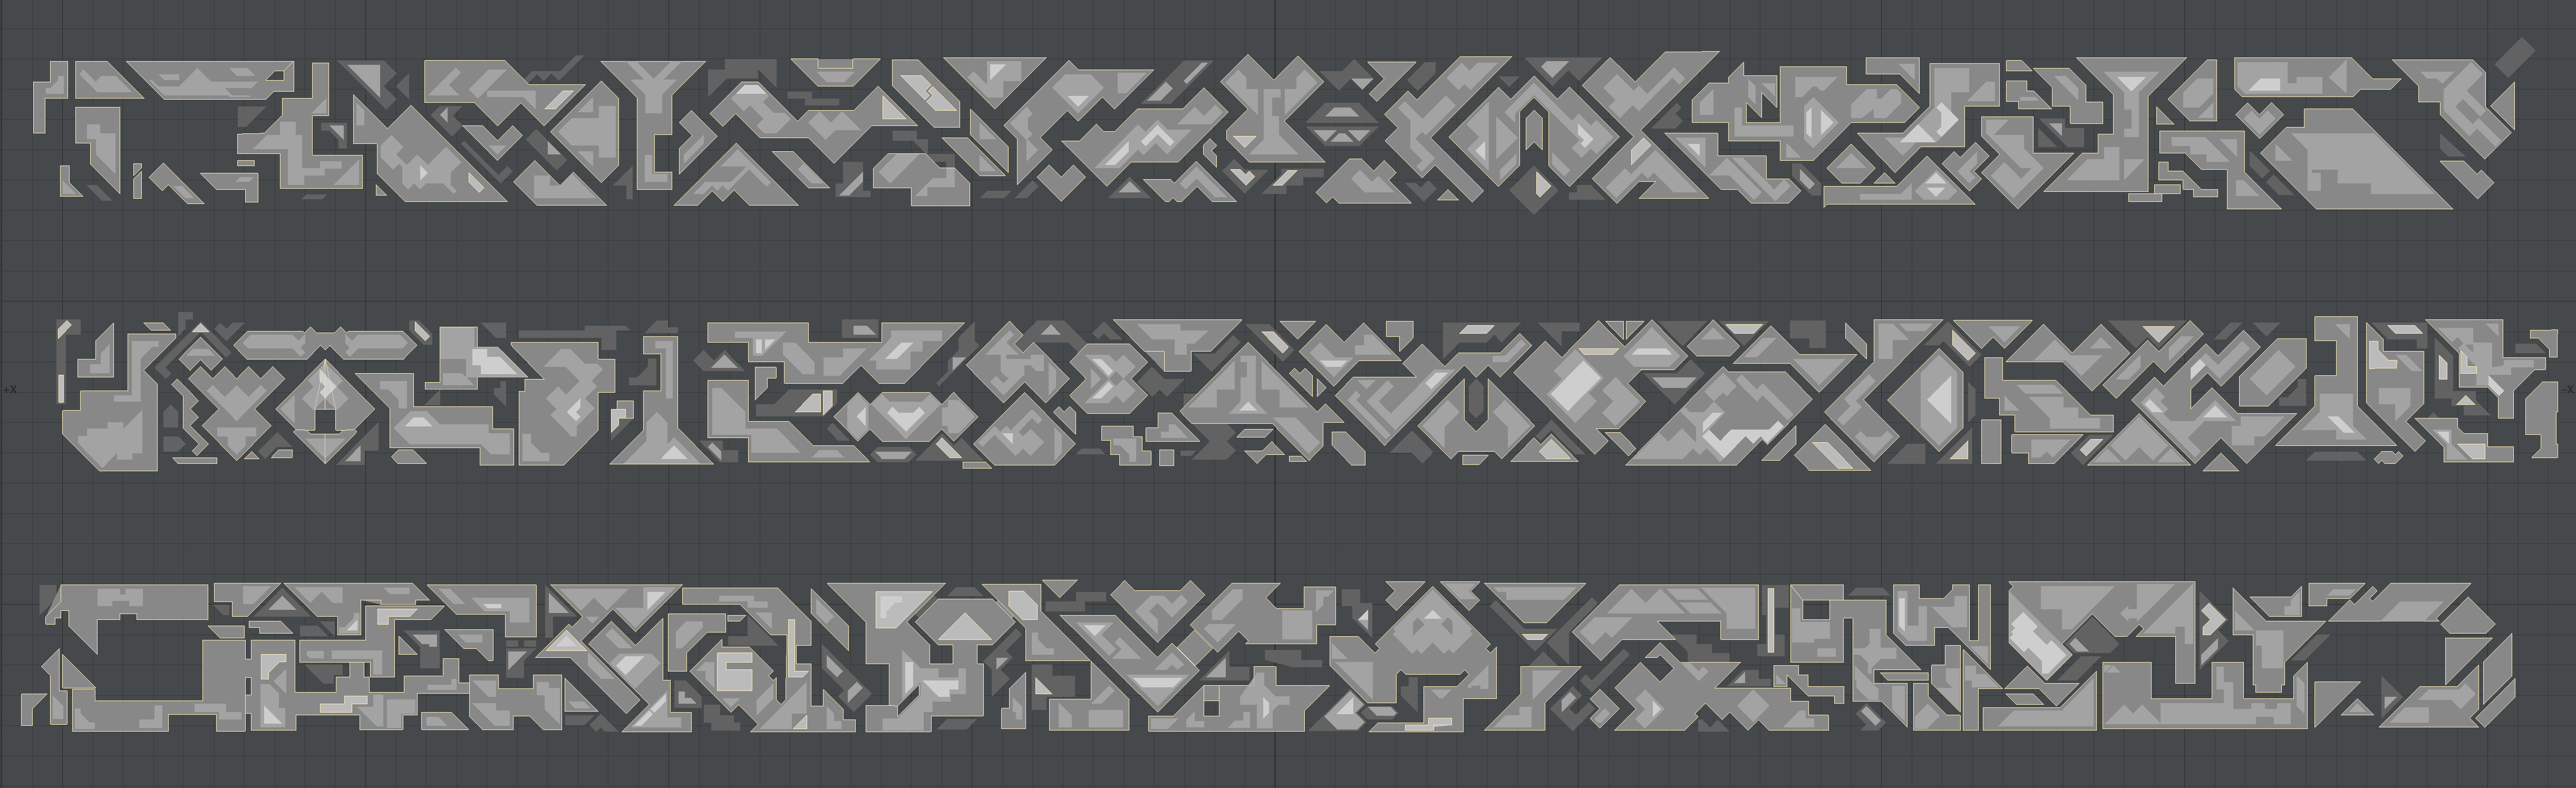
There are three levels of tile. In this image, darkest gray is lowest, lightest gray is highest. The tiles outlined in yellow are thicker than the ones that are not. The center segment is the outer rim, and the top and bottom are the sides. You can imagine folding the three groups like a piece of paper into a U-shaped cross-section and bending it into an arc to see how this guide relates to the final object.
Finally, the top halves of the front and rear faces of the stargate, the inner rings, and the chevron wings have a pattern of engraved arcs running across them. For my film/SG-1 models, I used the pattern from the original prop for the bottom segement, and extrapolated it across the other eight, so each segment was unique. This is not worth it. No one will notice. I did it and I can’t tell the difference unless I’m looking for it. The front and back faces have their own groove patterns, as do the left and right chevron wings.
Movie-Specific Elements
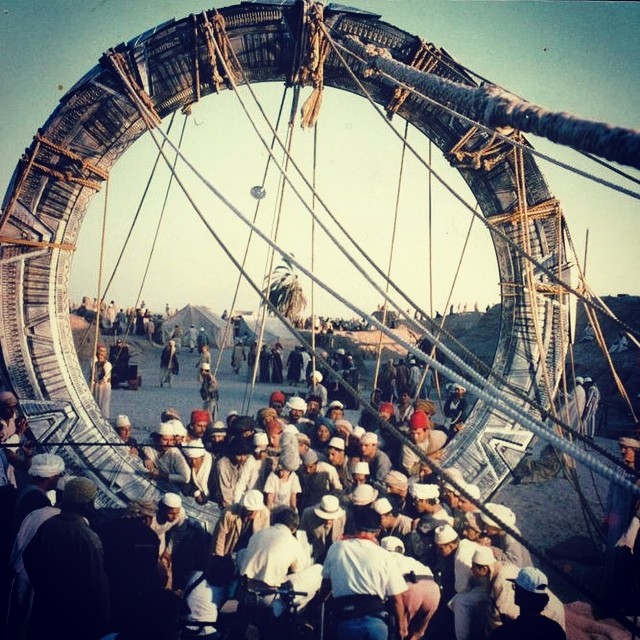
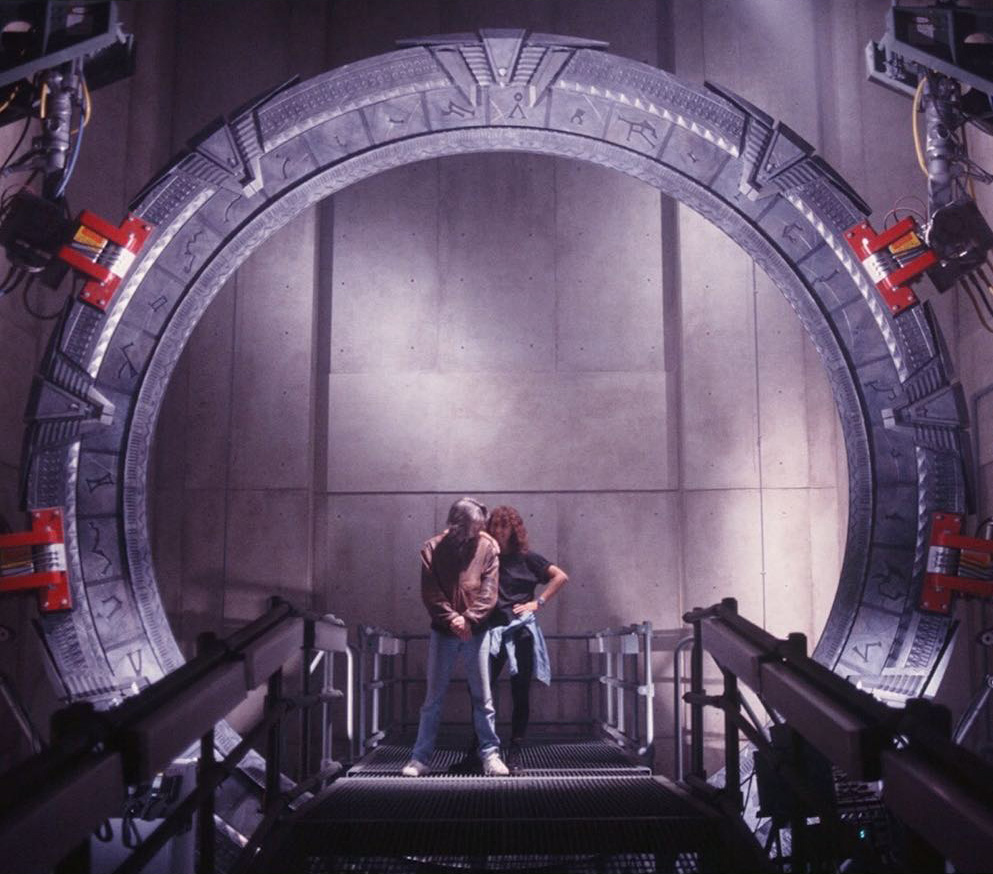
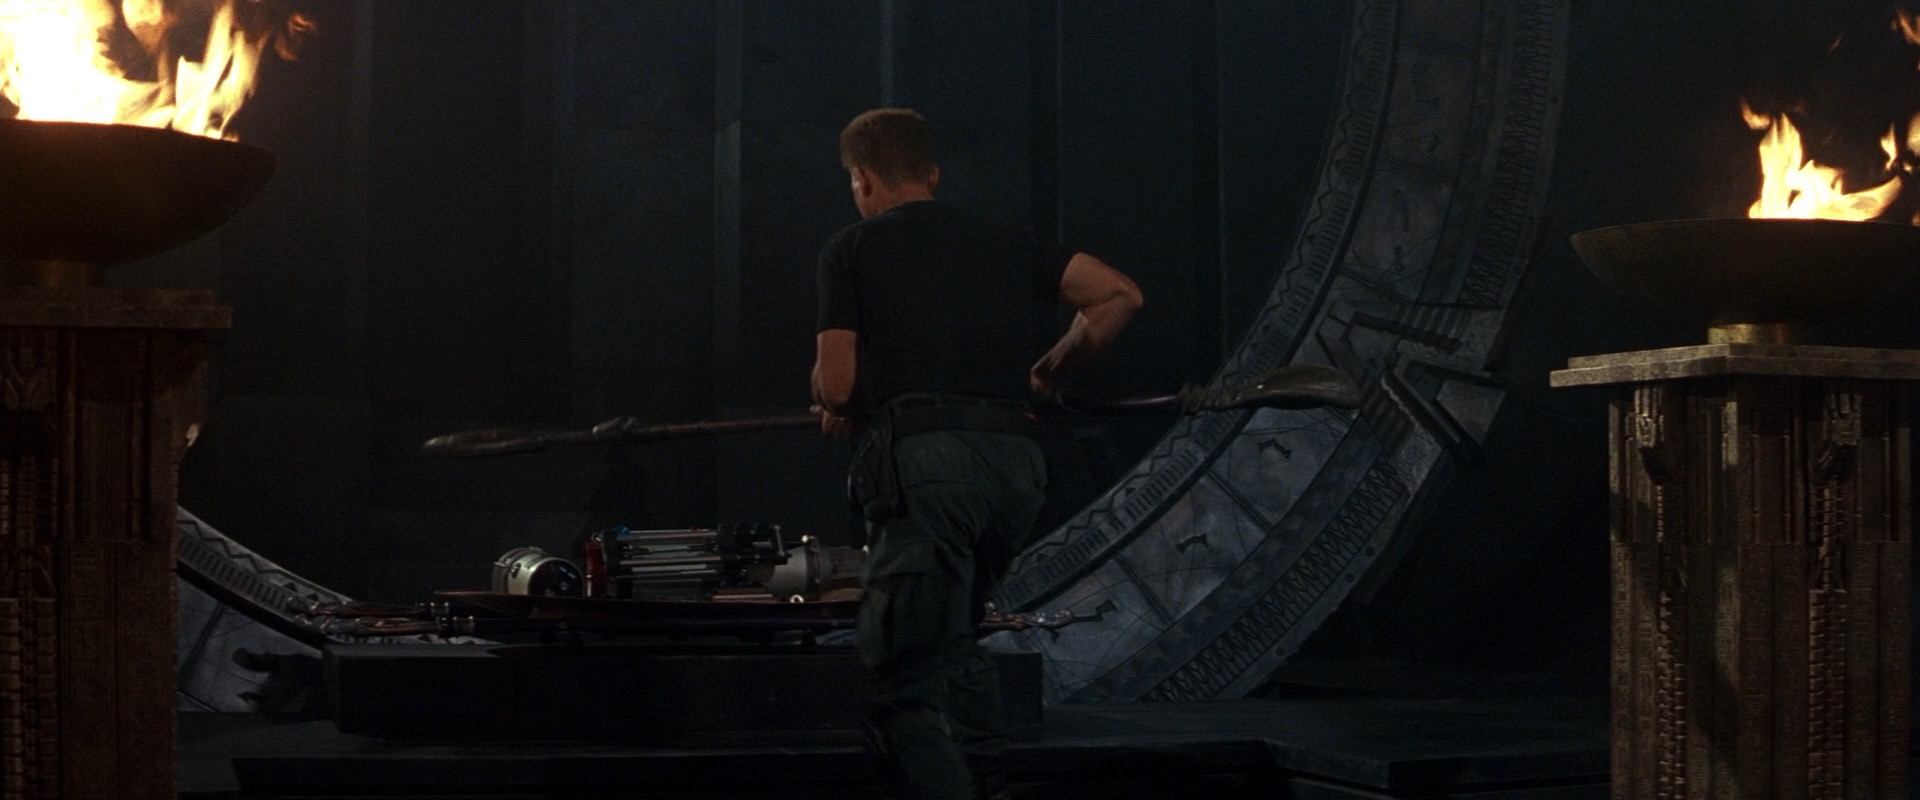
I believe there were two stargates constructed for the movie. A solid but lighter-weight version which was taken on location for the scene where it was excavated from the Egyptian desert at the beginning of the movie (which I suspect is the one recovered and uses as the basis for the SG-1 setpieces), and a second “hero” stargate that was used for the scenes in the military base and alien pyramid and was rigged to movie. My analysis focuses on the hero version.
The original film version of the stargate has aspects that are unique to it. Let’s start with the chevron “jewel,” which raises up as the “clamp” lowers during the chevron’s locking process. There are a couple of angles seen during the movie, and it’s a bit ambigous if the jewels are one large piece, or two separate pieces for the front and back. For my model, I went with two separate pieces. If not sure if there’s a shadow making it look different in some angles, or if they actually built it both ways on different chevrons.
In either case, there’s a recess between the front and back jewel segment, with several thin strips.
The chevron jewel also has a pattern of engraved arcs. There seem to be two different patterns, one used for the one face of the jewel, and one for the opposite face, and each jewel seems to alternate which pattern is facing forward.
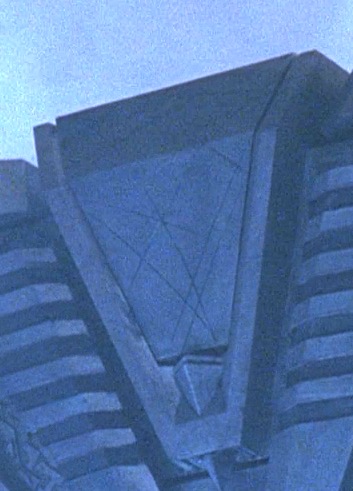
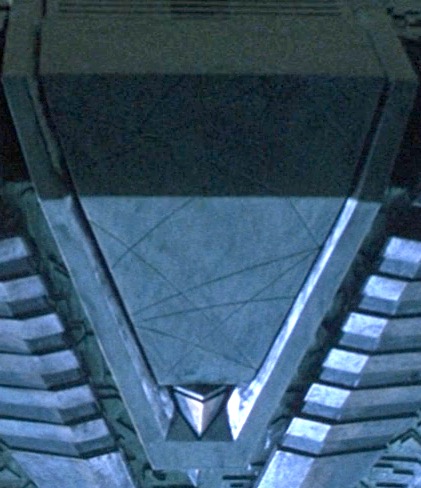
The chevron clamps and wings are aligned so that they form tangencies with each other, lines of action continuing from one piece to the next. I’m mostly mentioning this by contrast, as the chevron clamps were mounted higher on the SG-1 and Atlantis versions, and the wings on the SG-1 version were a little droopy.
The top chevron has a different design on the front from the other eight. The bottom half of the clamp was removed, allowing you to see the symbol underneath, the slot was expanded, and two large calipers were added, framing the indicated symbol. Unfortunately, I don’t think I’ve seen any photos of the movie stargate in pieces, so you’re going to have to guess when you expand the mosaic pattern to fill the larger slot. If I remember right, I reused the segments of the mosaic that are hidden behind the chevron clamps, since no one would ever know.
The outer rim segments all appear to face the same direction.
The inner ring has thirty-nine glyphs on them, representing thirty-eight constellations and one abstract pyramid, which are recessed into the ring. For the second stargate on the planet Abydos, several glyphs were partially filled in to disguise them as alien constellations, and the pyramid symbol was replaced entirely. More details on the symbols seen in the movie are in this blog post. The inner ring also has a pattern of engraved arcs.
When dialing, the inner ring rotates at approximately 7.5 RMP. It moved more slowly earlier in the film when Daniel was inspecting the various symbols. The chevron locking process takes 24 frames, but I’ll leave the specific timings and animation tweening as an exercise to the reader. This blog post has more detail on the dialing process.
The stargate is largely a smooth metallic silver with subtle weathering. The glyphs and striped insets in the chevron clamps are a rougher dark gray.
SG-1-Specific Elements
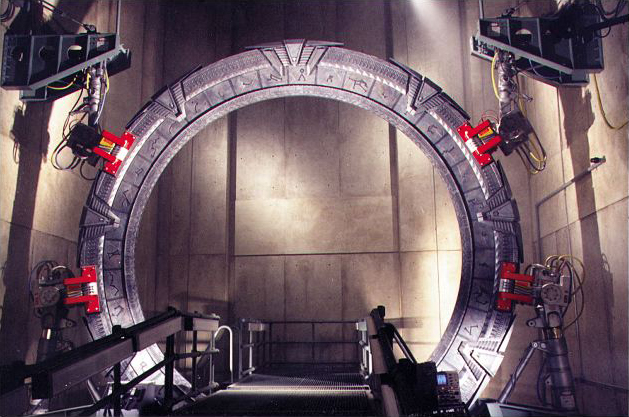
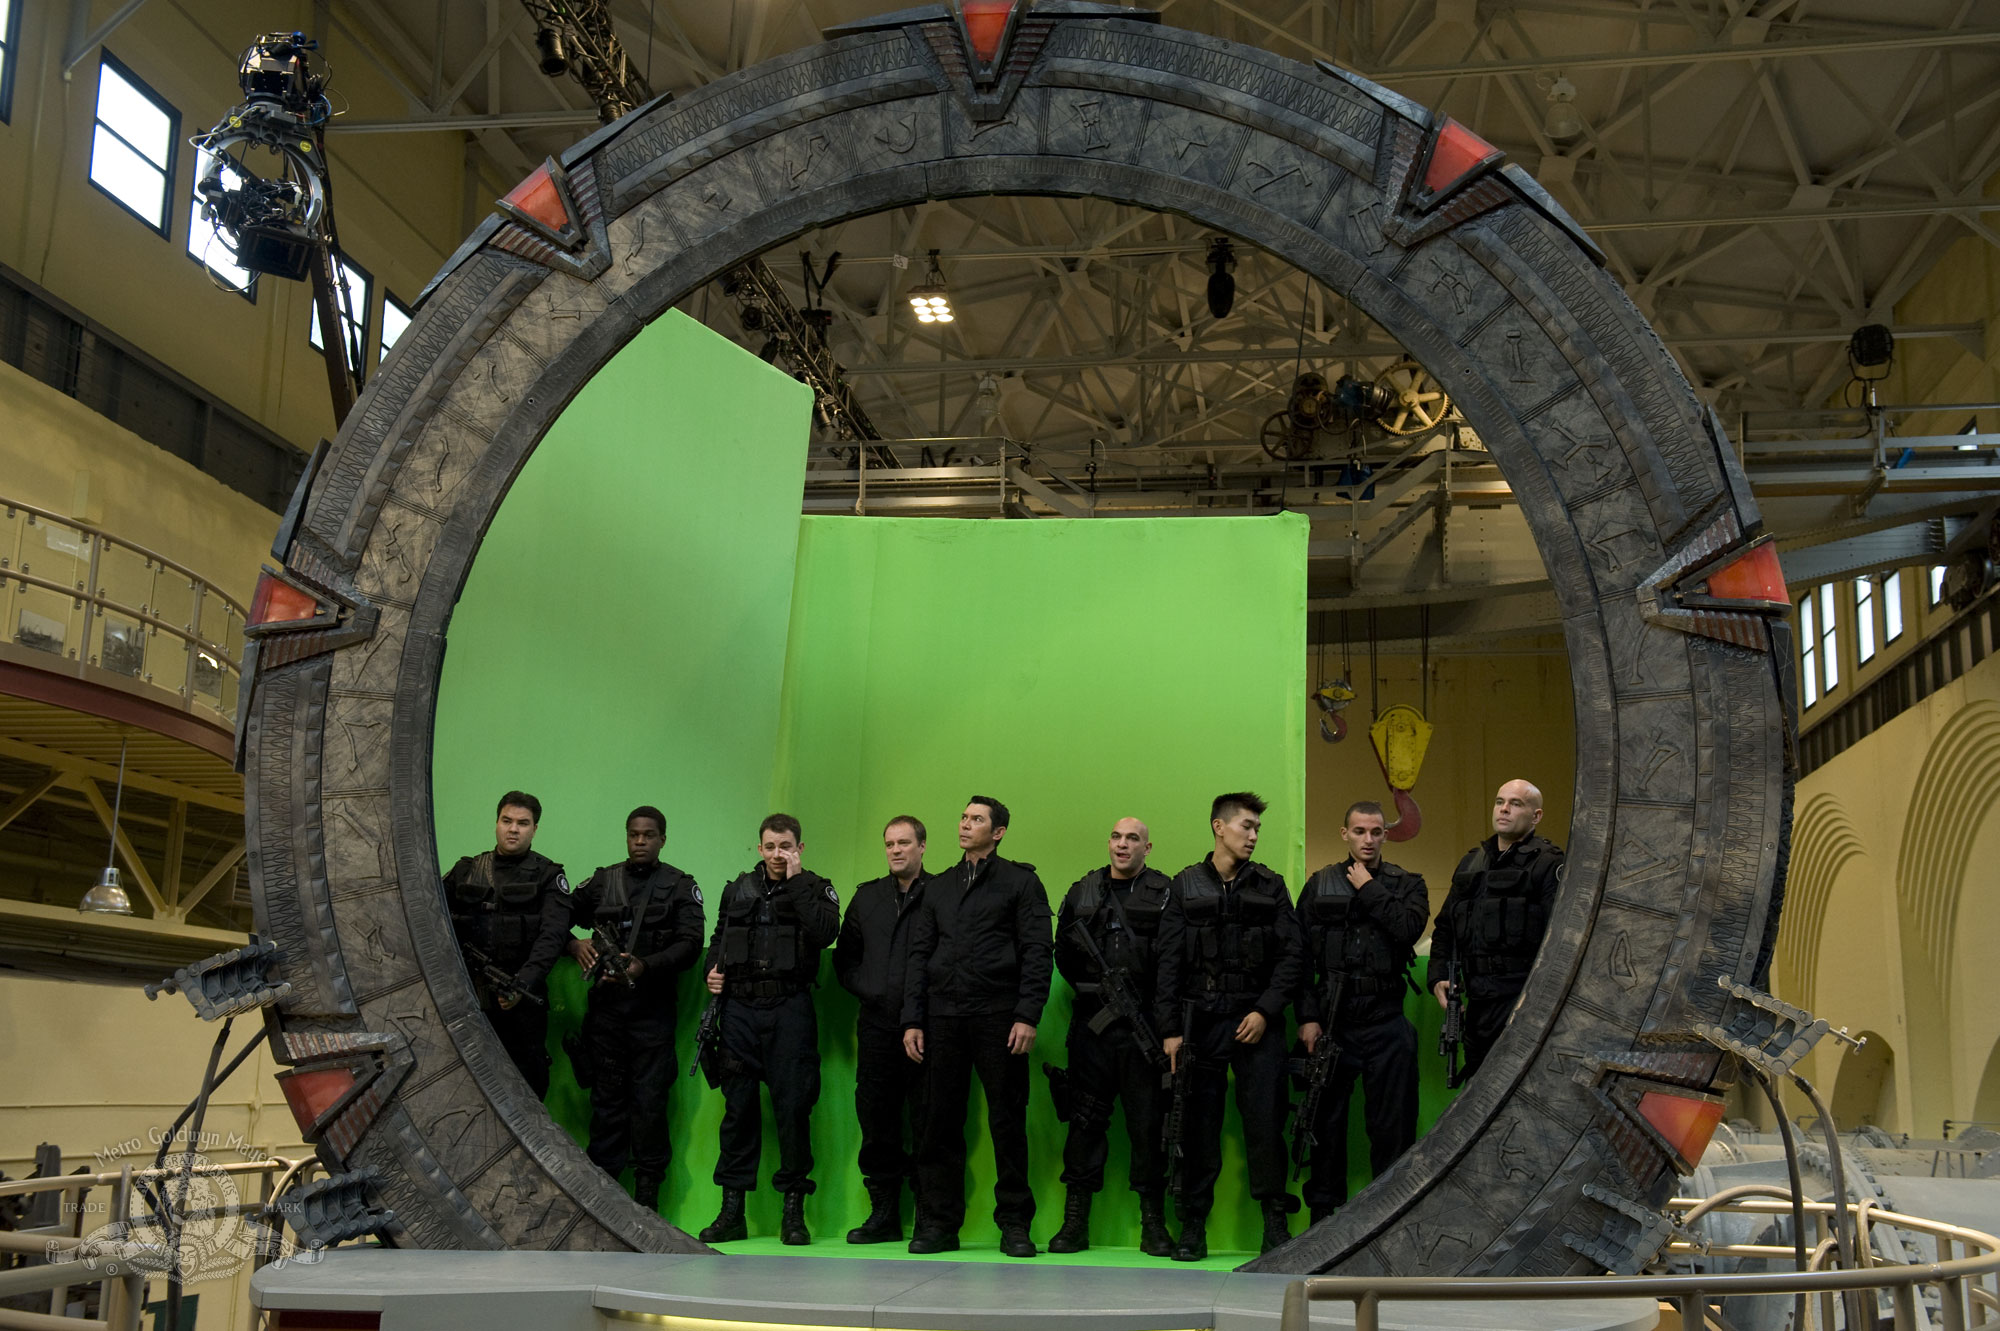
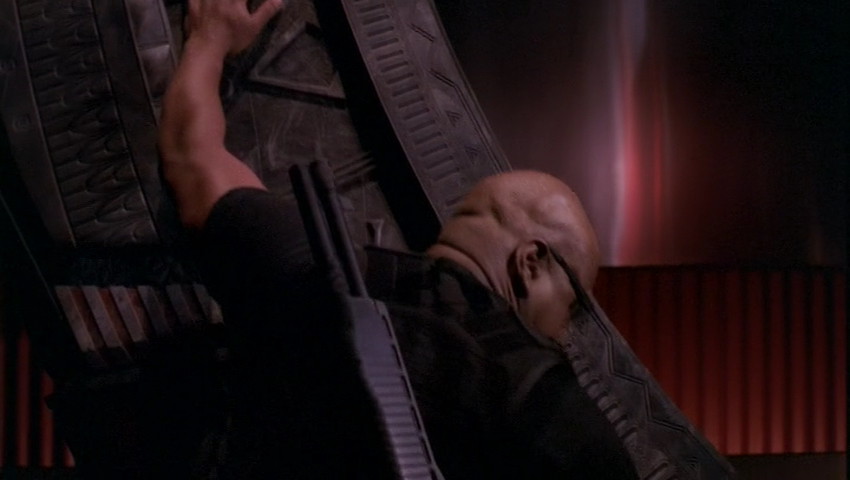
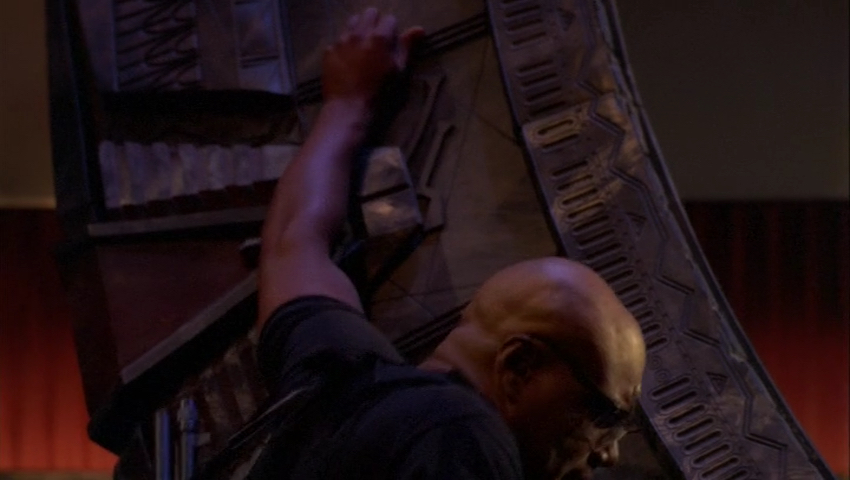
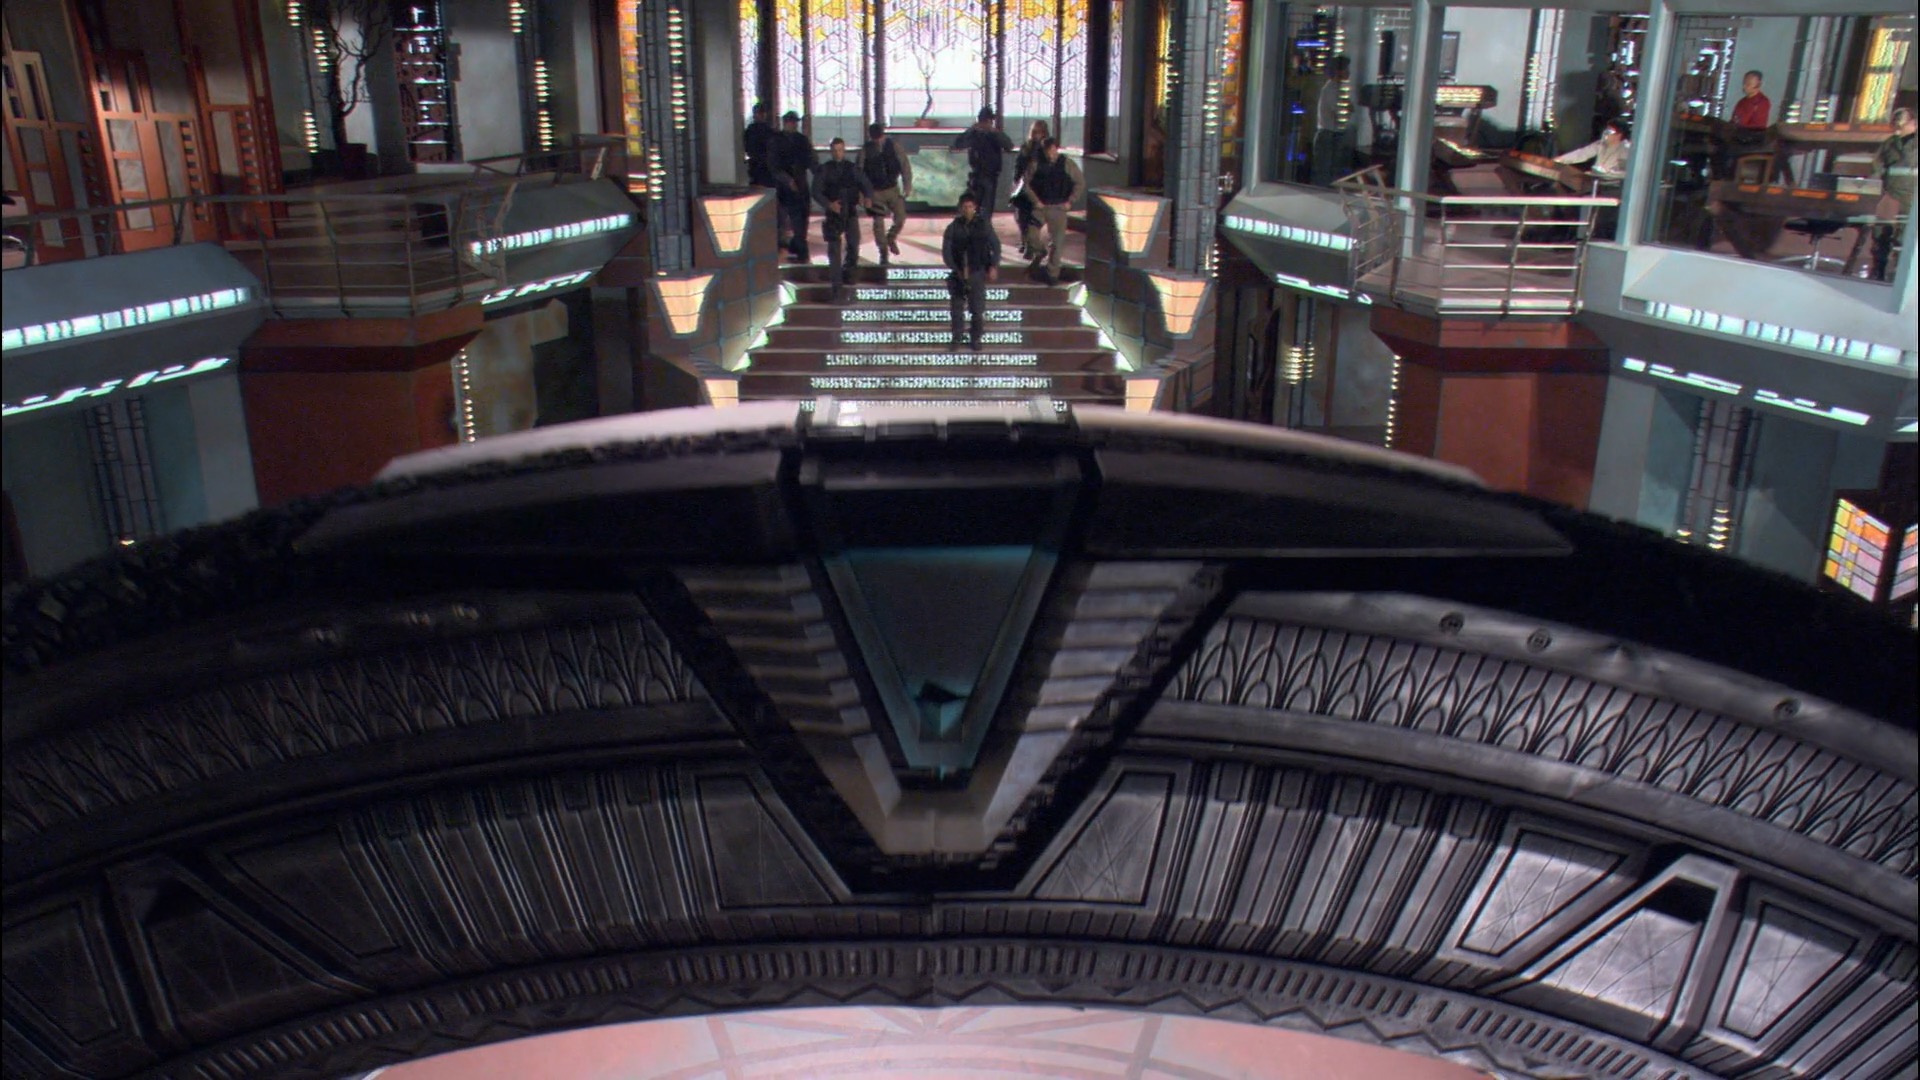
As with the movie, there was more than one stargate built for the show. Again, I’ll be focusing on the “hero” version that was permanently mounted in the SGC set.2The SGC was occasionally redressed to represent stargates on other planets. A second stargate that could be disassembled was used for location filming and other sets. The portable stargate did not have movement features, only lights, and had some courser detailing than the hero version. I’ve seen interviews that described a third stargate that only consisted of the front face, but I’ve never seen any photos of that version. While multiple physical stargates were seen on-screen at the same time in the season 9 episode “Off the Grid,” there were never more than nine total stargate sections visible, so it’s likely this was the single portable stargate assembled in two separate pieces.
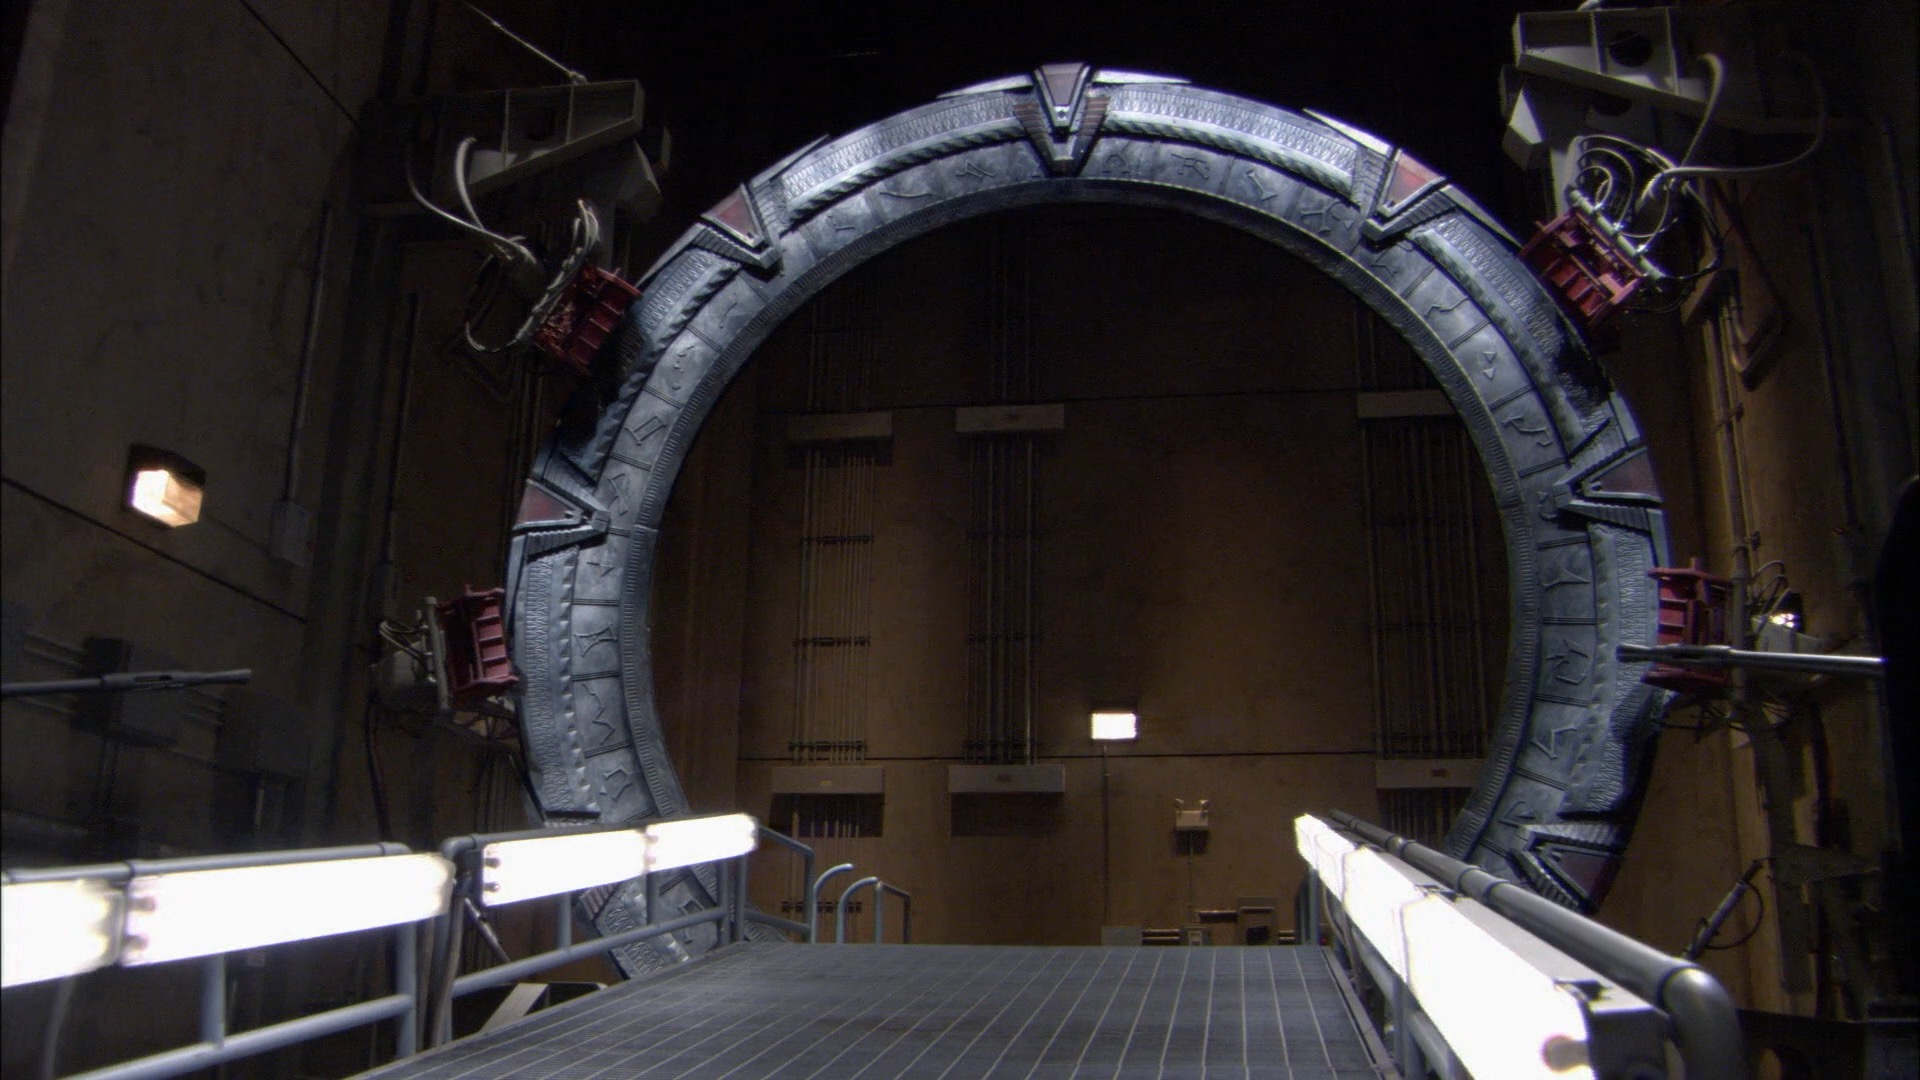
When the stargate was rebuilt for SG-1, the most visible change was to the chevrons. The jewels and clamps had lights added to them, and the unique top registration clamp was omitted. Only the top chevron was rigged to move, and only the front half of its jewel. The mechanism to move the chevron meant that the top chevron clamp also had a different lighting pattern than the others which were attached directly to the stargate.
As mentioned above, the chevron clamps were mounted higher. The chevron jewels were also slightly differently shaped and did not have engraved arcs. On my model, I kept the chevron clamps aligned as they had been on the movie version, which I thought made for a cleaner and more unified appearance.
On the original setpieces, only the front halves of the chevrons illuminated, and the corresponding sections of the rear chevrons were painted with the same stone texture as the rest of the stargate.
Occasionally, visual effects were used to make the rear chevrons also light up in SG-1; by the time of Stargate Universe, it became a consistent practice to depict the rear chevrons as identical to the front ones, including the lighting features.3Fun trivia note, on SG-1, the bottom two chevron clamps were not present on the main stargate, as they were obscured by the ramp. This can be seen in some behind the scenes episodes, as well as the episode “Moebius, Part II,” where the front ramp was removed. The bottom two clamps were only added and rigged to light up when the SGC set was revamped into Icarus Base for the premiere episode of Stargate Universe.
The 39 symbols on the inner ring were extruded outward rather than recessed, and the symbols themselves were redesigned from how they appeared in the movie. The lore of every stargate having unique symbols was modified so that only the origin symbol was unique, however, that was depicted only once on the stargate itself, and twice on the Dial-Home Device control console. Personally, I like to depict stargates with unique origin symbols and have build a considerable library of alternate symbols. Another option is to simply rotate the inner ring so the origin symbol isn’t visible on alien stargates, hidden under a chevron or below the ramp leading to the stargate’s portal.4I truly don’t understand why they practically never did this on the series; given the way the “Giza” symbol on an alien stargate was specifically emphasized visually in the episode “New Ground,” I suspect the production team thought of it as the signature visual icon of the show and wanted to have it visible as much as possible.
The symbols on the “hero” SGC stargate had beveled edges, while the portable stargate had symbols with straight edges.
I haven’t made a simple chart of all the SG-1 glyphs the way I did for the movie and Atlantis versions, but I will link a zipped folder of the screencaps and photos I referenced when building my model, organized by glyph. Included are the canon alternate origin symbols for Antarctica, Abydos (in two versions, a small one seen on-screen in the pilot and upside-down from its usual orientation, and a larger panel that was supposedly made for the full-size stargate but was never seen on-screen), and P7J-989 (the planet from the second-season episode “The Gamekeeper”), as well as Phoenix Site, from the second Stargate SG-1 table-top role playing game.
Another important point about the glyphs, when doing your own research, is that they aren’t consistent between the stargate, Dial-Home Device, and computer screens. The latter two sources added several “floating” elements that aren’t present on the version on the stargate itself. If you aren’t careful, you might accidentally add extra parts to #11 (Scutum) or #19 (Pegasus).
The mosaic rim segments seem to alternate orientation on the SG-1 stargates rather than all facing the same direction, but this is difficult to be certain of; this isn’t a piece that was frequently visible in detail, and subtle elements like that weren’t always assembled consistently on the portable stargate (it wasn’t uncommon for the inner ring to be assembled out of order, for instance, jumbling the sequence of the symbols).
When dialing, the stargate rotates at approximately 5 RPM. The chevron locking process is 72 frames long:
- T=0 Ring stops
- T+18 Chevron starts opening
- T+25 Chevron open
- T+29 Lights start turning on
- T+35 Chevron Clamp Light on
- T+39 Chevron Jewel Light on
- T+39 Chevron Starts Closing
- T+44 Lights start turning off (if using top-chevron dialing)
- T+46 Chevron Closed
- T+51 Lights off (if using top-chevron dialing)
- T+72 Ring starts rotating
There’s some ambiguity on the specific dialing procedure, more details on my stargate dialing blog post.
The SG-1 stargate is stone-colored, rather than metallic, with a medium-to-dark-gray base. Soft patches of very dark gray cover the device, with a top layer of white, chalky marks that resemble scrapes. The segments that can light up are red with a dull finish, and the glyphs have a rough “sandpaper” texture on their face rather than the smoother finish of the rest of the stargate. However, the glyphs’ coloring matches the rest of the setpiece, so the difference is only visible from a close perspective.
The portable stargate appears to have been consistently painted slightly darker than the hero version, even in similar lighting conditions. There are a couple of cases where, to show the portable stargate’s inner ring in motion, it was intercut with close-ups of the hero stargate, sometimes with background images or objects inserted to make it appear to be in the same place as the portable stargate.
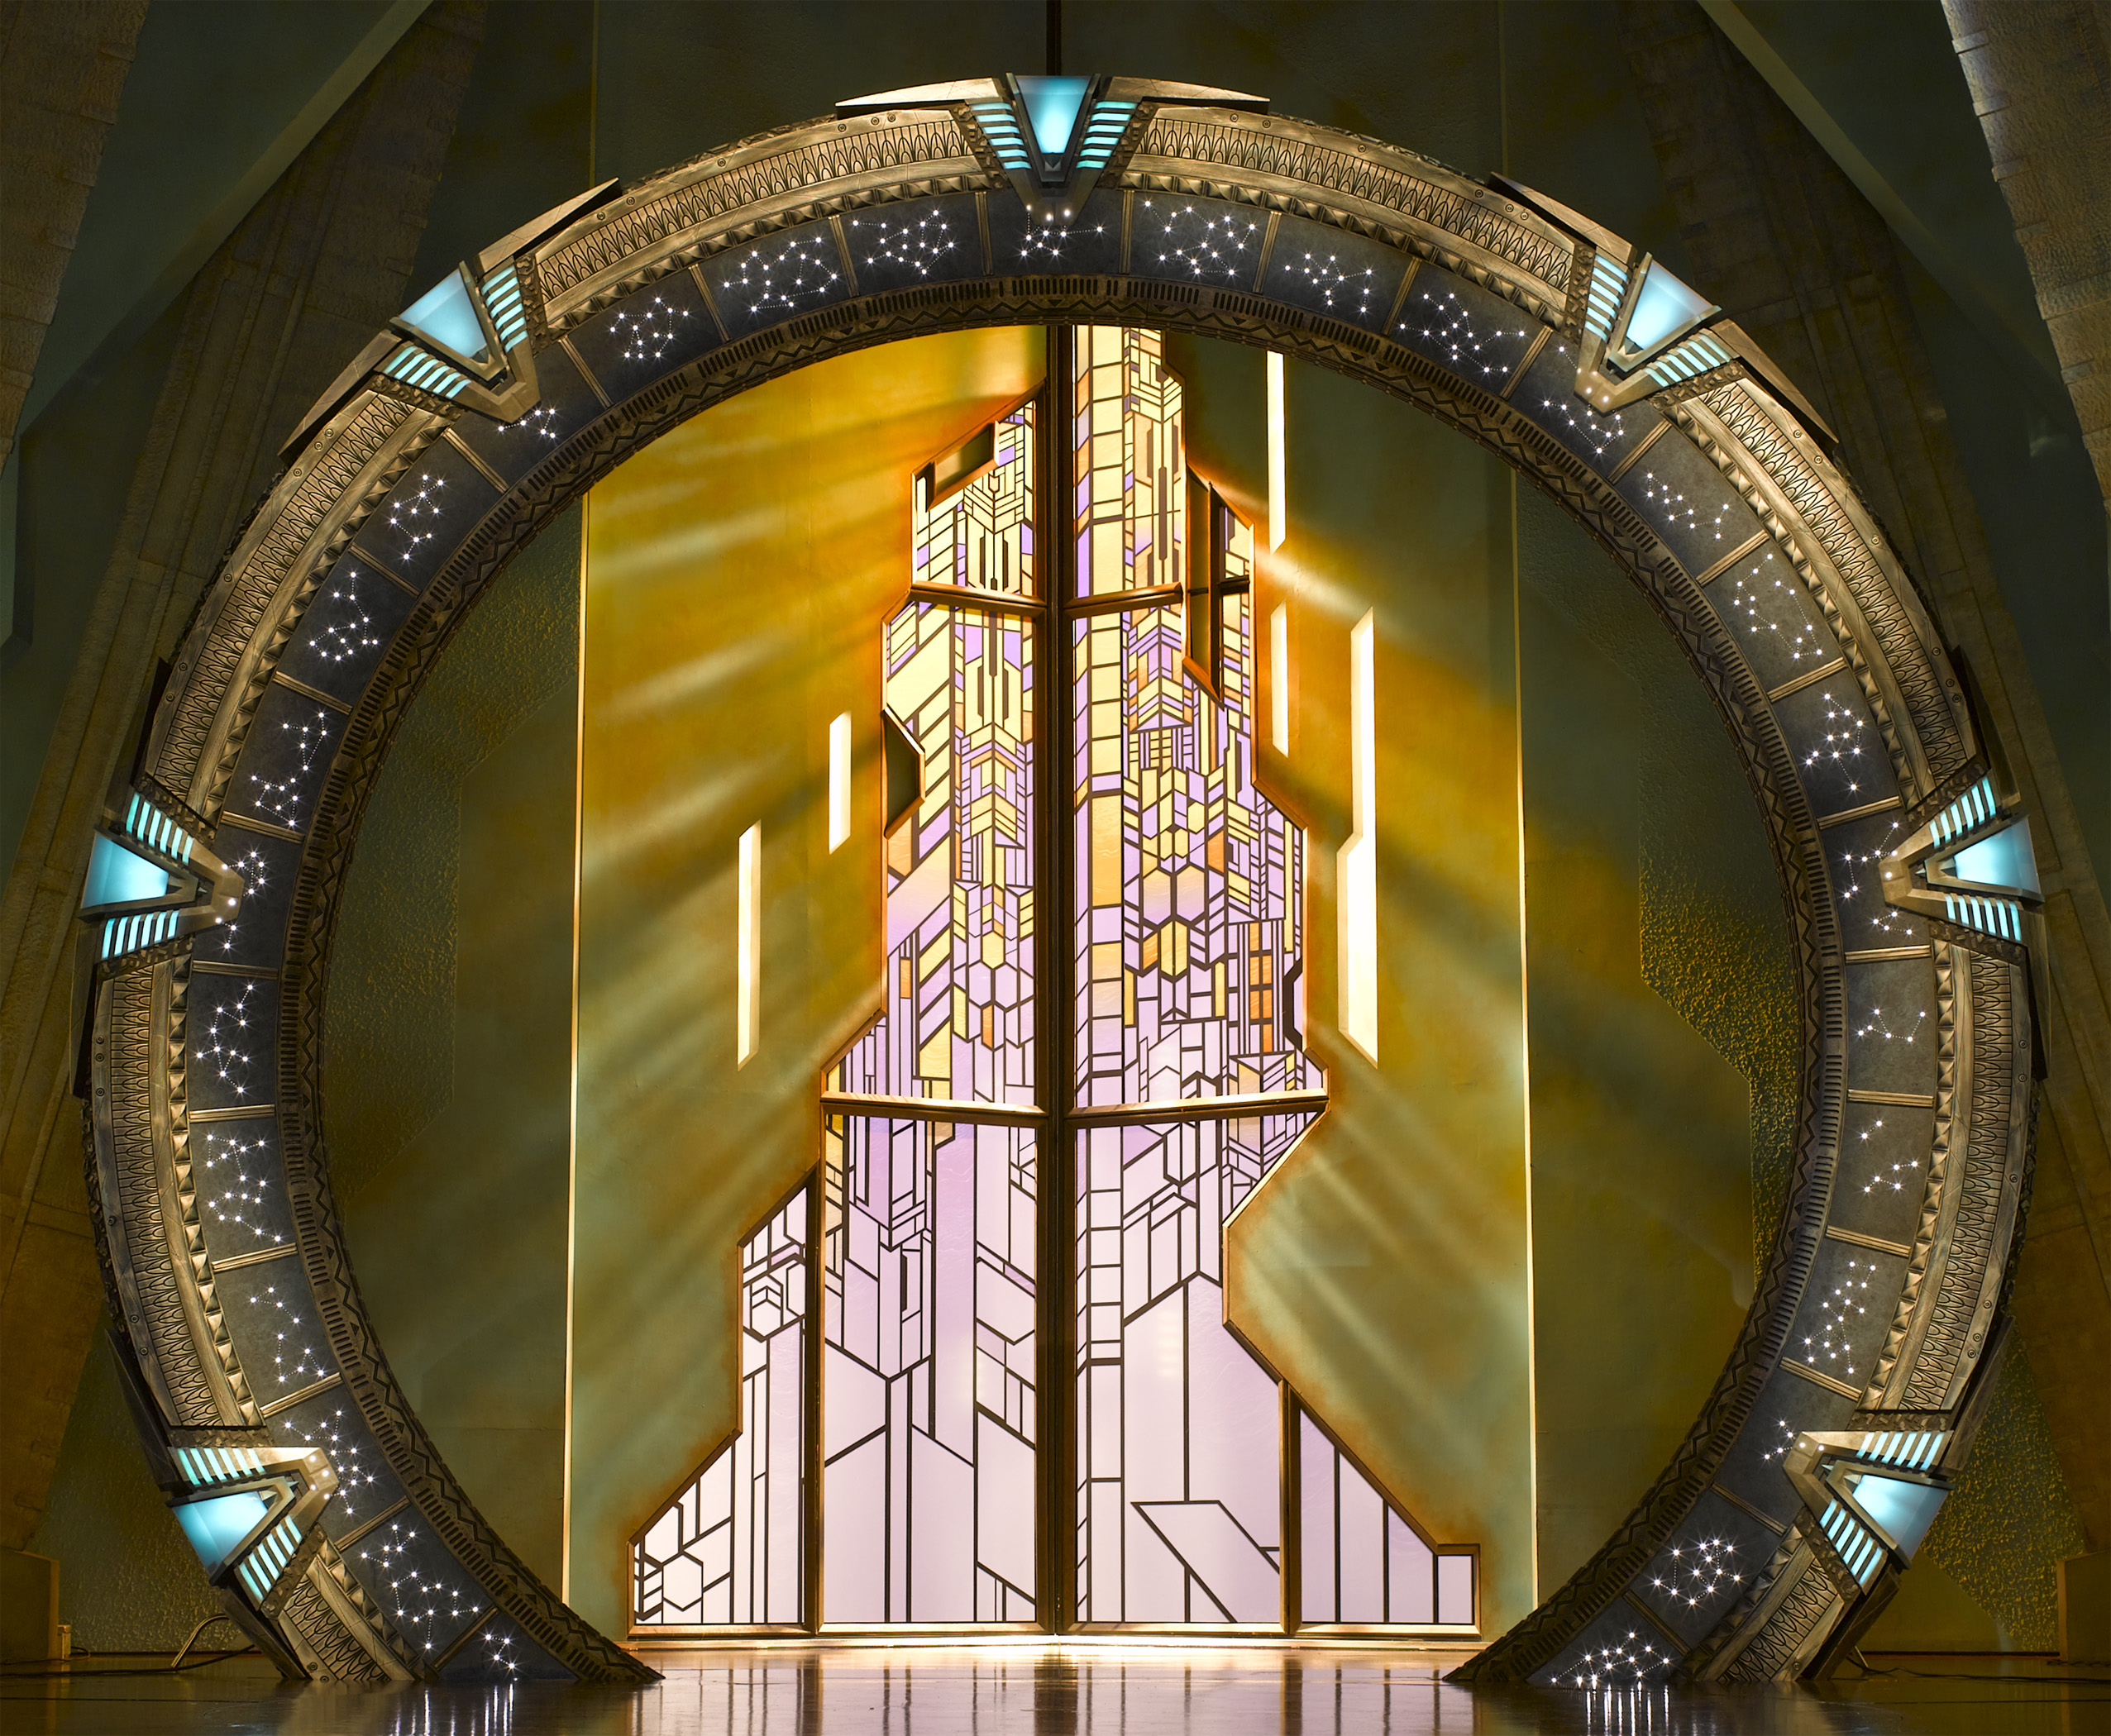
Atlantis Elements
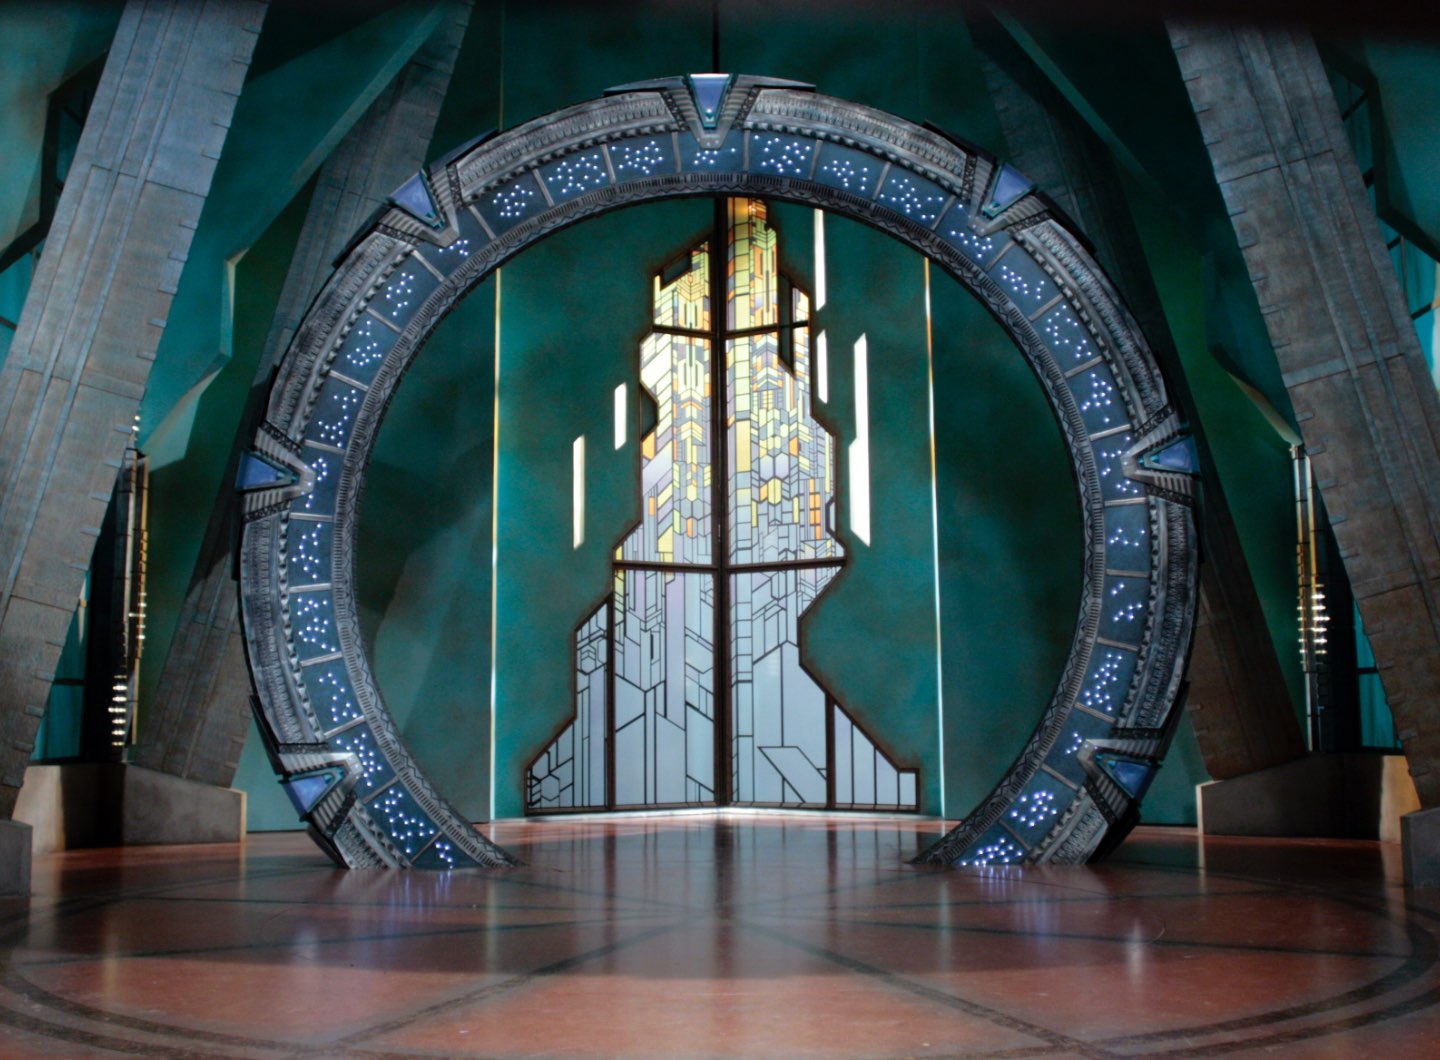
For the first spin-off series, Stargate Atlantis, the stargate was rebuilt from scratch. While superficially similar, virtually every detail was modified in some way. Unlike the earlier productions, only one stargate setpiece was built for the show, in the Atlantis gateroom. Off-world stargates were exclusively represented with CG models (or, very rarely, by redressing the Atlantis gateroom set) until mid-season 5. At that point, the episode “The Shrine” required a physical stargate the actors could sit on while taking refuge from a flood. A one-third arc was built out of pieces from the portable SG-1 stargate, redressed with the most obvious aspects of the Atlantis version; a blue inner ring with lit “digital” glyphs, blue chevrons instead of red, and a polished metallic silver paint finish. This stargate segment was used for close-up shots every time a land-based stargate outside Atlantis was seen for rest of the run of the show, while continuing to use CG when the entire stargate was visible.
The Atlantis stargate’s inner rim details are 711 “pills” wide, so you’ll want to use a multiple of that as your number of sides when lathing the model (again, I doubled that, so my Atlantis stargate has 1422 sides).
The patterns are also different
- Pills and dots:
- .1.13.2.11..14.11.19
- Triangles and lines:
- .3.3.3(1)1..6
That (1) triangle in the Atlantis zig-zag patterns is 2/3rds of the width of the normal triangle segment, so it’s visible shorter than the ones surrounding it.
On the rear face, the inner rim details have the same pattern, but are rotated so the half-height triangle is directly under each chevron.
In the pills-and-dots segment, the outer ring of each dot has a horizontal channel connecting it to the outer ring of the adjoining dot or pill.
There’s no lower row of S-blocks below the inner ring on the front of the stargate. The inner ring is less recessed, and the inner rim of the stargate is twice as wide as the prior versions, and is entirely flat, with two parallel rows of emitter details. The chevron slots are also shallower.
The upper “S-Blocks” are narrower than the movie/SG-1 equivalents, so there are more of them. Again, I’ll let you estimate the total count yourself, since they’re cut off by the chevron slots.
The arches and buttons are more-or-less identical to the prior versions. The arches have a small amount of recessed detail, though it’s almost entirely obscured by the paint finish. This feature is also visible in the mosaic tiles, though, like me, you may not notice until you see it in this extreme close-up photo.
The rear ring “conduit” is superficially similar, but has some differences. The segment surrounding the chevron is noticeably wider, though the large mid-chevron segment is identical to the SG-1 equivalent, except the pattern of engraved arcs is mirrored. The smaller segments between the large segments are slightly narrower to make up the difference.
All the chevron wings on the Atlantis version are based on the film/SG-1 right wing (again, you can tell by the engraved arcs), with the left ones mirrored copies of the right version. The shapes of the chevron clamps, jewels, and jewel housing appear to be subtly different as well. As with the SG-1 stargate, the clamps are mounted higher, but the wings and jewels have been realigned so they don’t look so out-of-place in that position.
The chevron clamps themselves were made of translucent material. The upper portion was painted to match the rest of the stargate, but the part hanging over the inner ring was left translucent, allowing the light glyphs to shine through. This is disguised by the color-change of the inner ring when looking at the front of the stargate, but the difference is more apparent when looking at the chevrons on the back of the stargate. The chevron jewels also have a glossy exterior finish, but the inner surface is much more diffused, giving that lighting effect a more “cloudy” appearance than the very defined lights on the SG-1 stargate.
The mosaic pattern on the chevron slots are symmetrical, identical on the front and back, and don’t extend under the chevron clamps.
The mosaic patterns on the rim segments repeats three times per segment, and are also identical on the front and back, meaning it’s a mere 2/9ths of the amount of rim mosaic-drawing compared to the equivalent movie/SG-1 feature. Clearly, someone on the Atlantis production design team hated drawing those tiles almost as much as I do.
Here’s the template I photobashed of the mosaic tile pattern on a complete rim segment.

At the top of the chevron jewels is a small strip of emitter details bridging each rim segment (except, as you may have noticed above, chevron 2, where it apparently fell off at some point and was not repaired, at least not immediately).
The inner ring does not rotate, but instead consists of 36 fixed panels. Each panel is translucent, and hides an LED array nicknamed the “superglyph” by fans, a series of large lights representing stars connected by lines of smaller lights. Each of the Pegasus galaxy stargate symbols consists of some subset of these stars and lines, which are lit in sequence during dialing out to give the appearance that each symbol is rotating across the inner ring. When idle, the stargate has these symbols lit at partial brightness, and they light up to full sequentially when the stargate is receiving an incoming connection. More information on the Pegasus glyphs is on the page for my Atlantis stargate model, and the animation modes are covered in my dialing article.5Tracking addresses from Stargate Atlantis can be complicated. The fandom (including myself) number the symbols as they appear on the Atlantis stargate, but behind-the-scenes sources number them in the order they appear on the Pegasus version of the Dial-Home Device. This also means, since the DHD setpiece was minimally redressed from its SG-1 design so it could be used for both shows, and there was apparently some kind of miscommunication about the nature of one particular symbol, there are three extra symbols on the DHD that don’t appear on the Pegasus stargate or the Atlantis and Puddle Jumper DHD consoles. The details on the Pegasus version of the DHD are in the post.
The incoming wormhole sequence takes exactly five seconds. 36 symbols lighting up sequentially over five seconds does not factor evenly into any standard framerate if you’re doing a CG animation. When keyframing, you could count it off evenly (one glyph per frame, for instance) then rescale the complete sequence to be five seconds long, or you could set your animation to an unusual framerate, then set it back to a normal video speed when you’re done and let the computer scale out your keyframes.
I did the latter to animate the outgoing dialing template on my model, setting the scene to 72 FPS, which meant each glyph remained in a segment for five frames before moving on to the next one. There’s also a two-second hold between a glyph reaching its target chevron and the next glyph “launching” from it. Luckily, because of the way the Pegasus stargates work (and since you’re probably using a distinct CG object for each glyph rather than animating every individual lightbulb the way the real-life version would’ve), you only have to animate one dial-out sequence, and then you can just replace each glyph with the correct one for the address you’re animating.
The stargate’s base color is polished silver. There are spots where it’s worn away to reveal a dark-gray “naquada” color, as well as a patina of crystalline blue over the entire surface. Additionally, engraved details like the pills and zig-zags start as dark-gray naquada, as if the stargate was initially a polished template and those details were carved out of it by some futuristic CNC machine. The mosaic patterns under the chevrons and on the rim are naquada-gray at the base, while the highest layer of tiles are polished silver. The inner ring has a mottled dark blue pattern like a crystal or geode, and is translucent to allow the light glyphs to shine through from below.
| ↑1 | I call to the jewel the “Chevron Block” in my models, and the clamp simply the “Chevron,” but I’m using terminology from the production of the film for clarity in this article, rather than having the words “chevron” and “block” refer to multiple objects. |
|---|---|
| ↑2 | The SGC was occasionally redressed to represent stargates on other planets. |
| ↑3 | Fun trivia note, on SG-1, the bottom two chevron clamps were not present on the main stargate, as they were obscured by the ramp. This can be seen in some behind the scenes episodes, as well as the episode “Moebius, Part II,” where the front ramp was removed. The bottom two clamps were only added and rigged to light up when the SGC set was revamped into Icarus Base for the premiere episode of Stargate Universe. |
| ↑4 | I truly don’t understand why they practically never did this on the series; given the way the “Giza” symbol on an alien stargate was specifically emphasized visually in the episode “New Ground,” I suspect the production team thought of it as the signature visual icon of the show and wanted to have it visible as much as possible. |
| ↑5 | Tracking addresses from Stargate Atlantis can be complicated. The fandom (including myself) number the symbols as they appear on the Atlantis stargate, but behind-the-scenes sources number them in the order they appear on the Pegasus version of the Dial-Home Device. This also means, since the DHD setpiece was minimally redressed from its SG-1 design so it could be used for both shows, and there was apparently some kind of miscommunication about the nature of one particular symbol, there are three extra symbols on the DHD that don’t appear on the Pegasus stargate or the Atlantis and Puddle Jumper DHD consoles. The details on the Pegasus version of the DHD are in the post. |