Category Archives: Animation
General Reel — Winter 2014
Motion Graphics Reel – Winter 2014
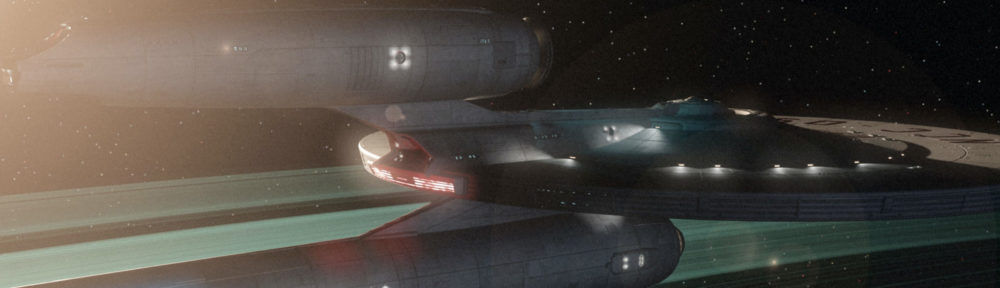
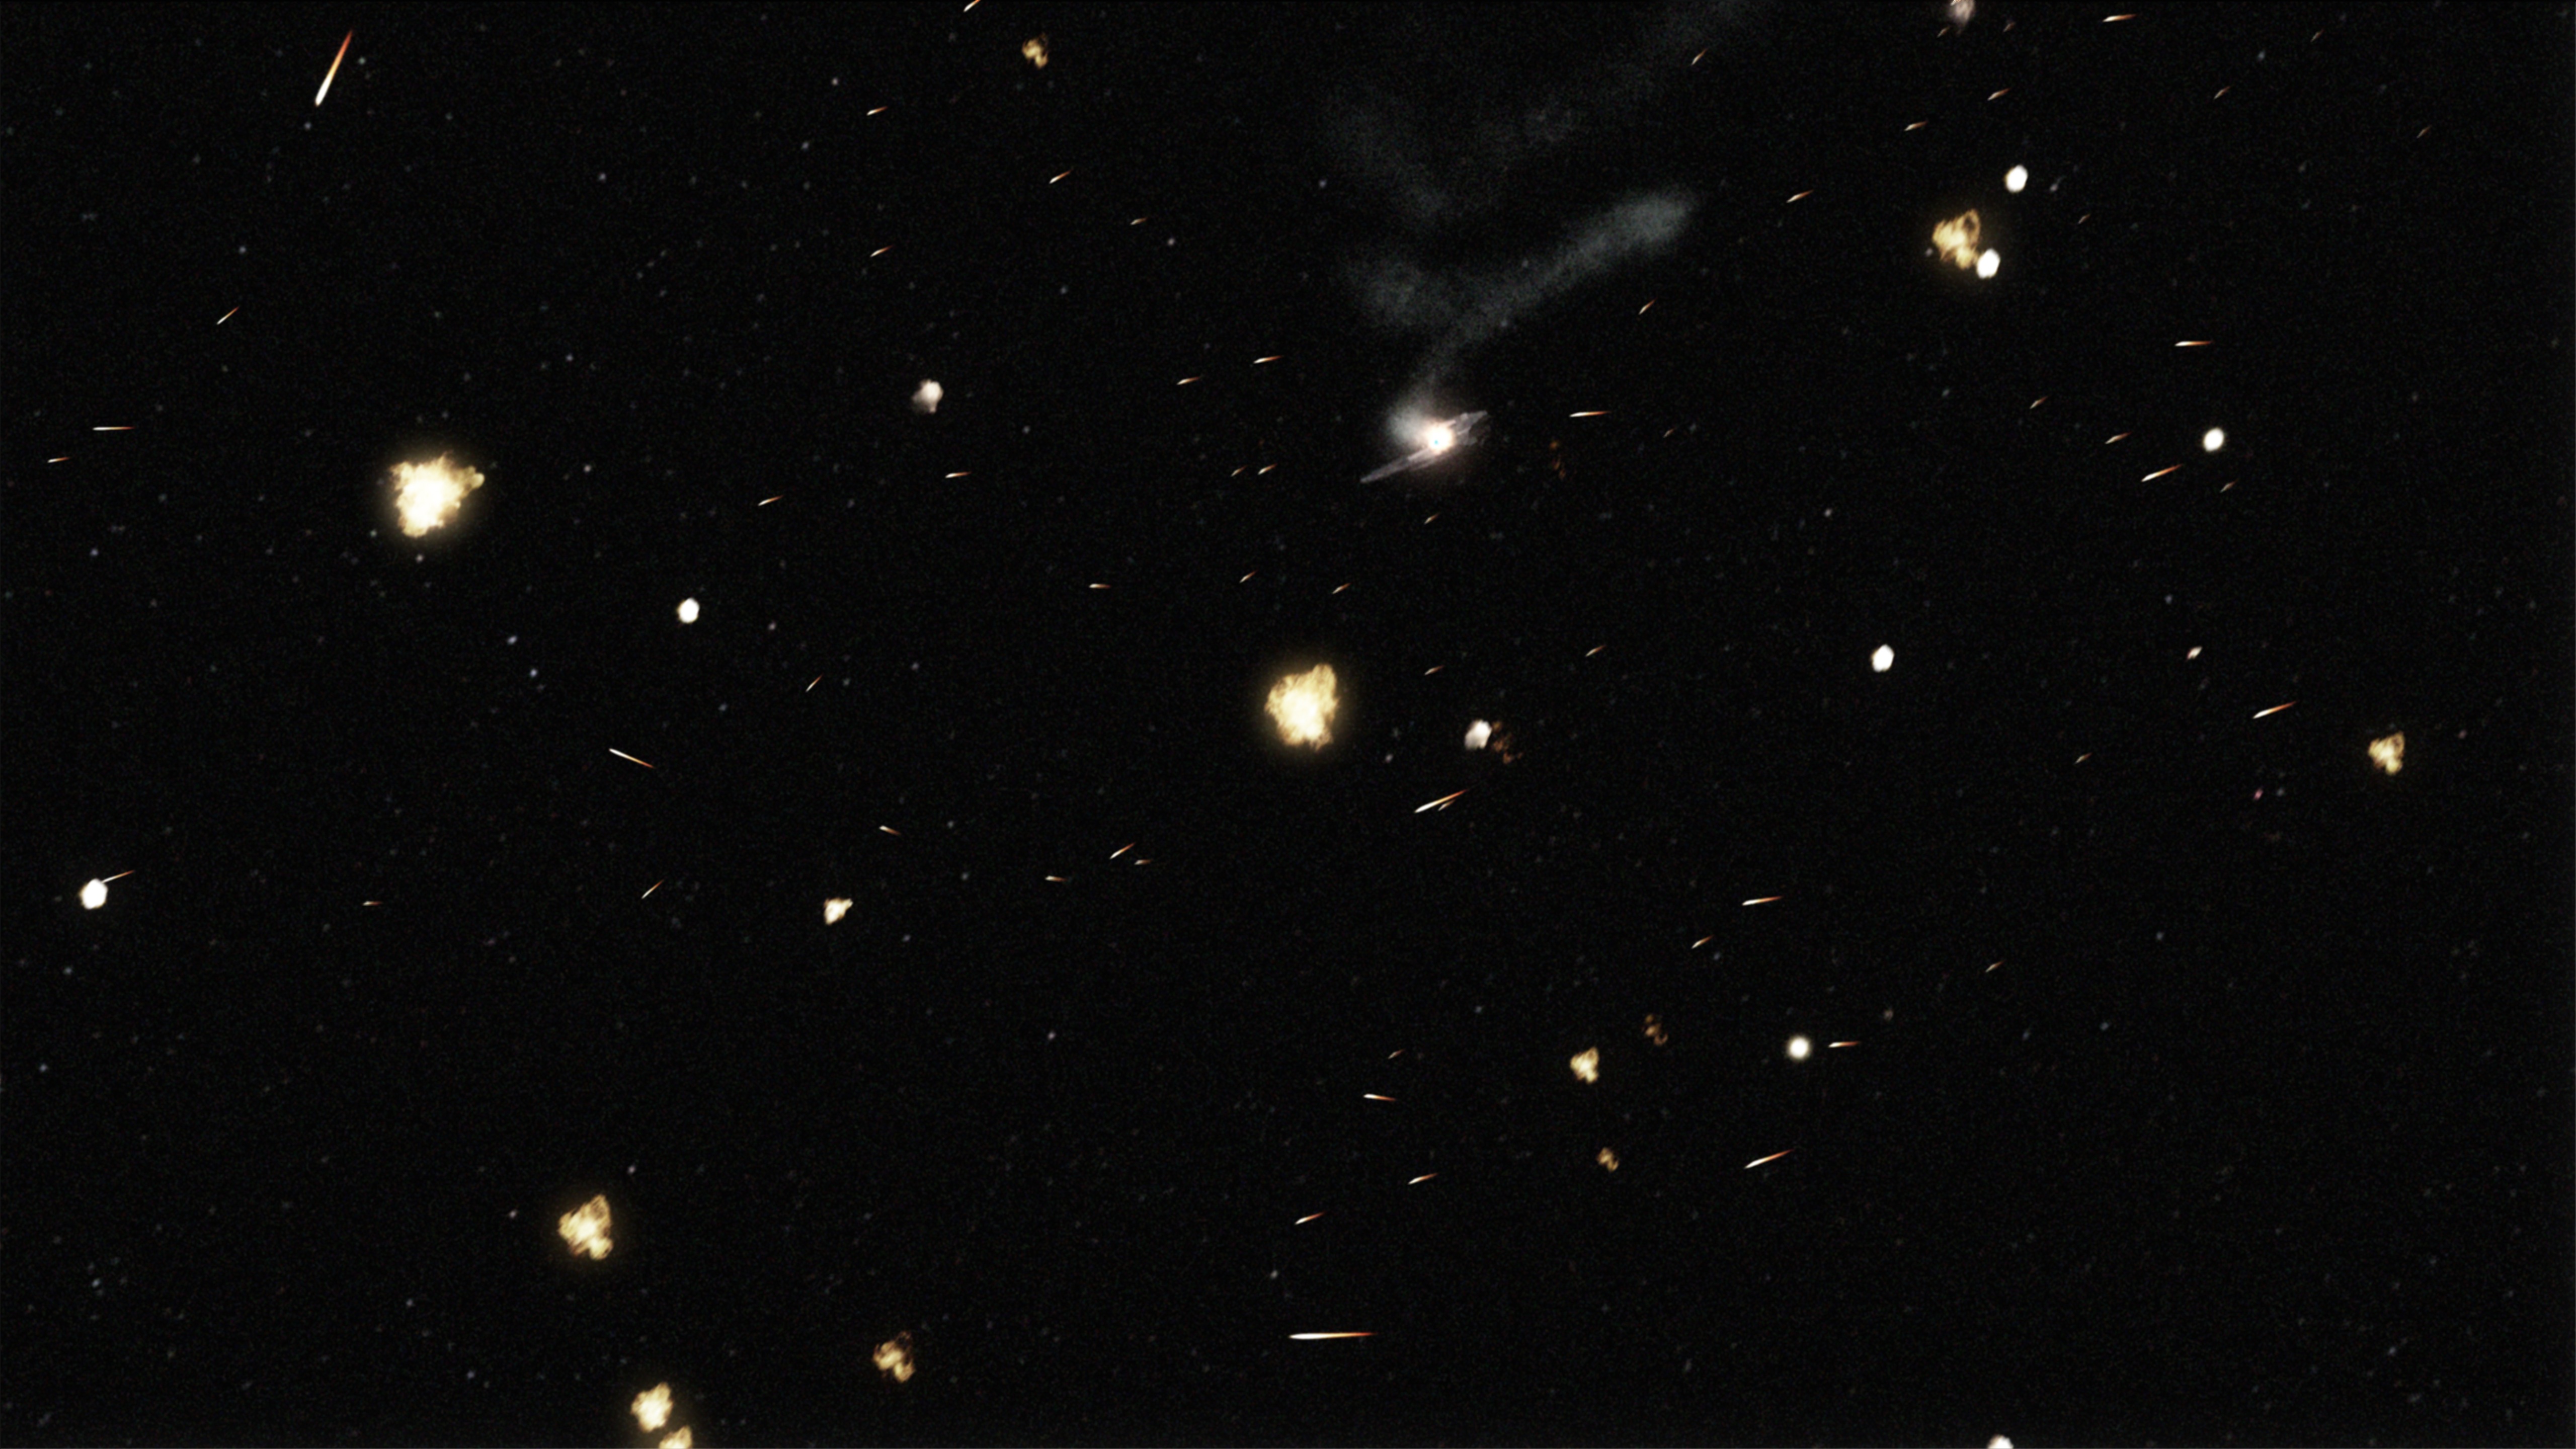
Something you want to add to this briefing, Captain?
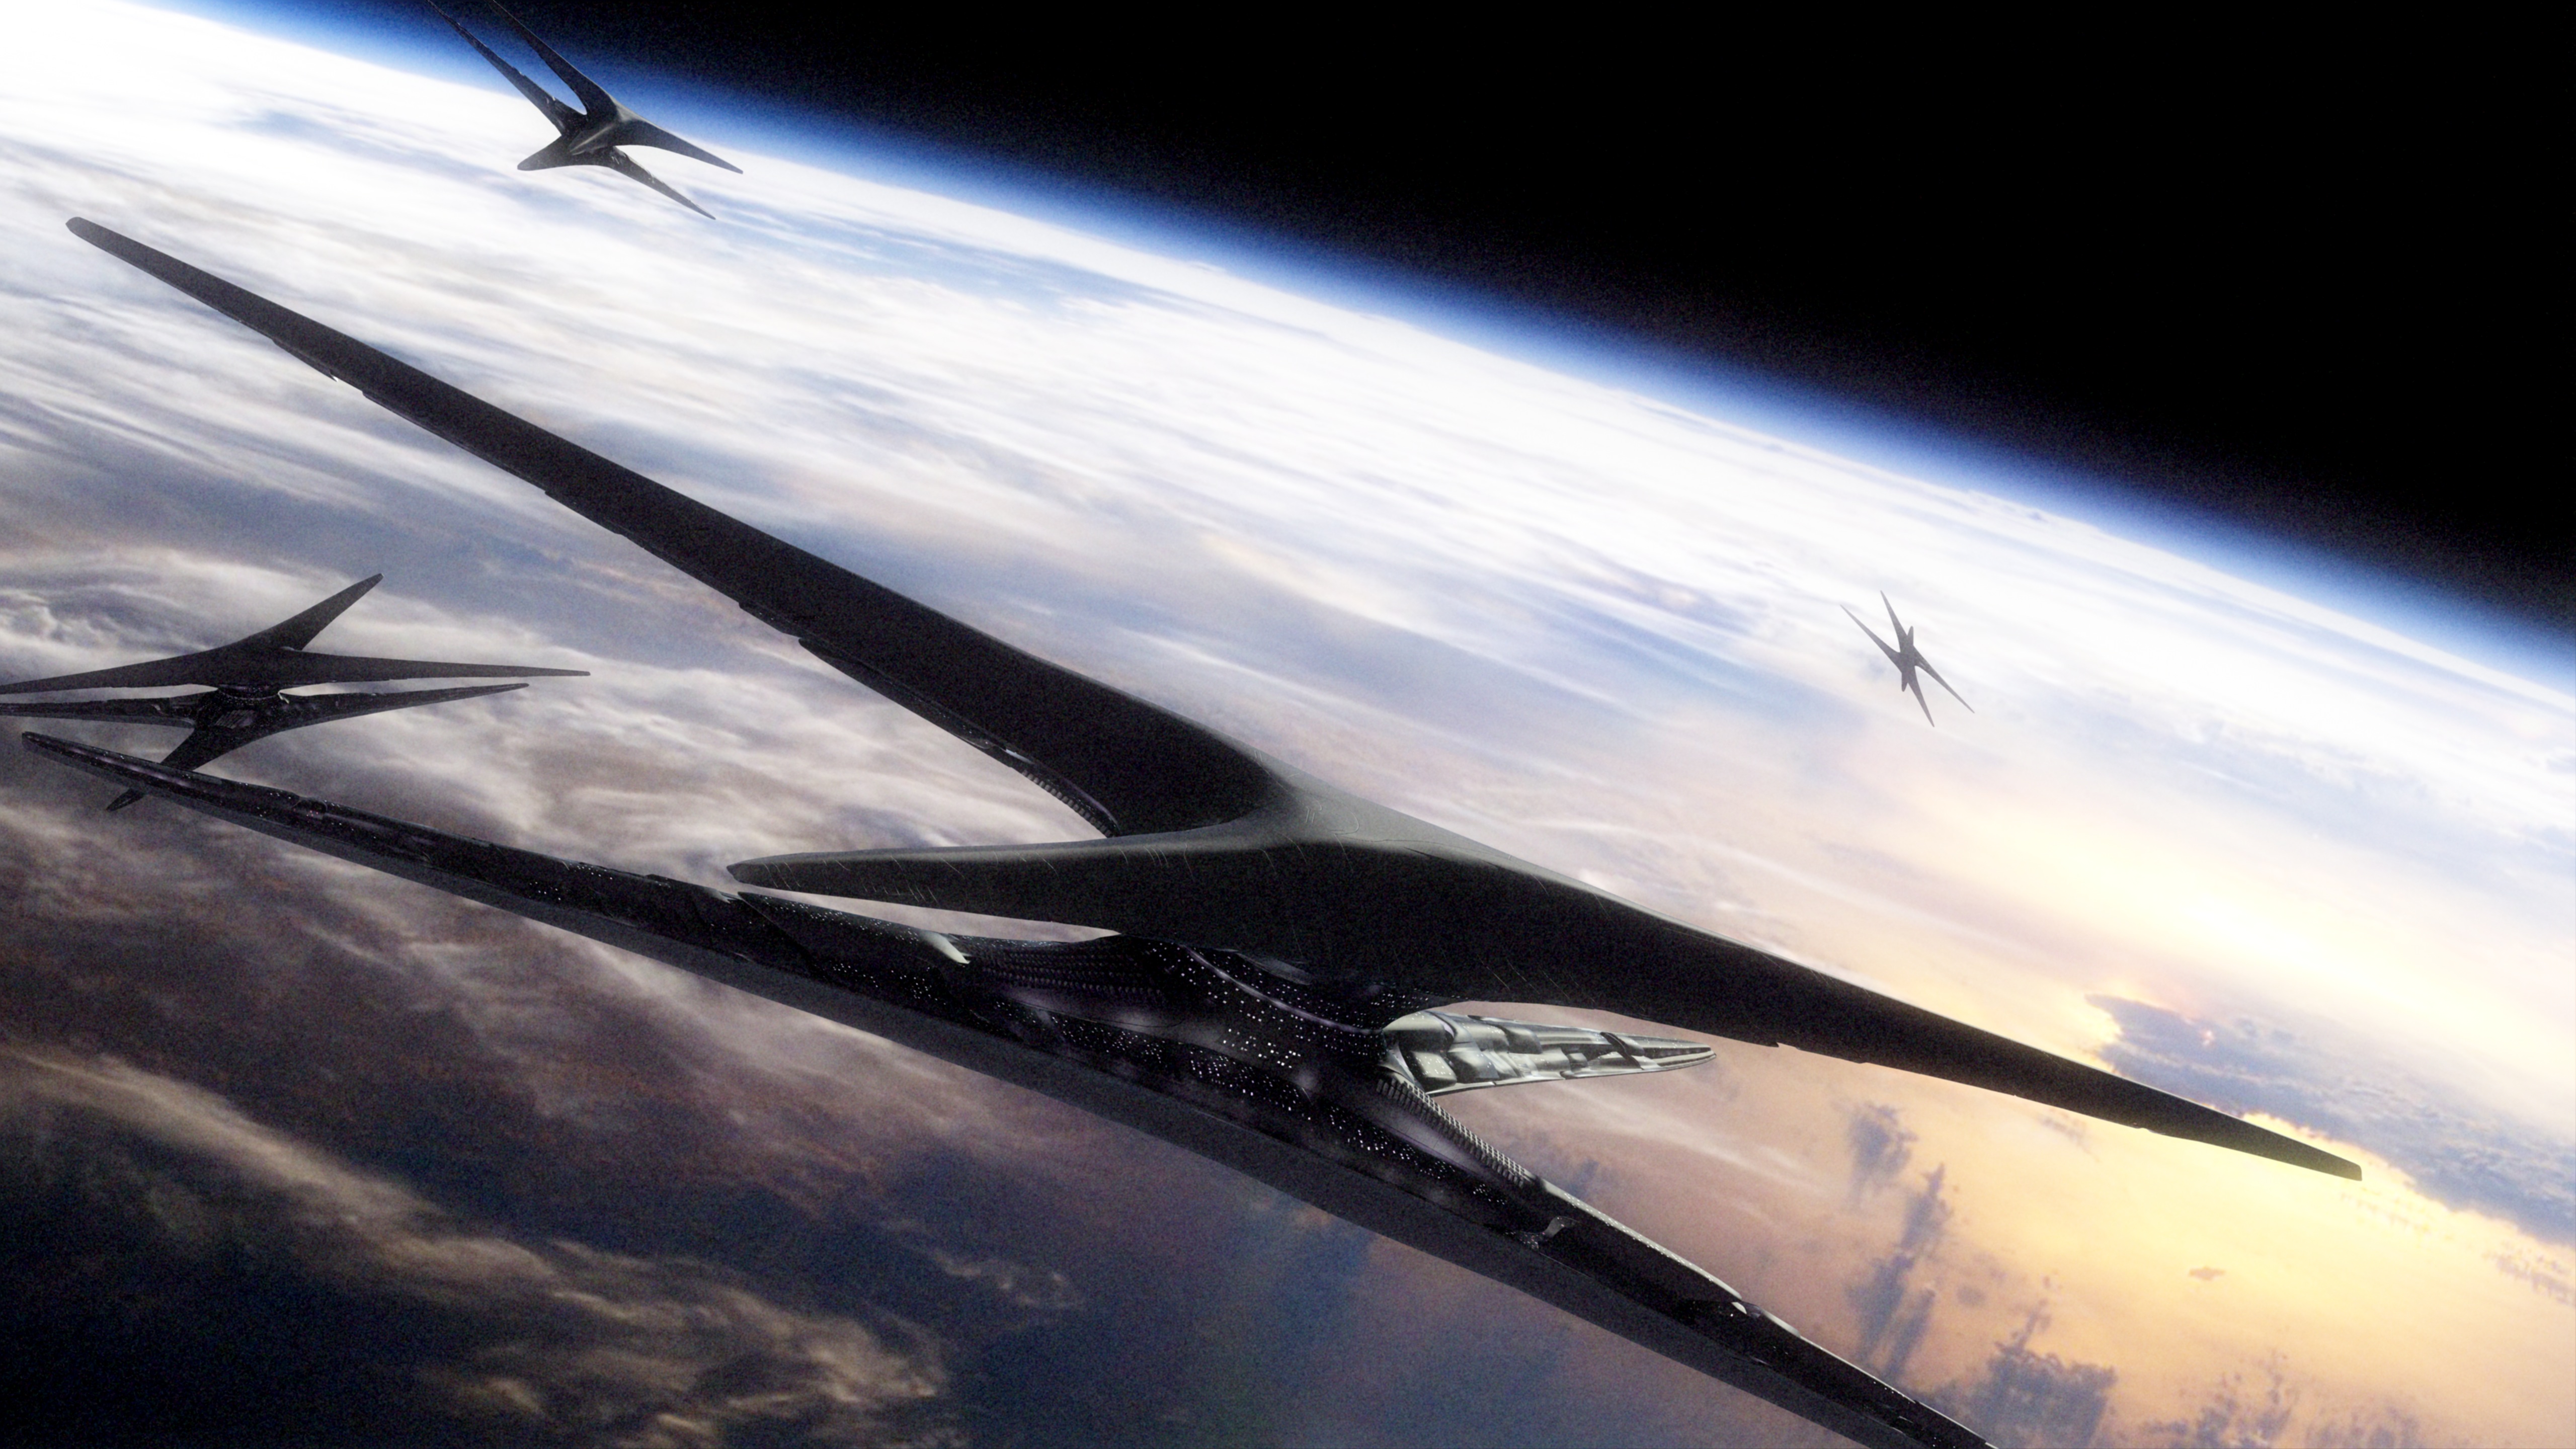
Diaspora is a space combat simulation game set in the universe of the remade Battlestar Galactica, and based on the Freespace 2 engine. It’s super-fun and polished, and if you ever wanted to fly a Viper, you should probably download it now. A while ago, the call came out once again for volunteers, specifically mentioning visual effects animators. I leapt at the chance.
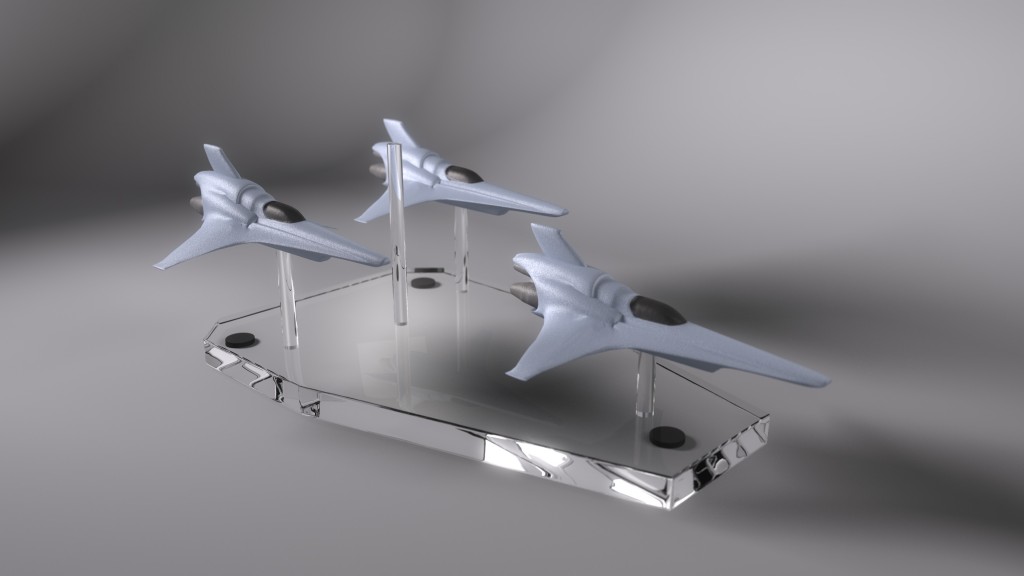
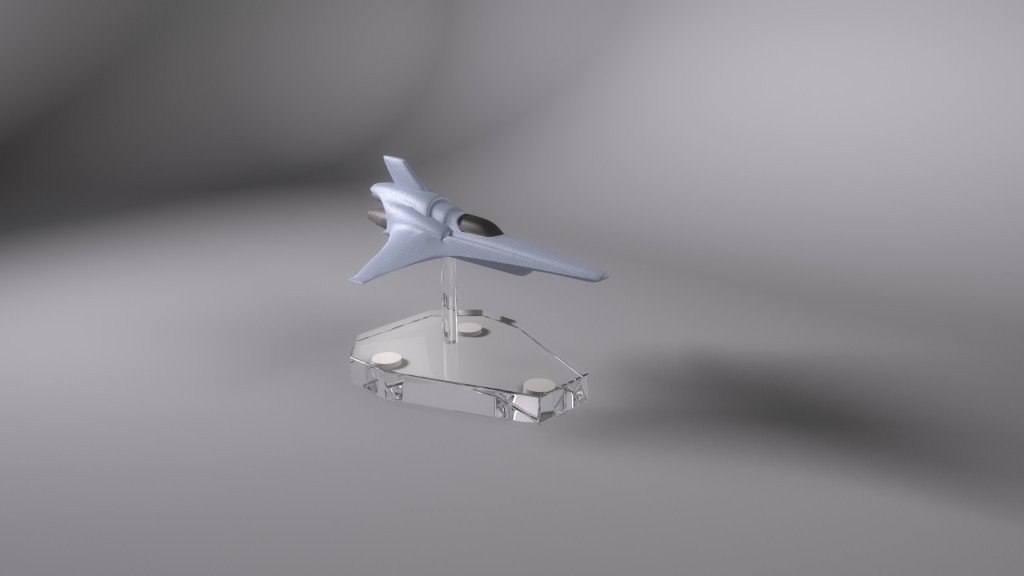
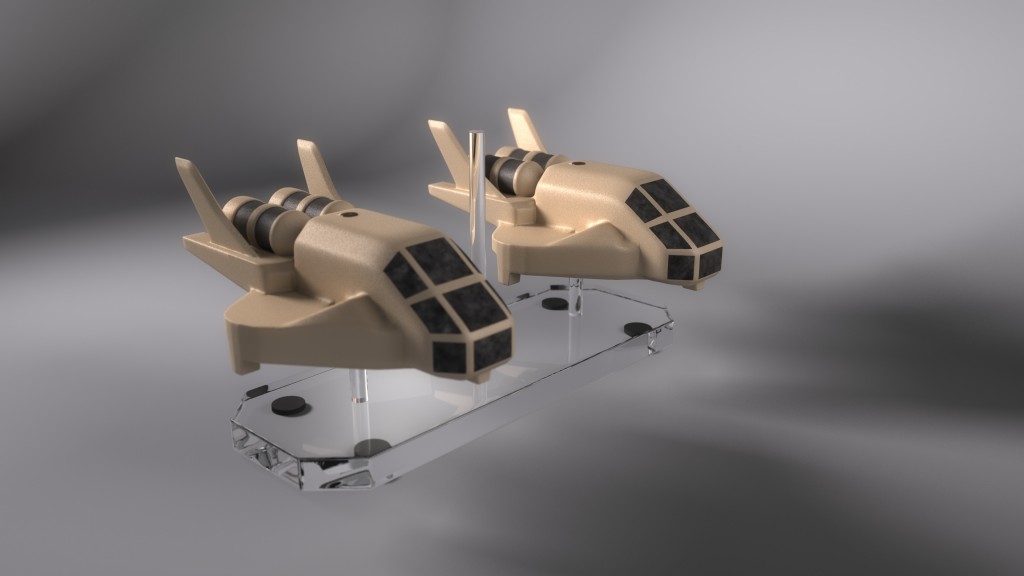
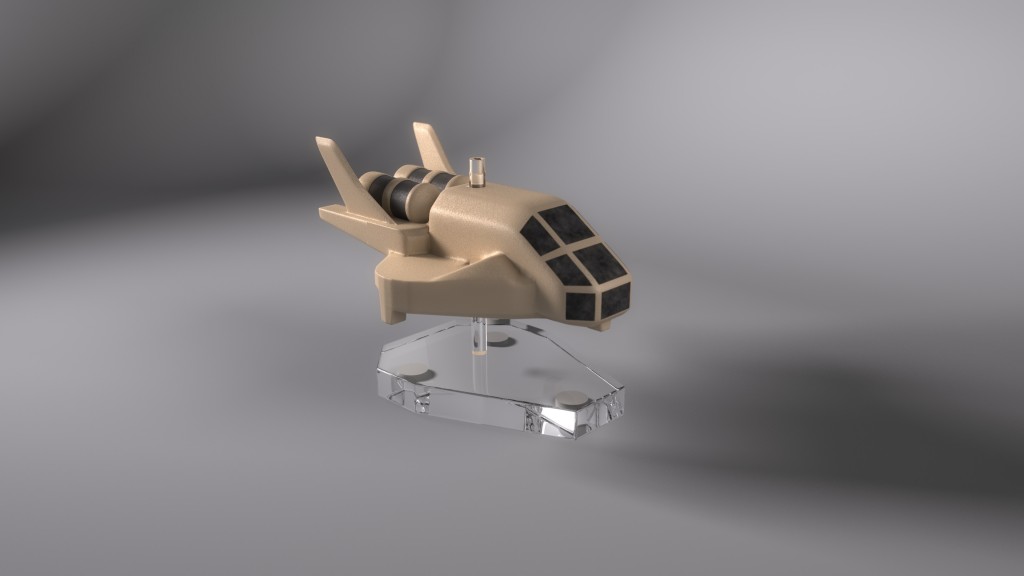
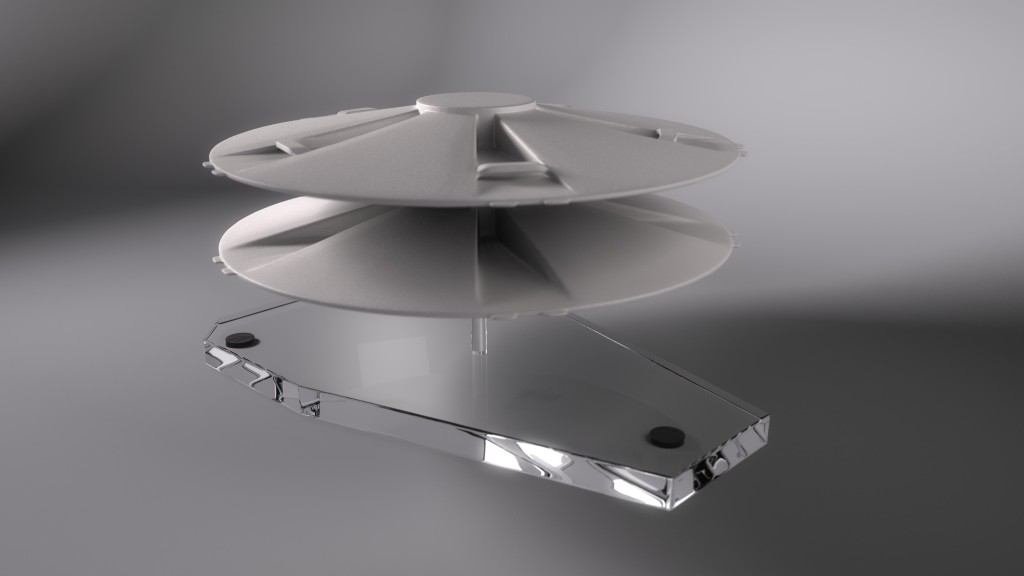
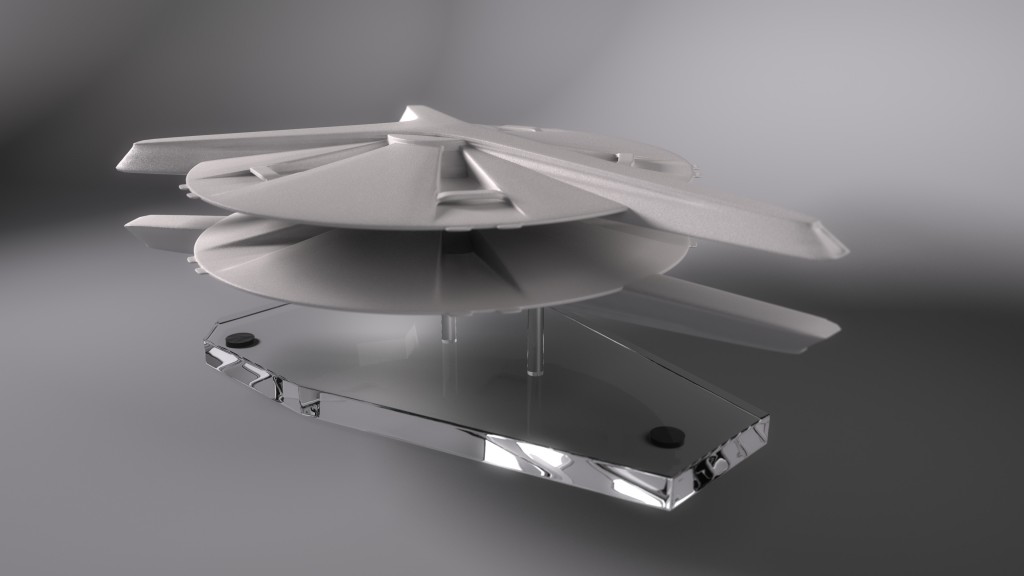
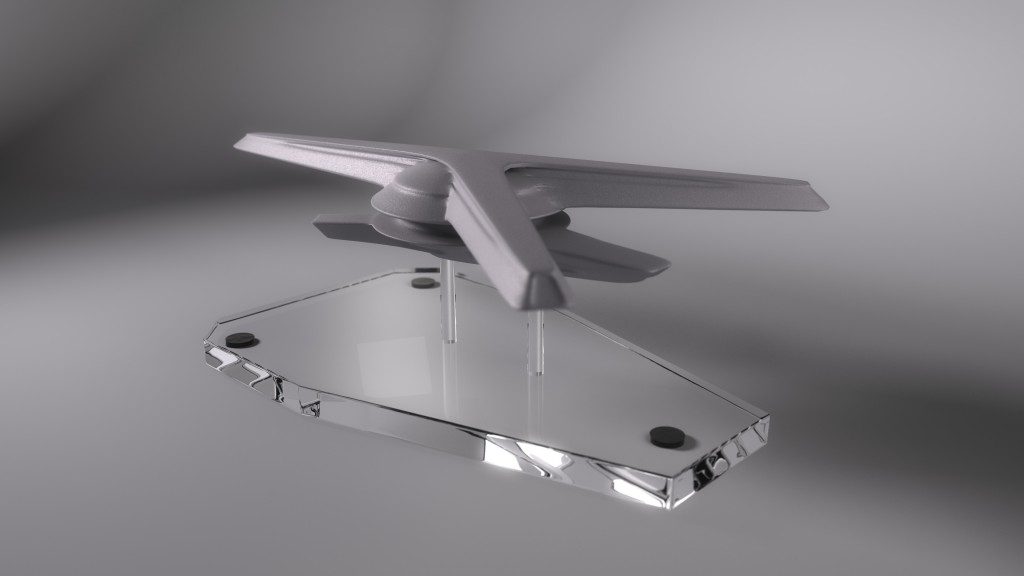
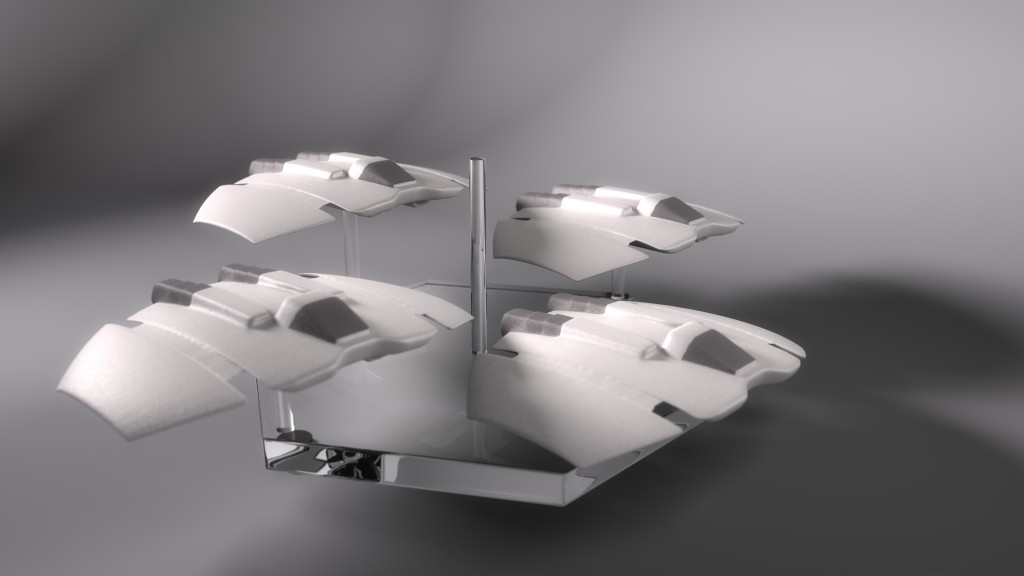
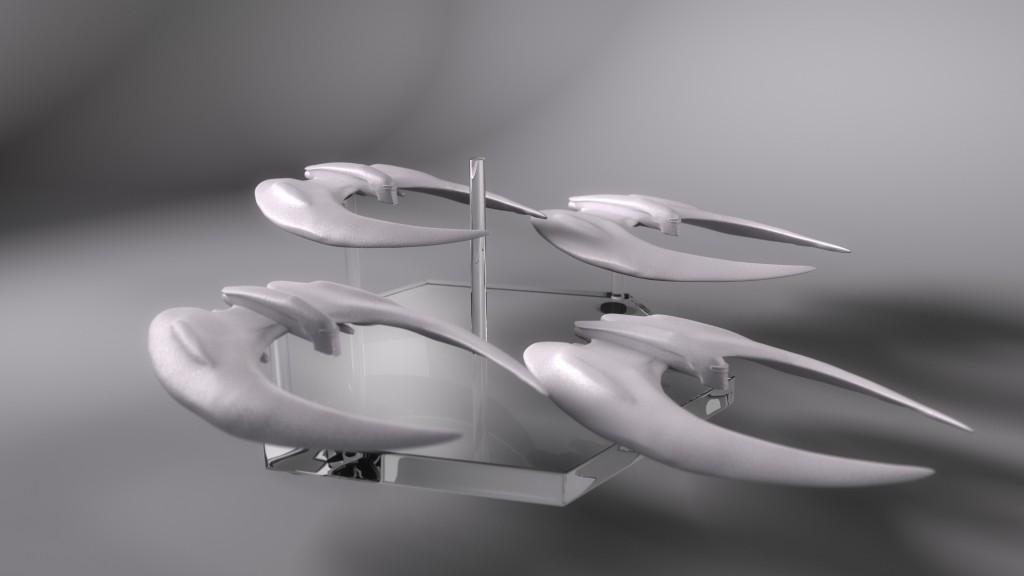
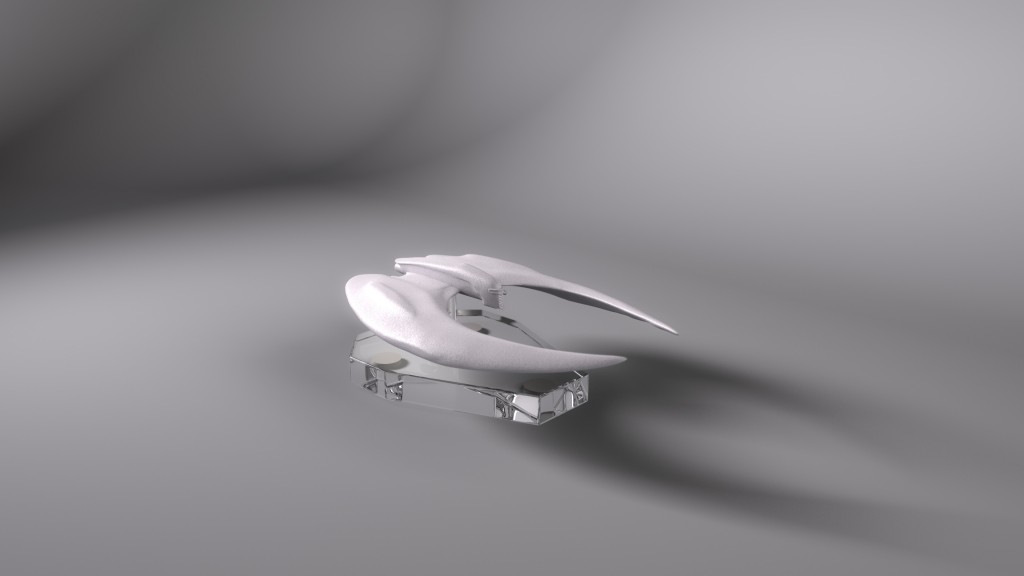
When you ask to join the Diaspora team, there’s an audition process where you’re given a minor assignment in whatever your area is. The original concept for mine was deceptively simple: In several episodes, the Galatica’s “war room” was seen, which had as its centerpiece a large light-table where the crew pushed around little models with sticks to plan attacks, or keep track of battles that were in-progress. The concept was to have a 3D-rendered version of the table and these models, and to show them being pushed around in a cutscene, to replace one of the in-engine briefings for “Shattered Armistice,” the first episodic release of Diaspora.
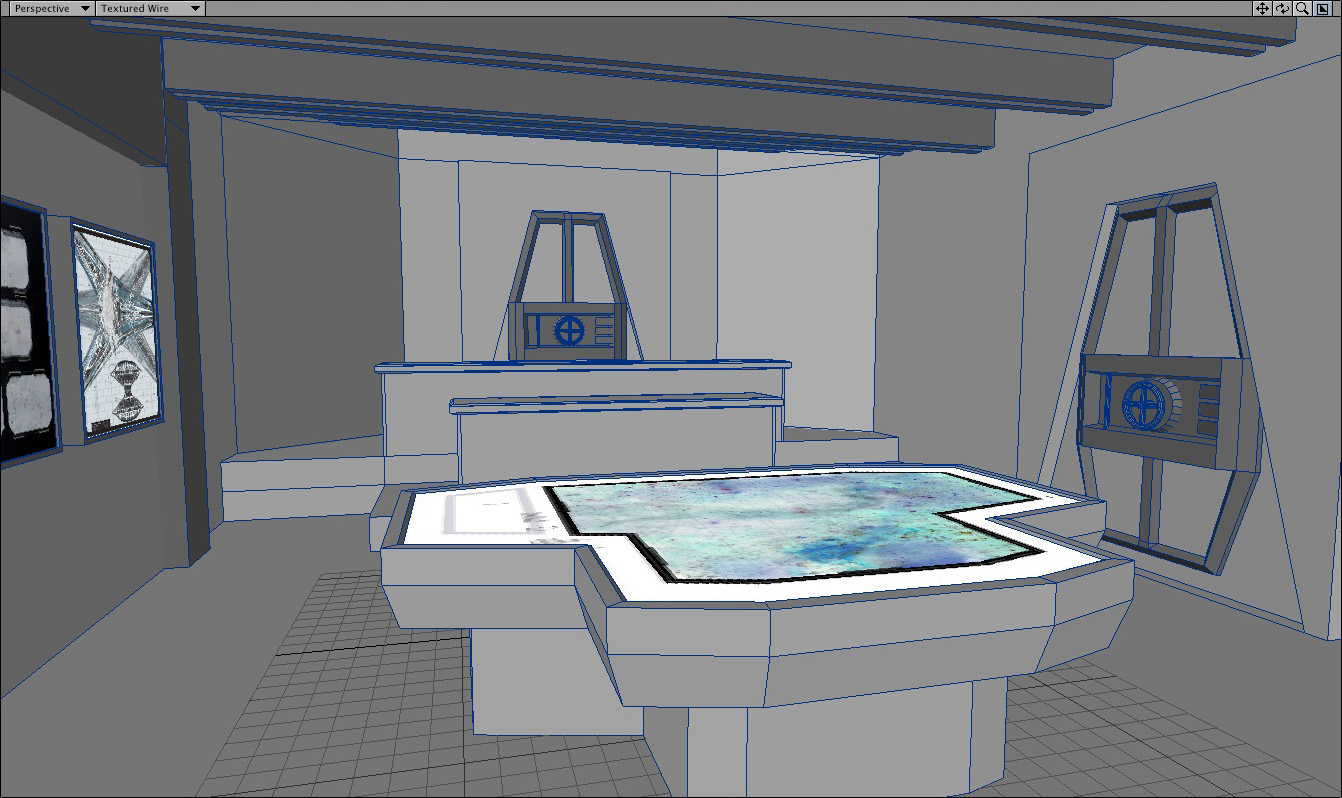
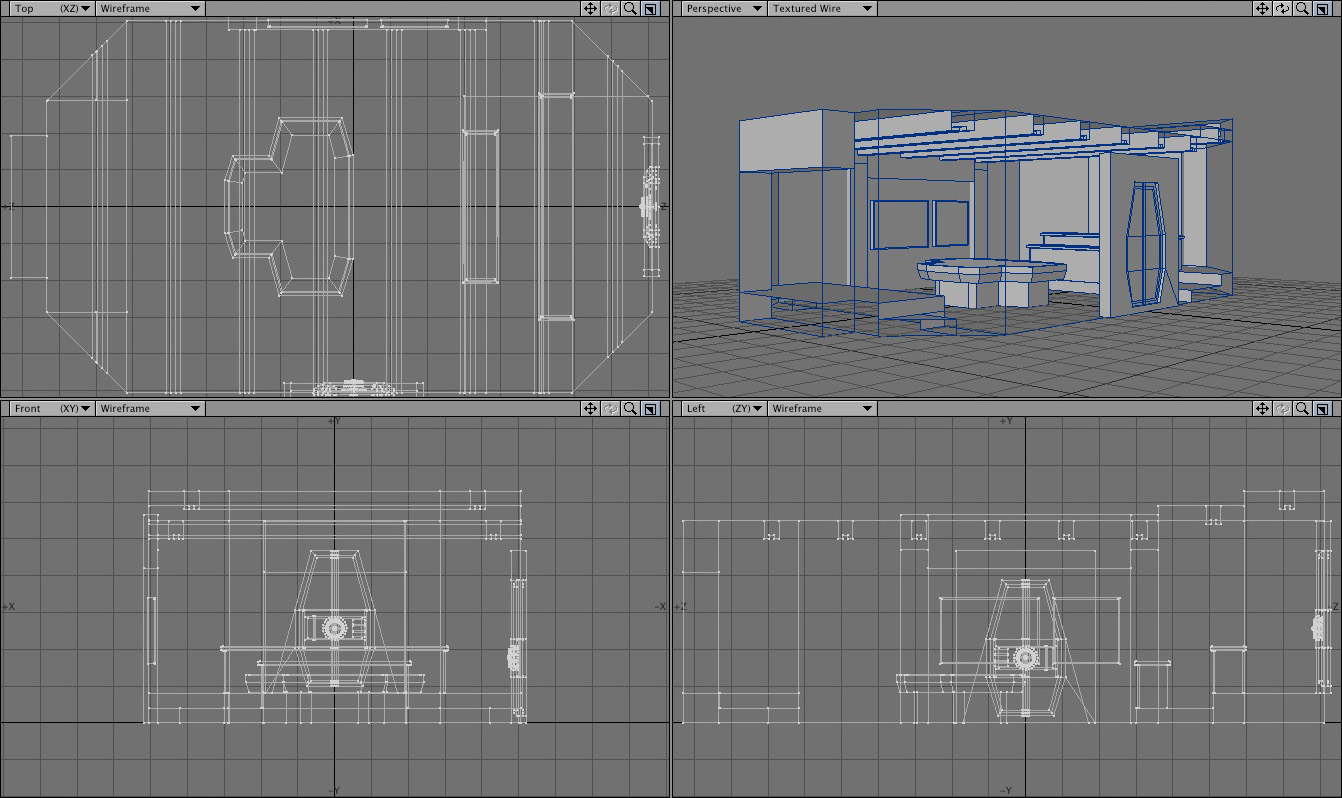
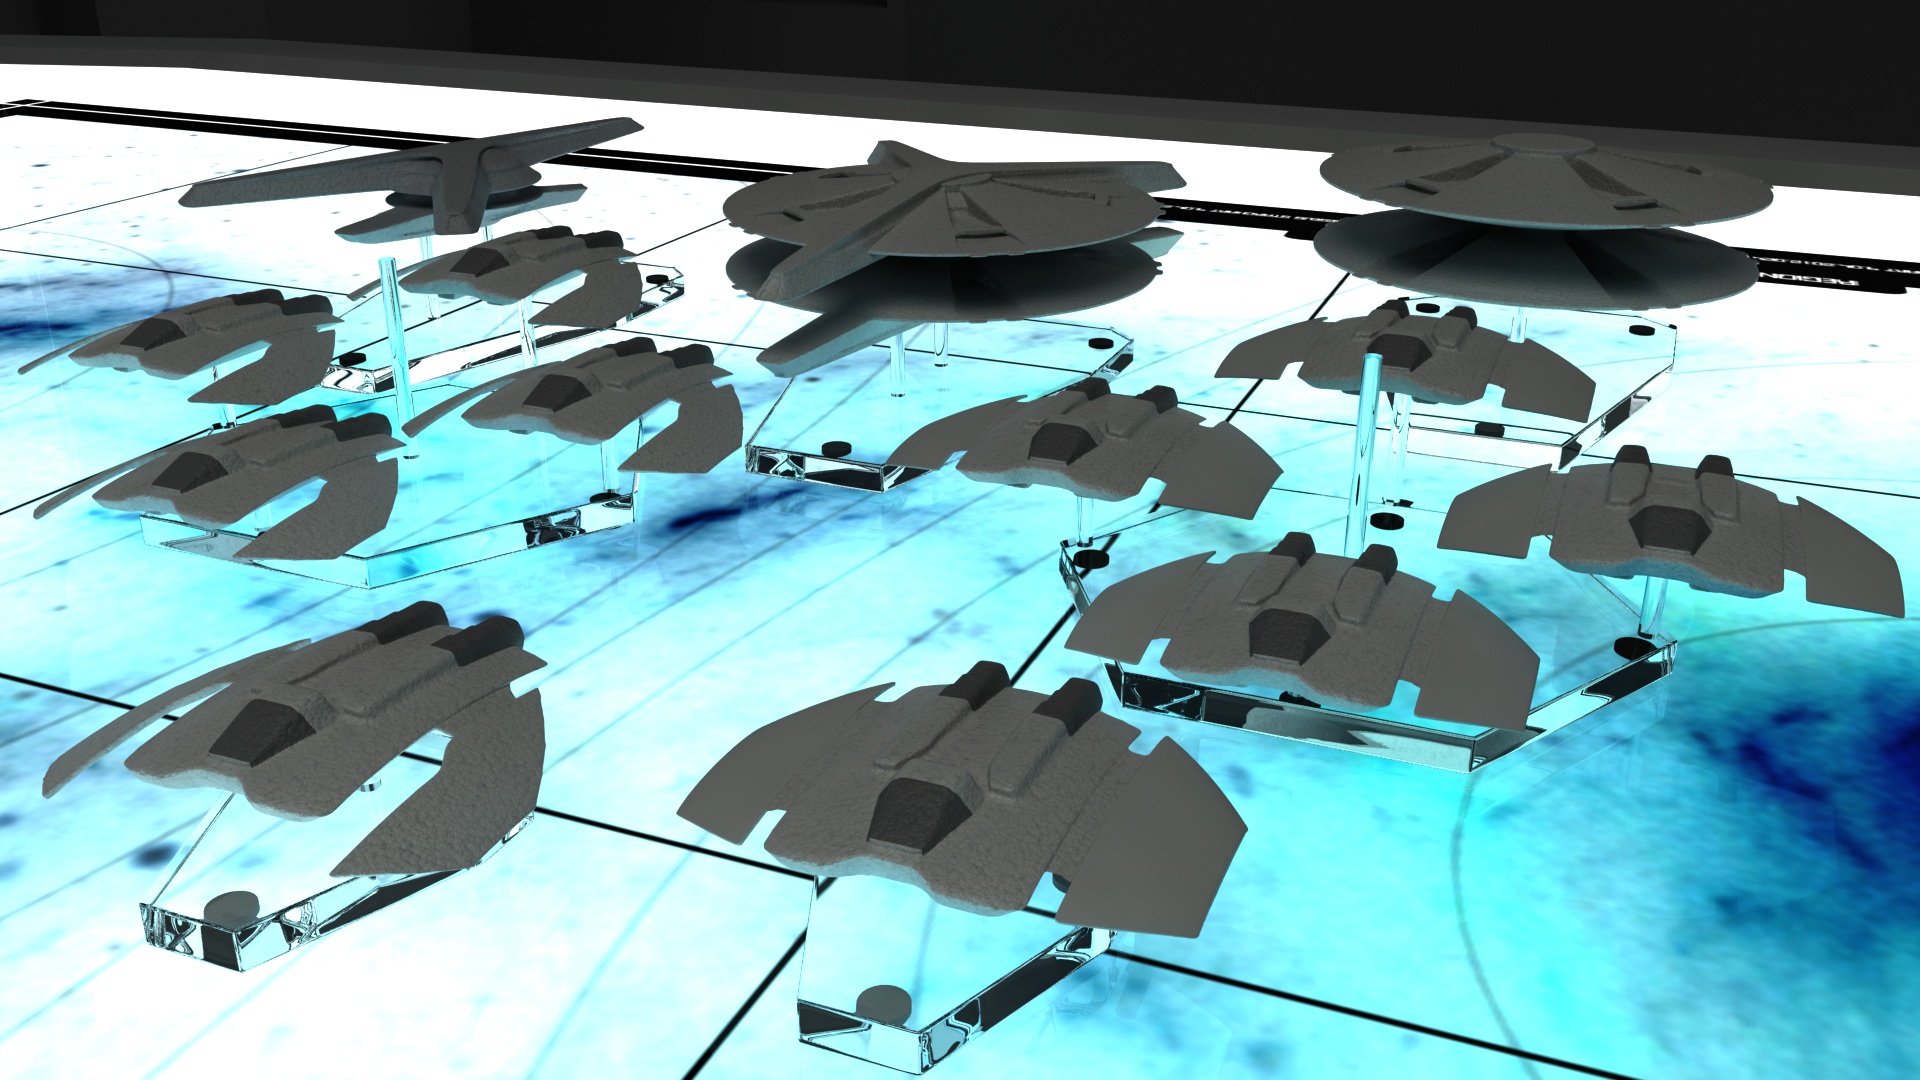
After some modeling and some R&D figuring out what the best conceit was for how to present it, we settled on the idea that a war room strategy session with the CAG, CO, XO, and other important initials which was recorded by a ceiling-mounted camera, and was being played back for the pilots on the briefing room overhead projector.
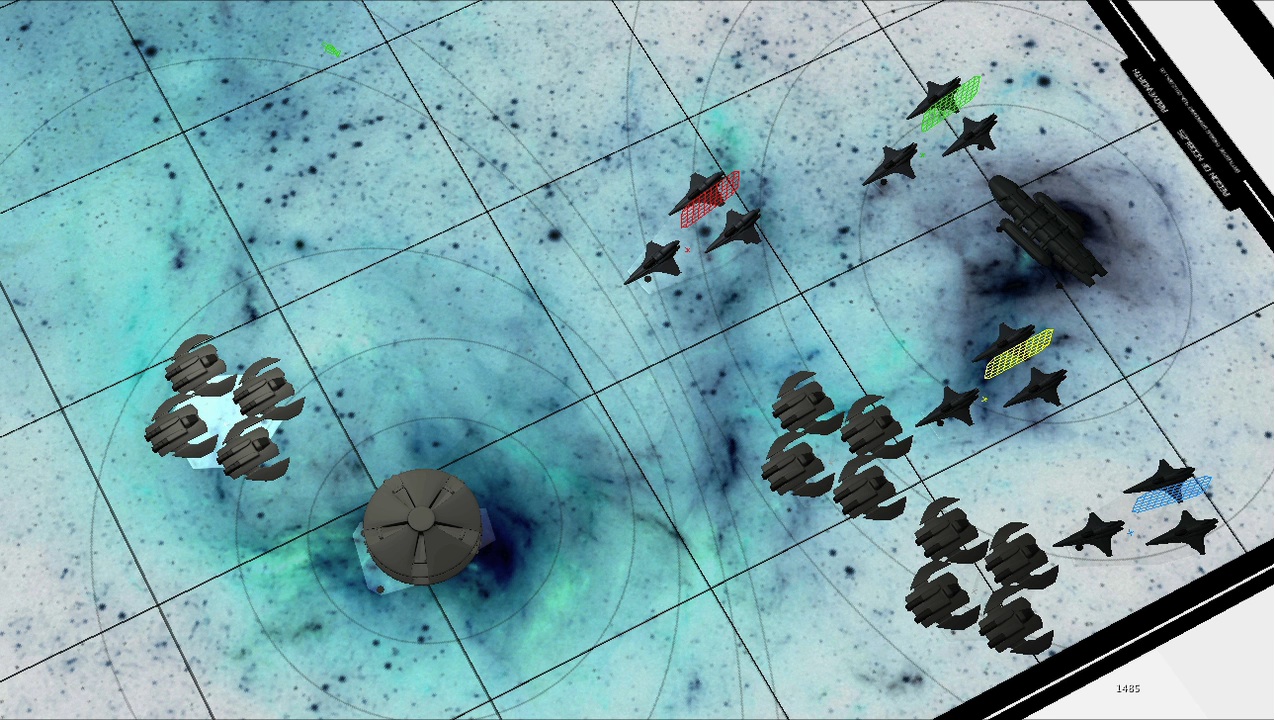
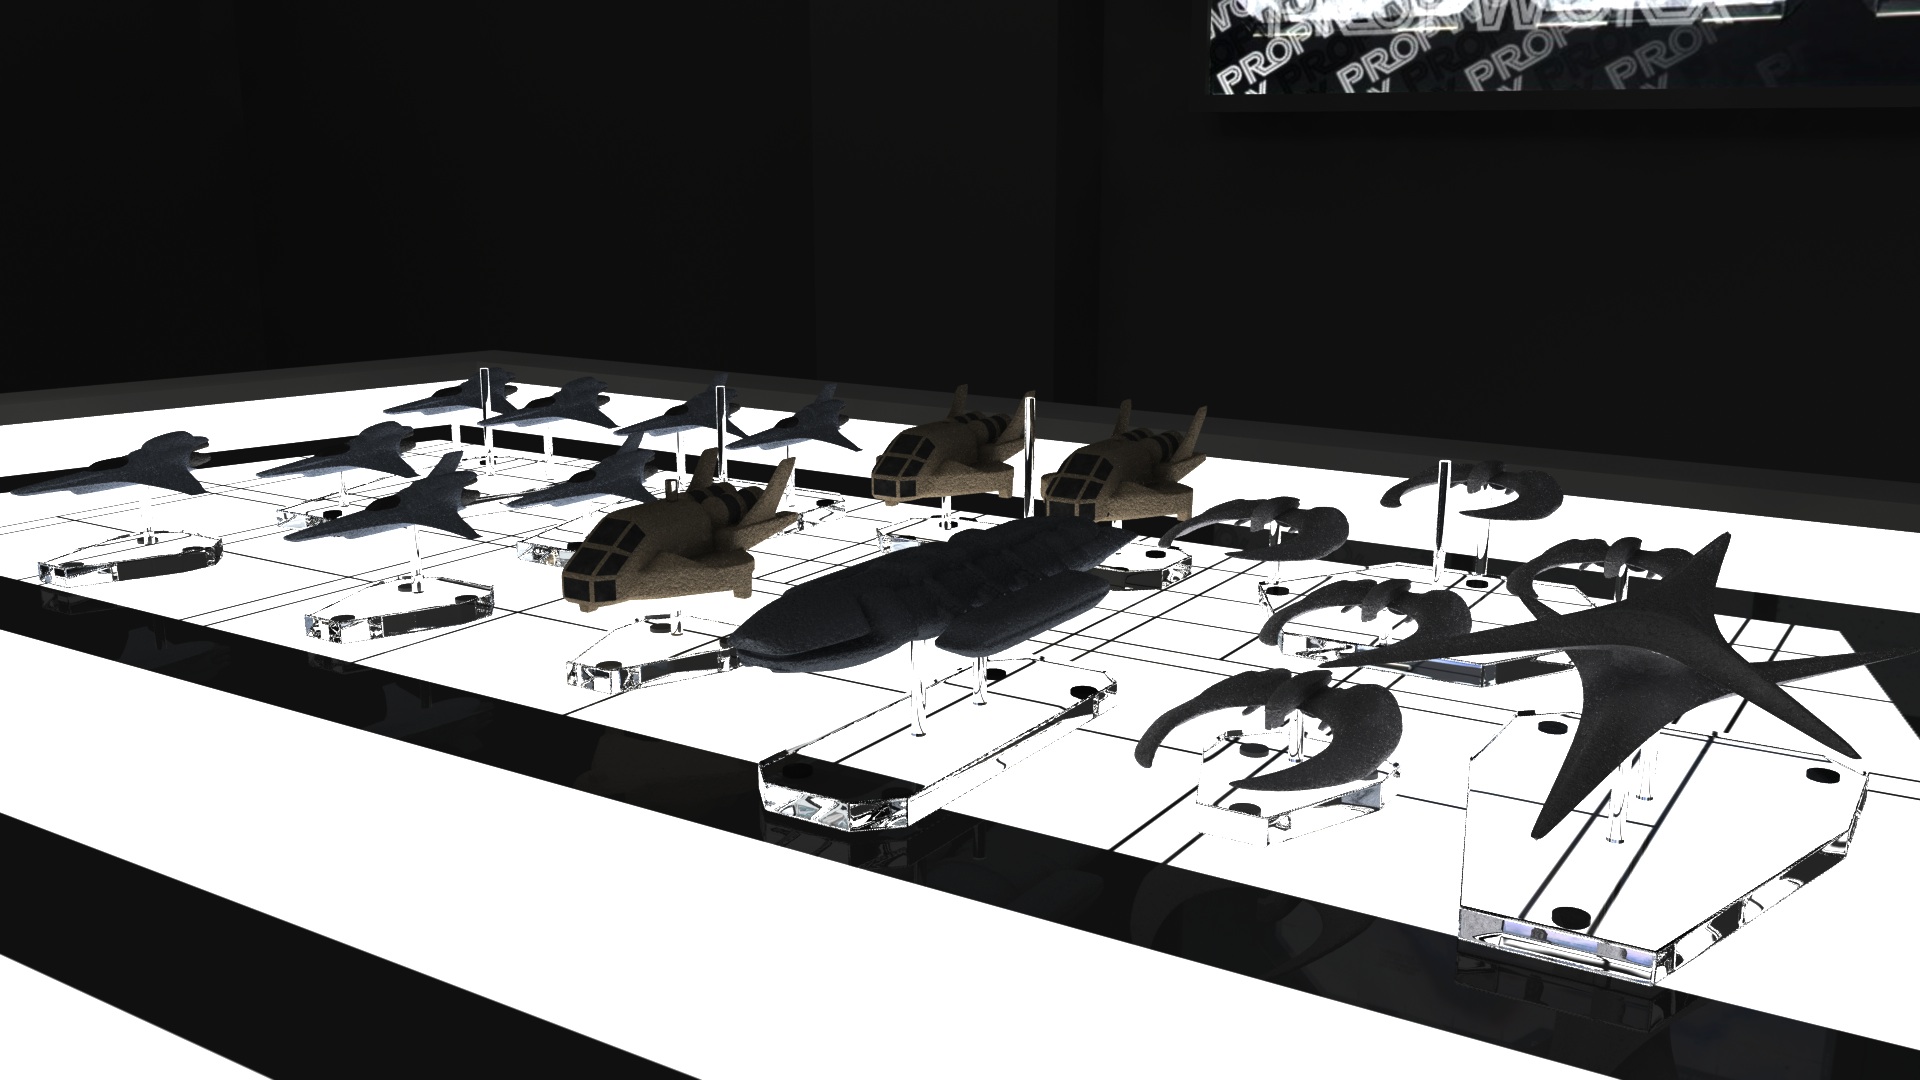
After animating the models being pushed around in time to the existing voiceover, I saw there were a lot of holds and dead air, and there were some concepts I was worried weren’t being communicated, such as the location of the missile batteries to be targeted on the enemy ships, so I experimented with cutting in some “gun-cam photos” of the Cylon basestars, and an engineering status screen. These were a hit with the team, so I continued in that vein, using the tabletop models in a supporting role as one visual aid among many.
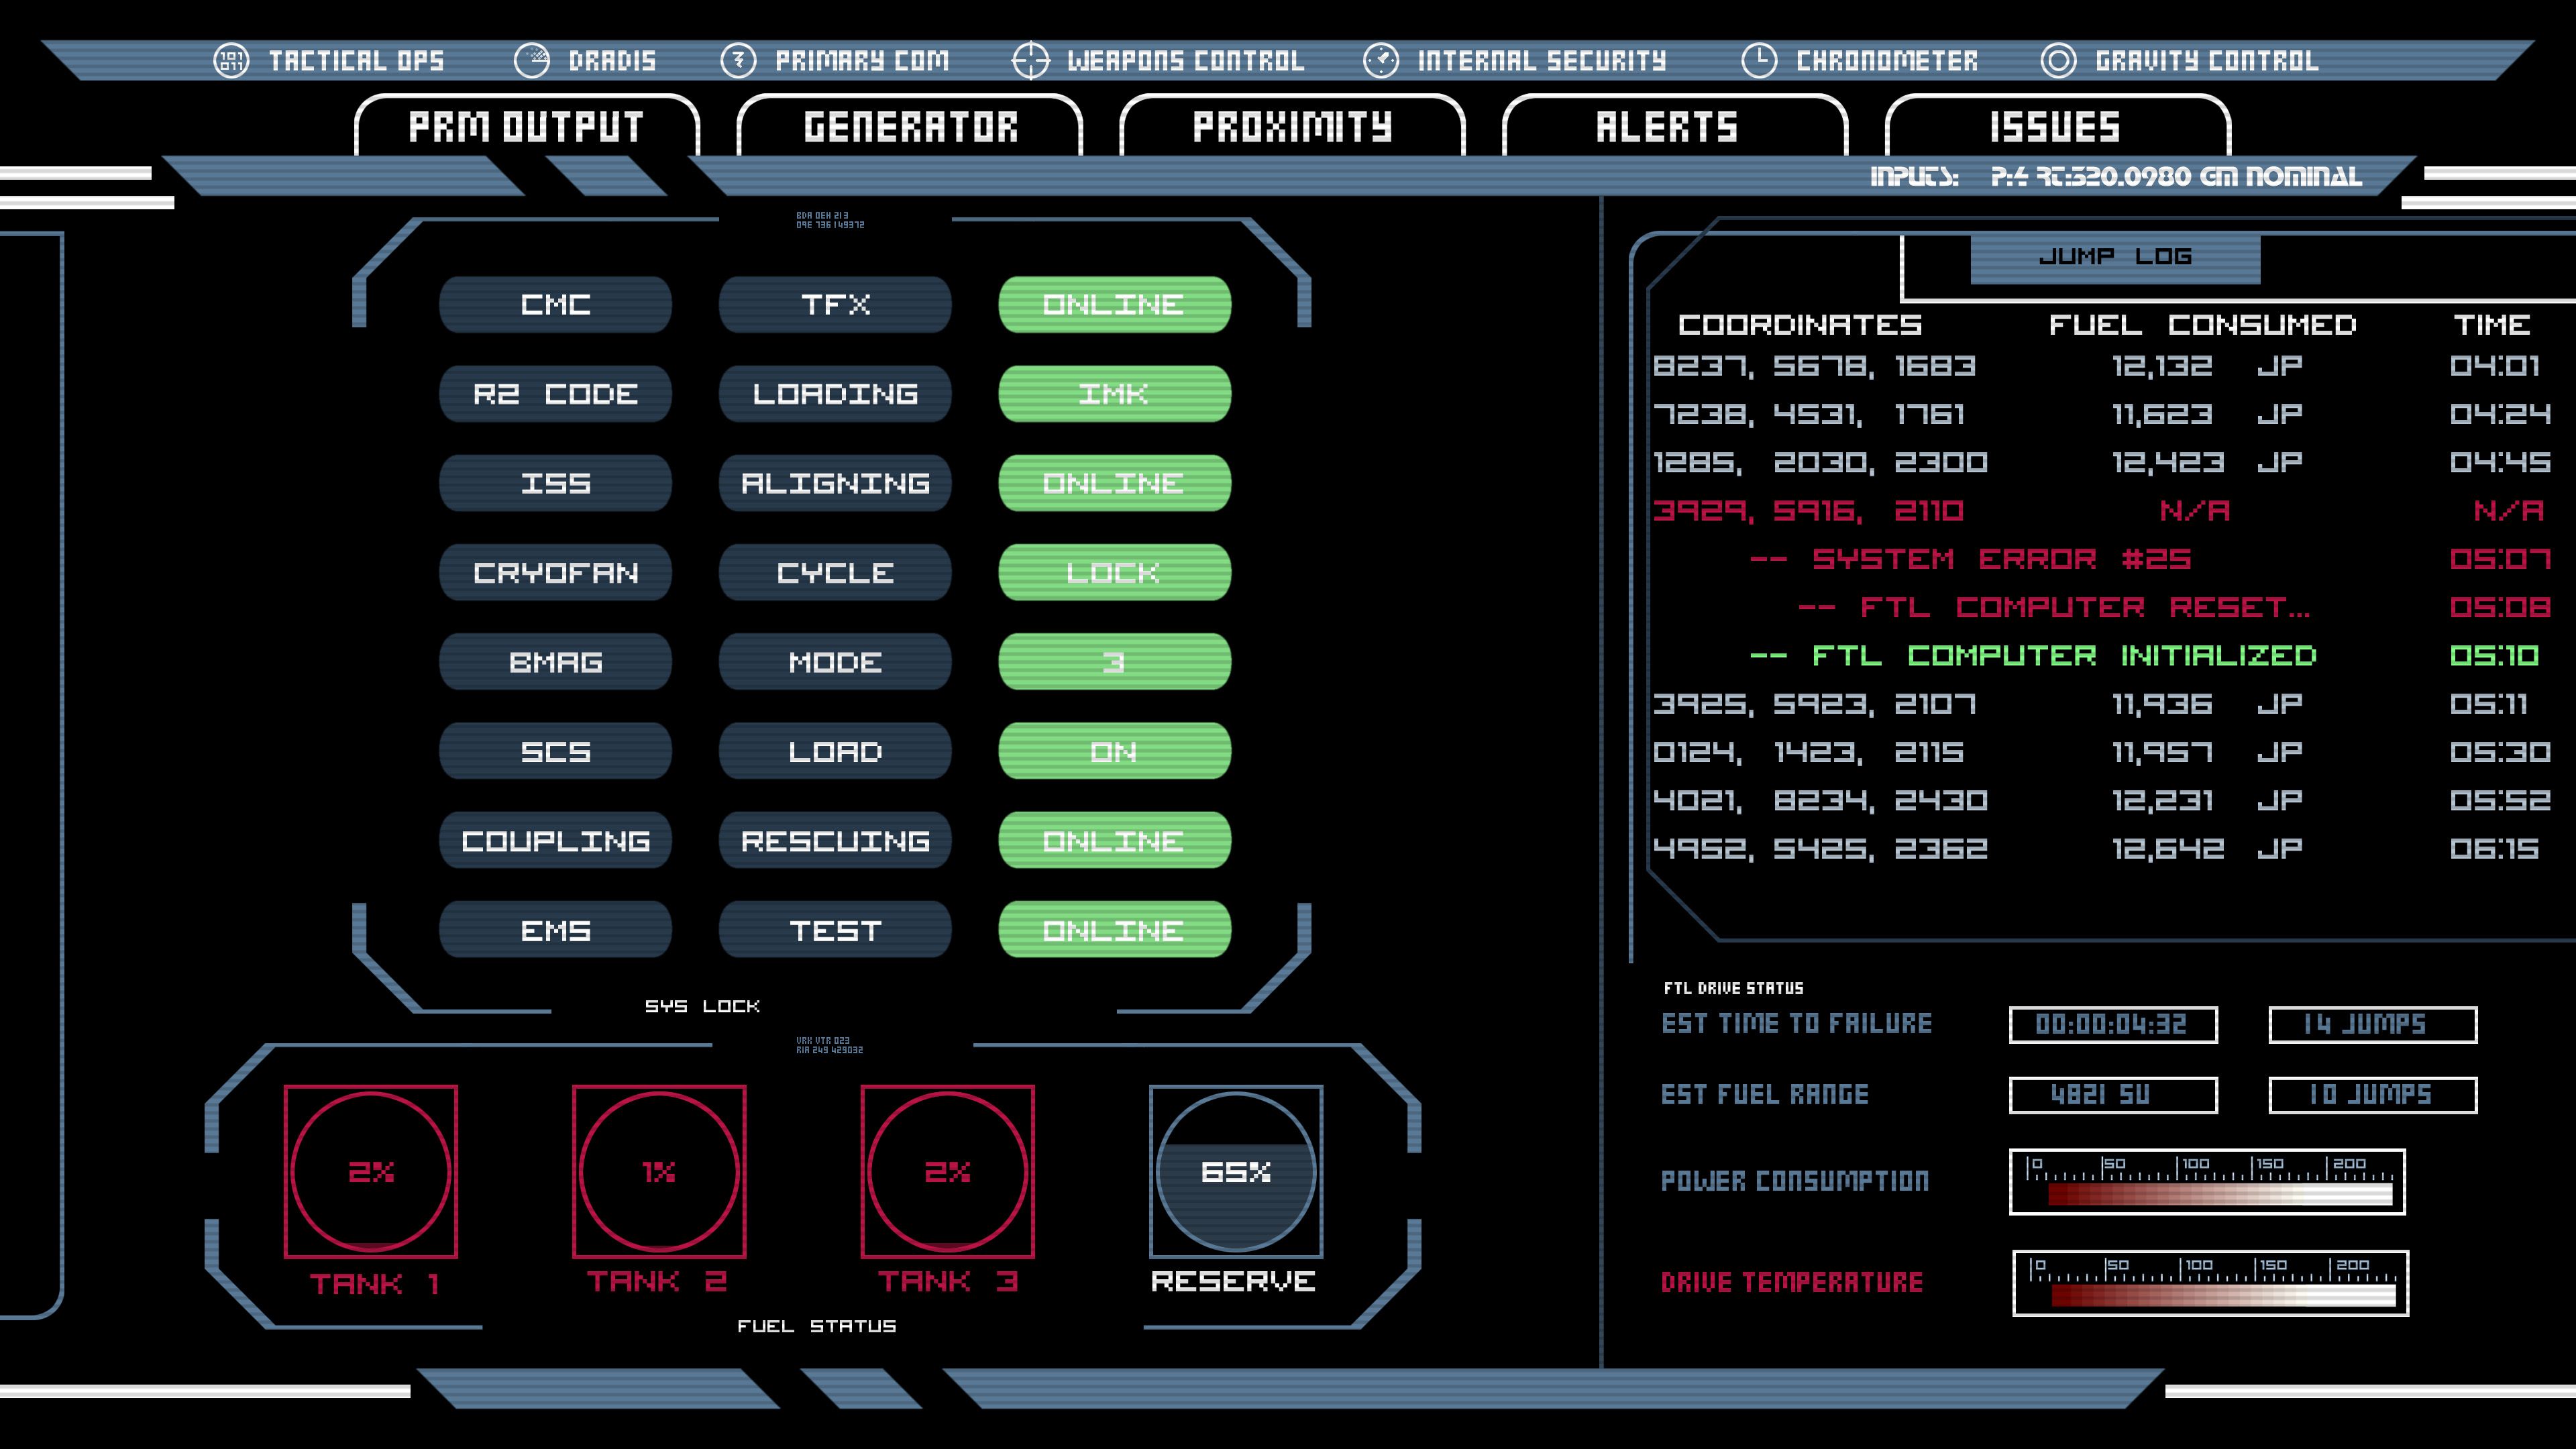
Once I had a completed cut of the briefing, I was officially inducted, which consisted mostly of me getting a little icon on the Diaspora forums implying I know what I’m talking about. Lacking anything else to do, and realizing that it’d be kind of weird to have just one cutscene briefing, I started replacing all the single-player mission briefings for “Shattered Armistice.” Since there was only one mission with a degree of planning or strategic complexity that justifies the use of the war room, I created DRADIS readouts, starcharts, comm-screens, countdown clocks, and whatever else I could think of that the CAG might slap together into a futuristic PowerPoint show for her briefings. I even redid the engineering readout for the first briefing I did, after I’d built up a library of BSG-style computer graphics. And let me give a shoutout to Matt Haley, who recreated the DRADIS screen in Adobe Illustrator and graciously allowed me to use it and build on it in these cutscenes.
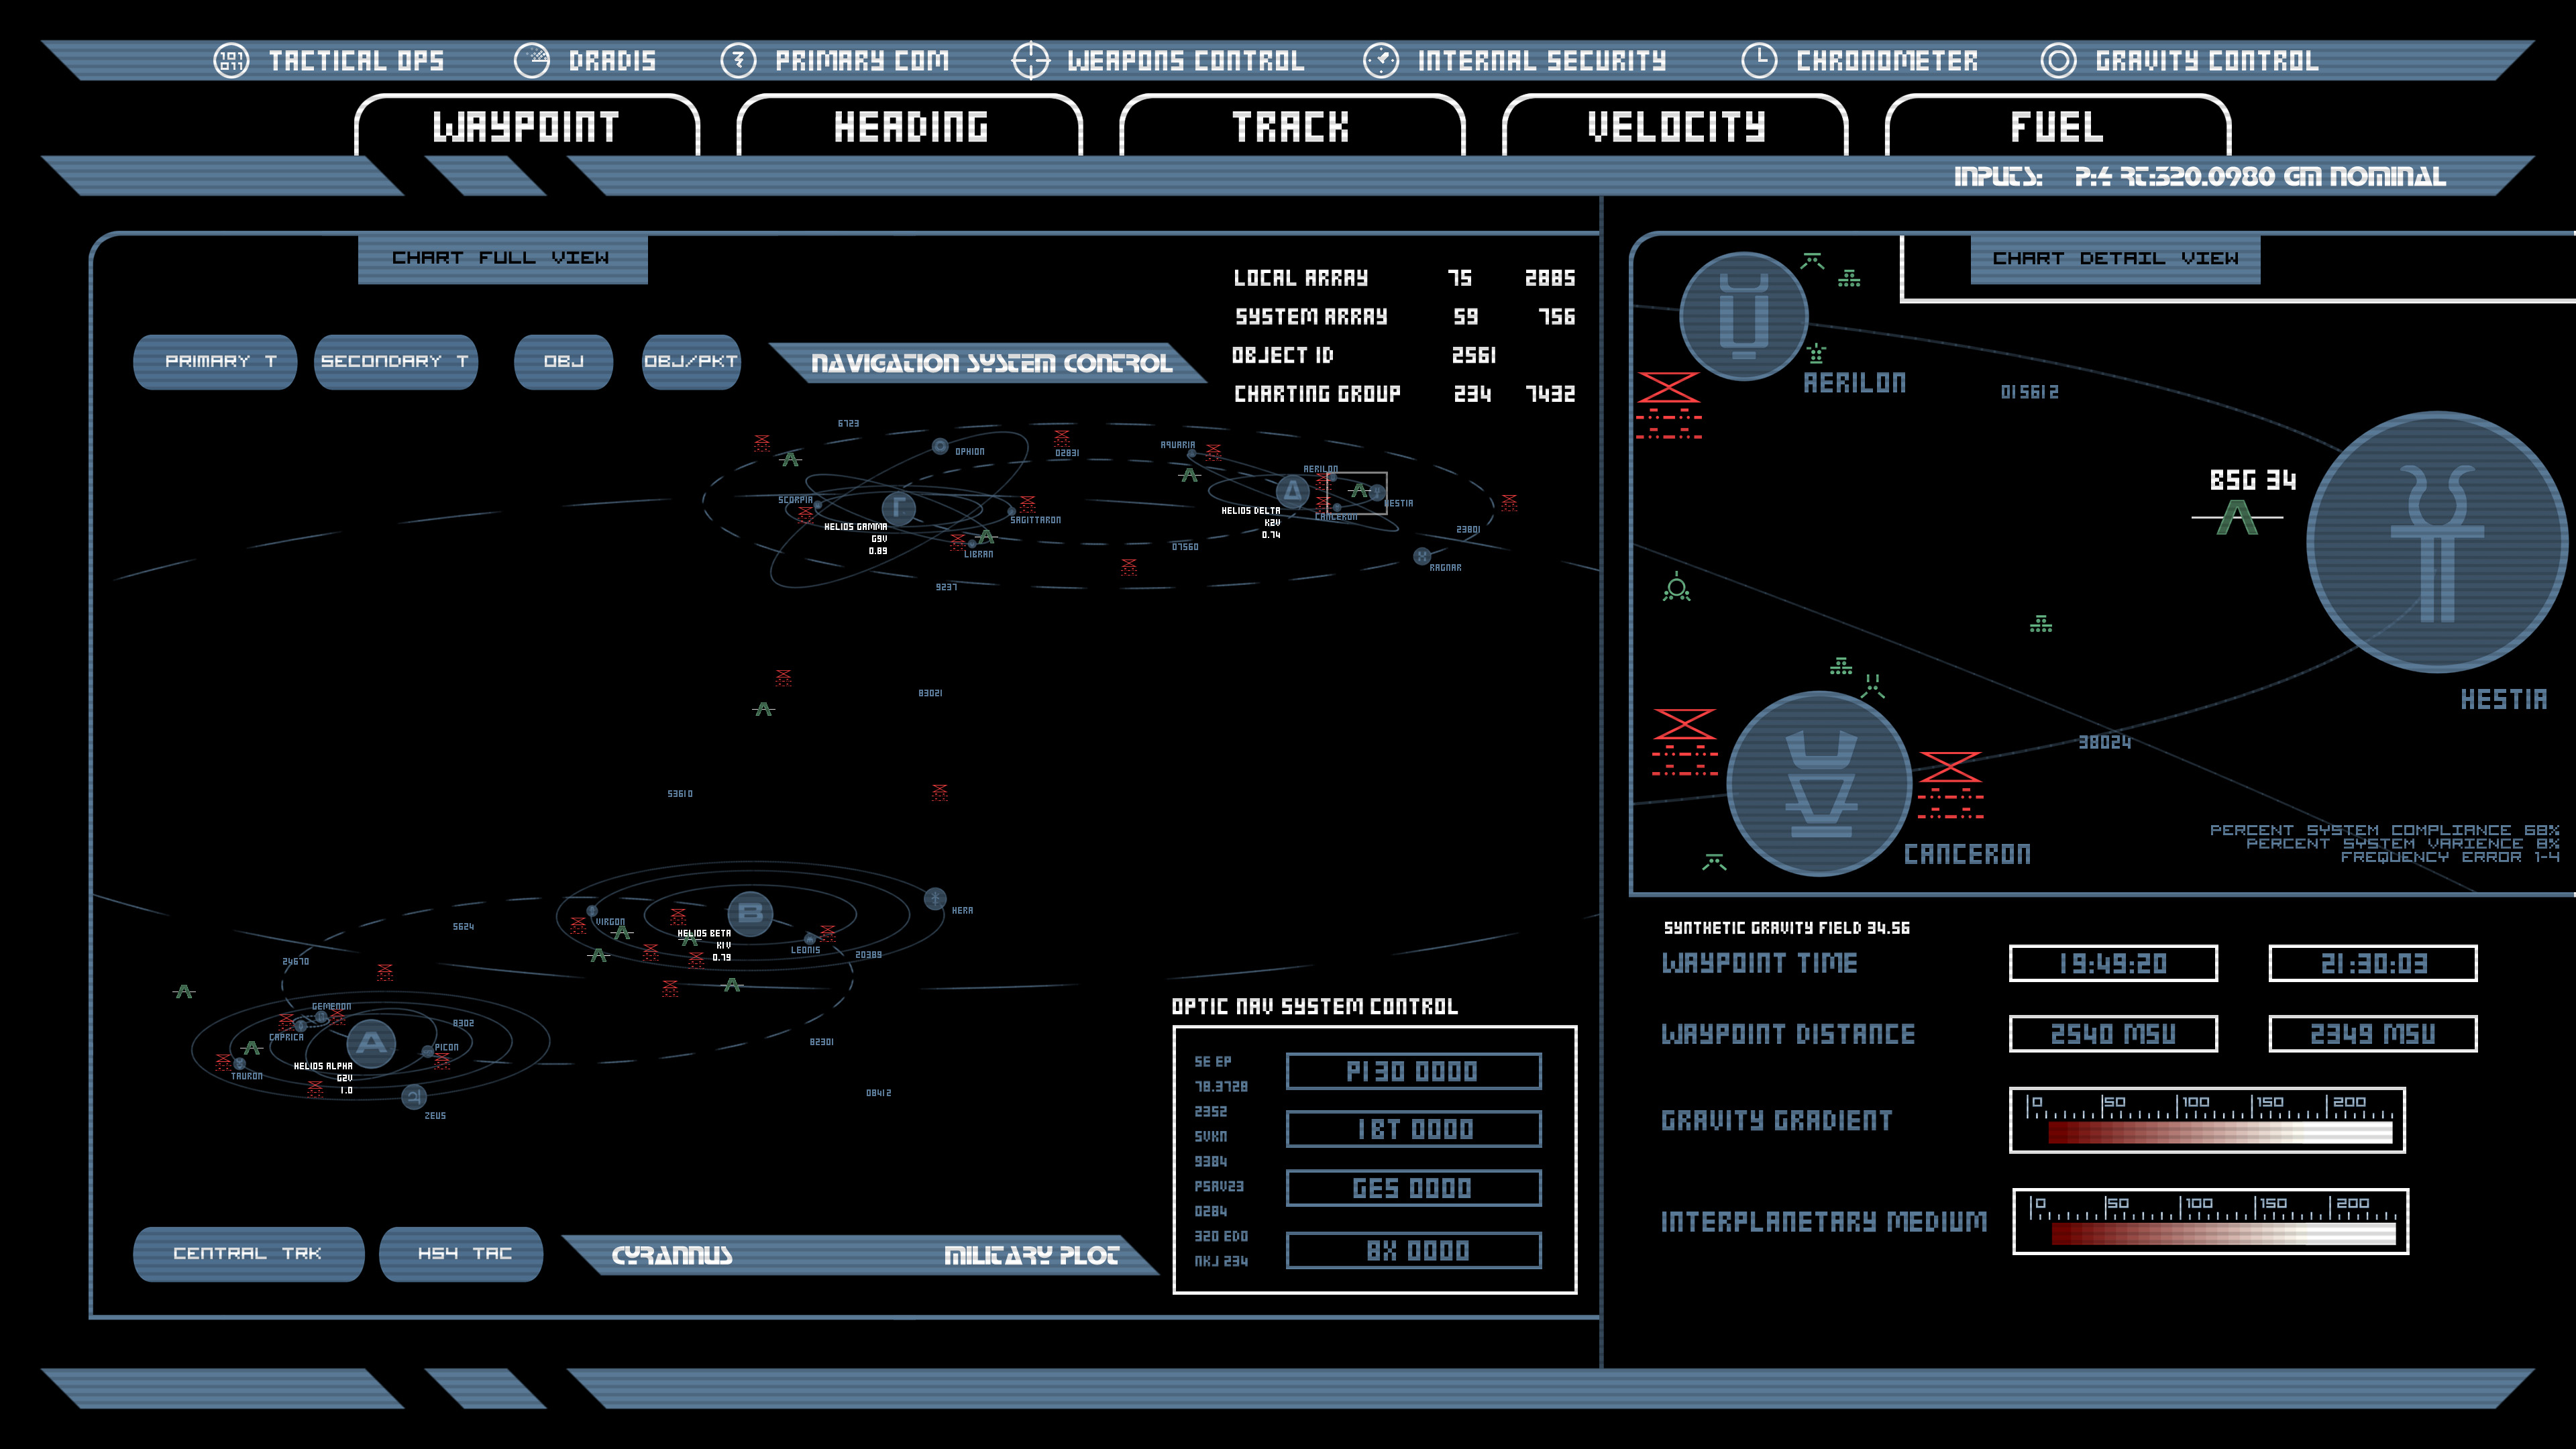
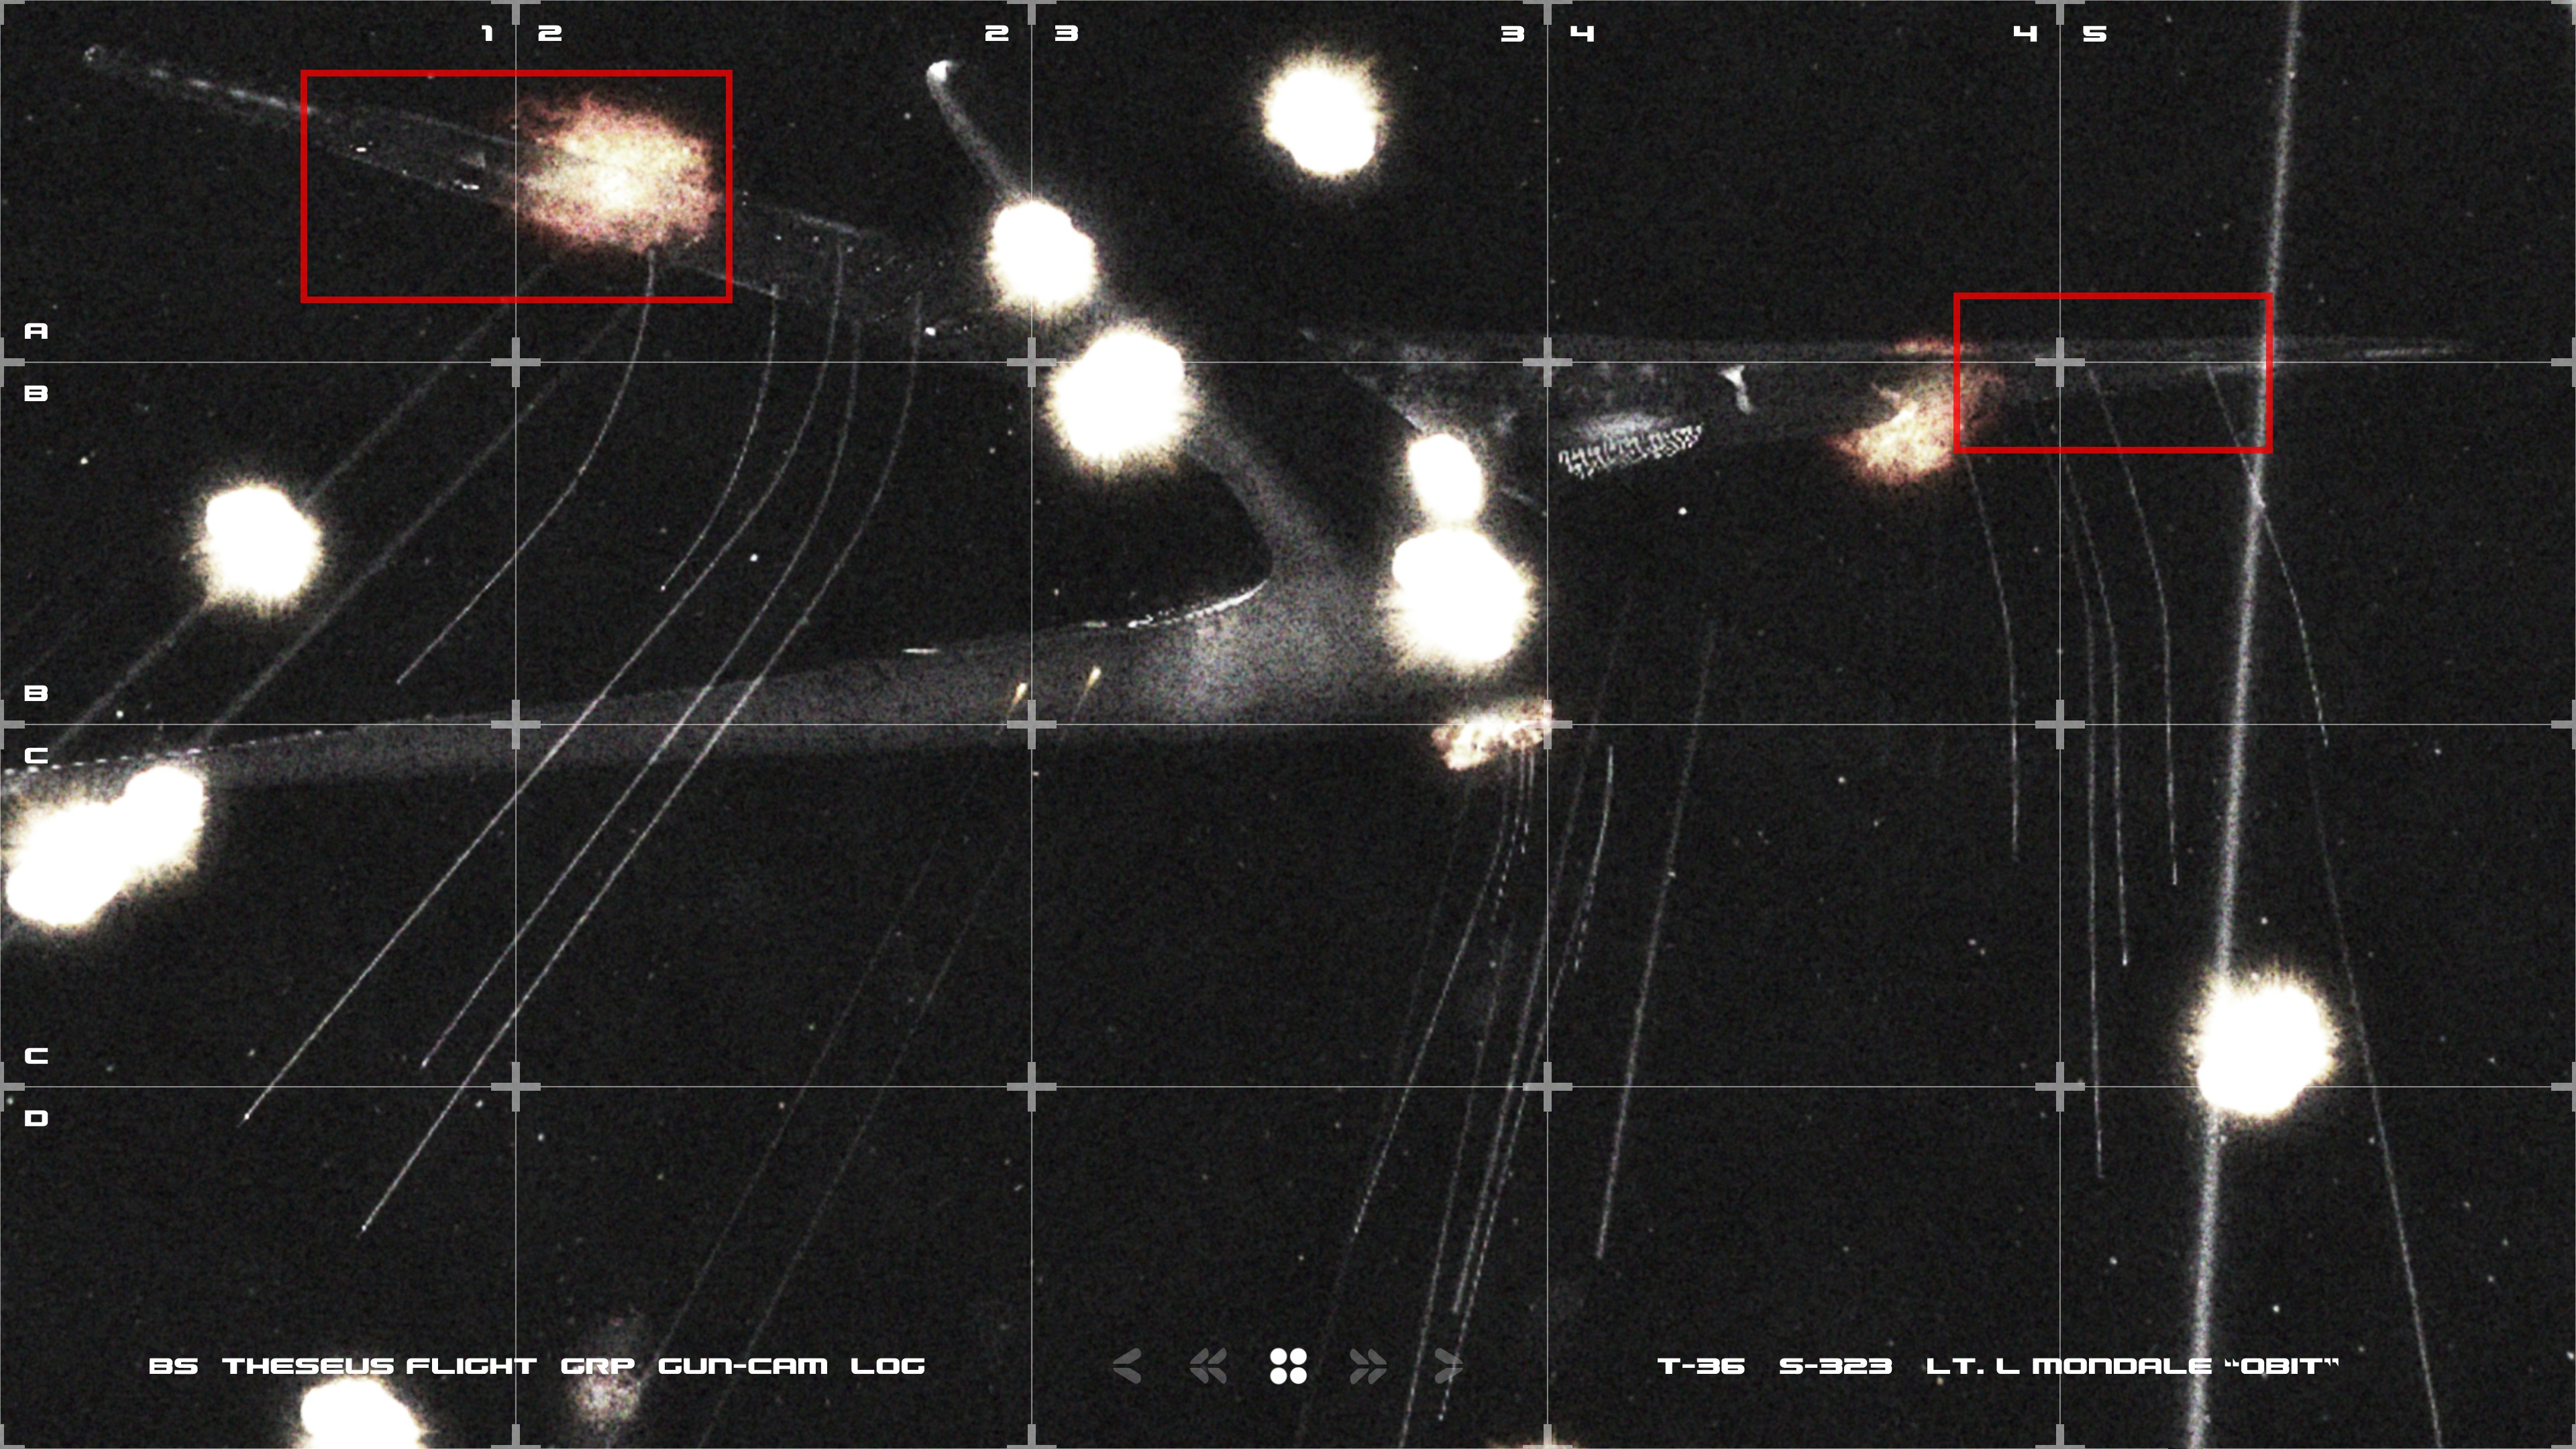
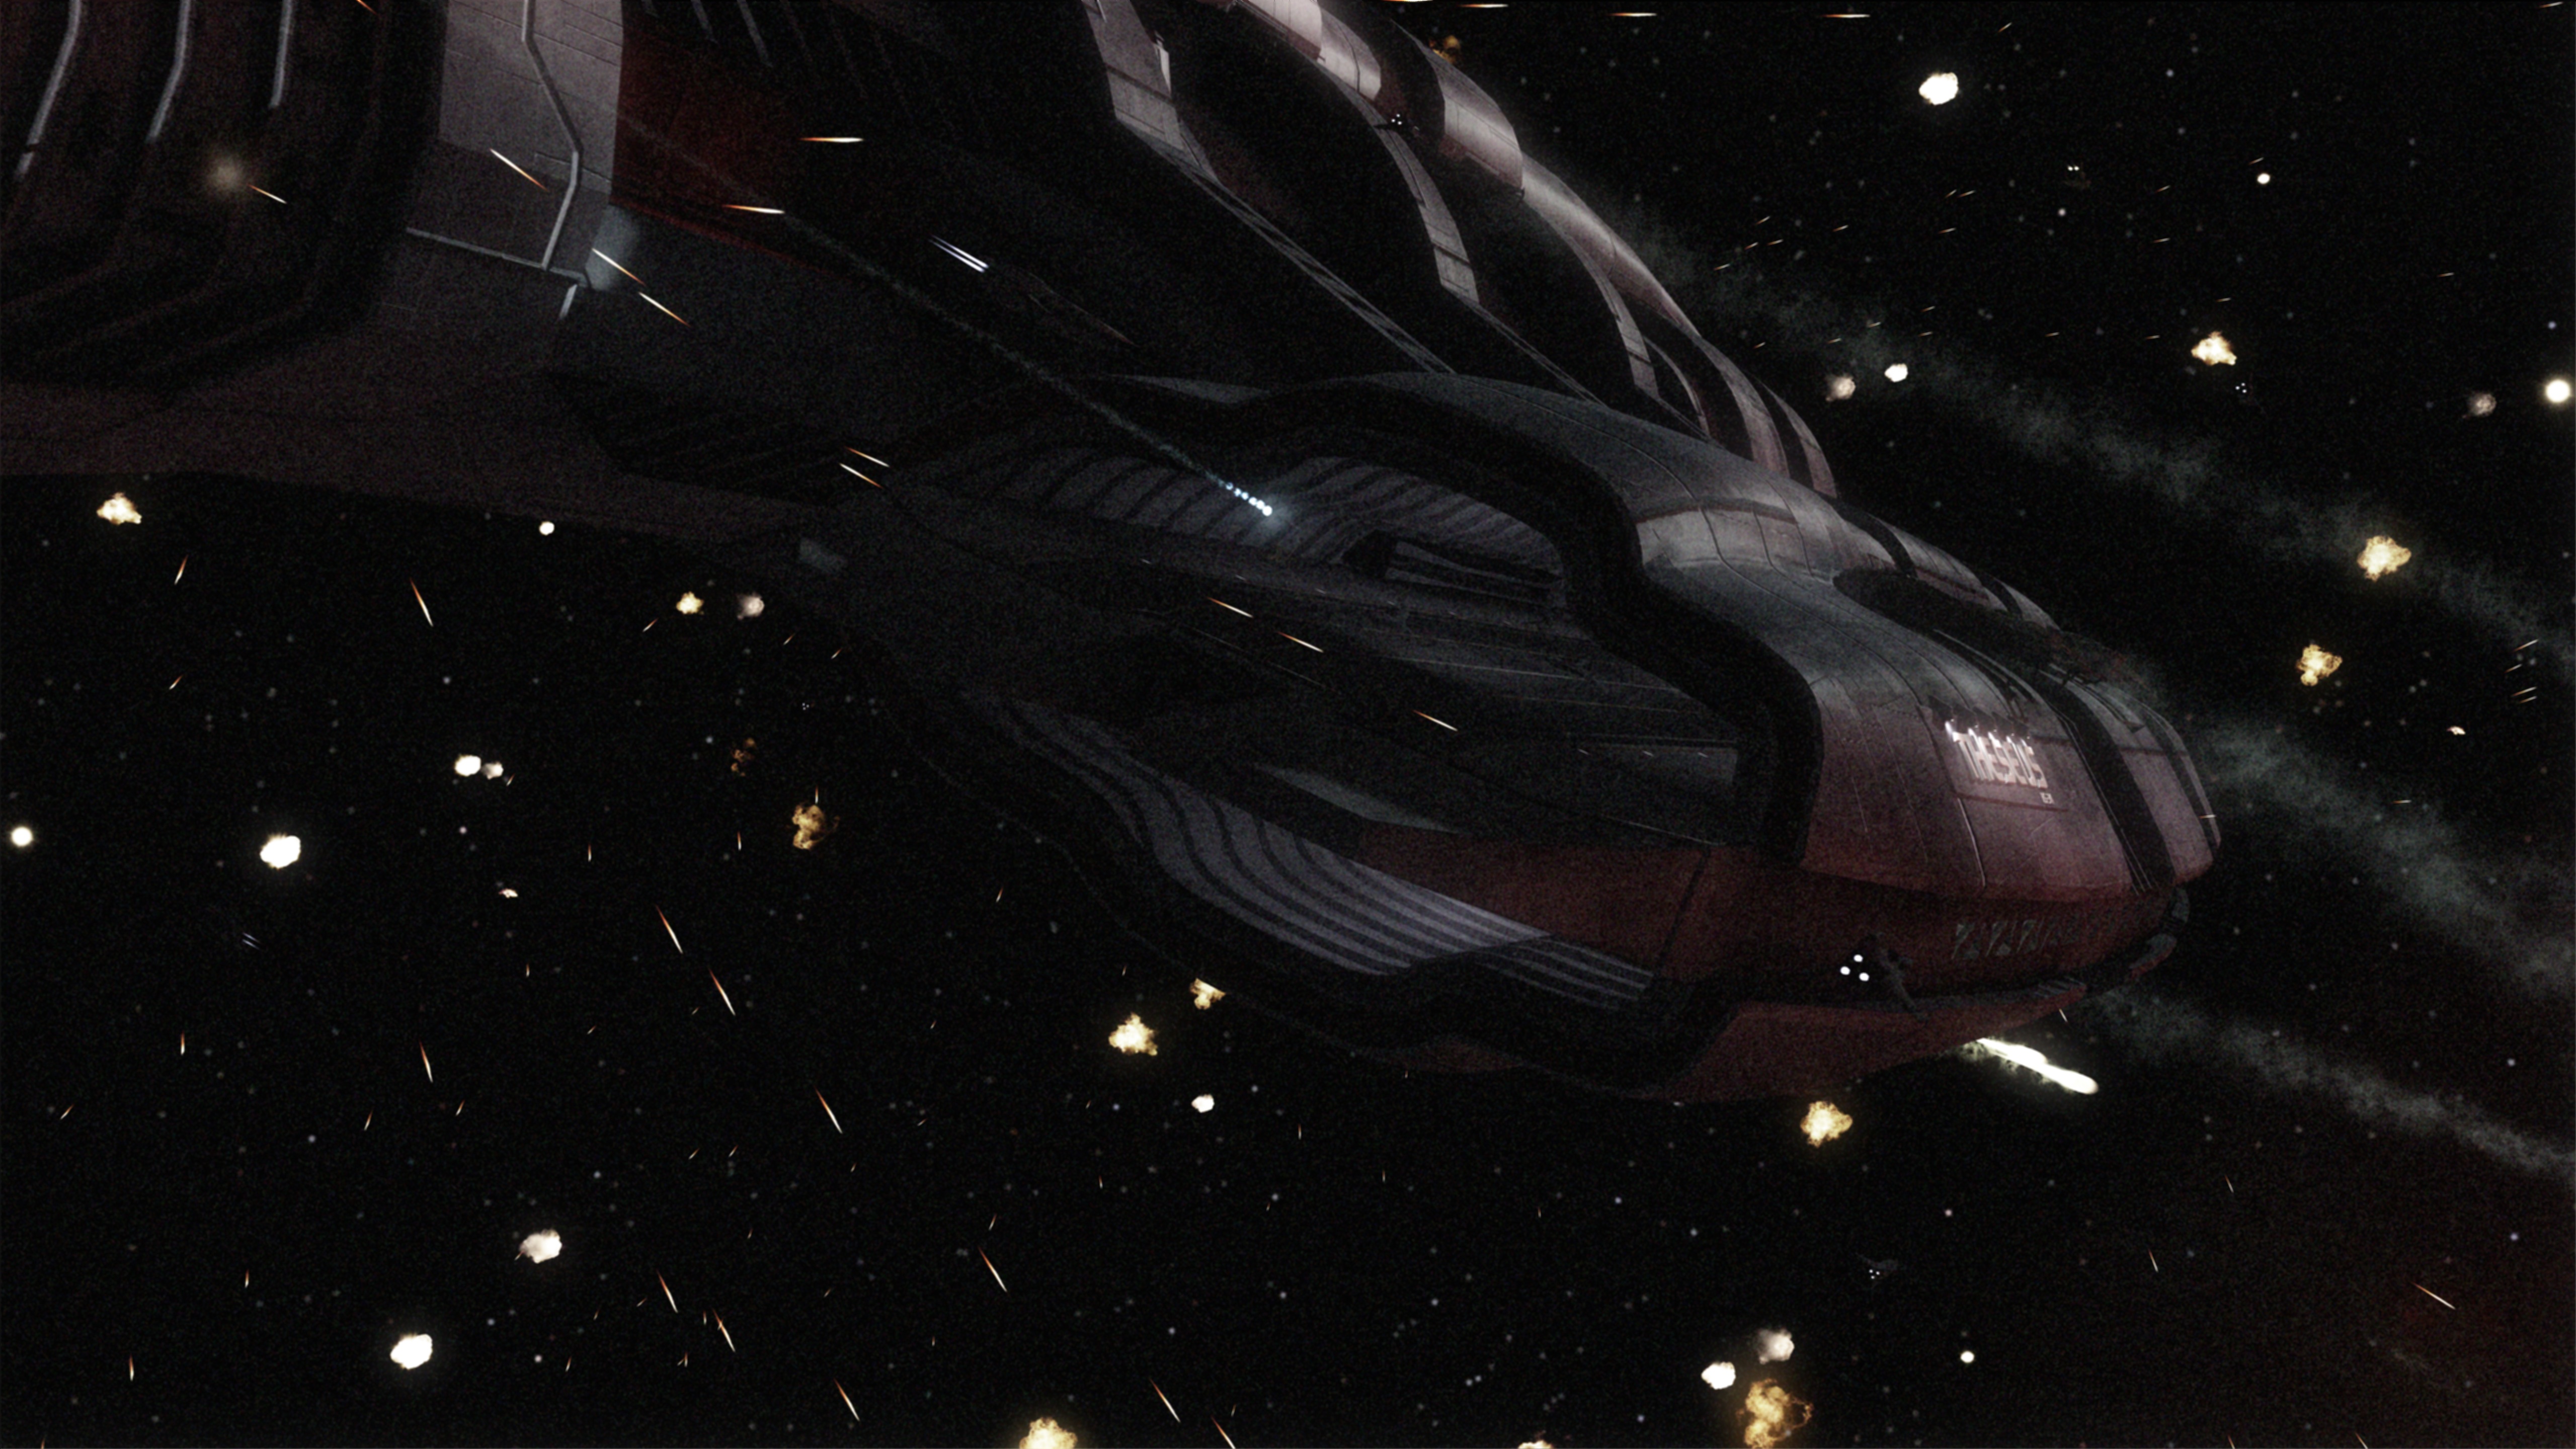
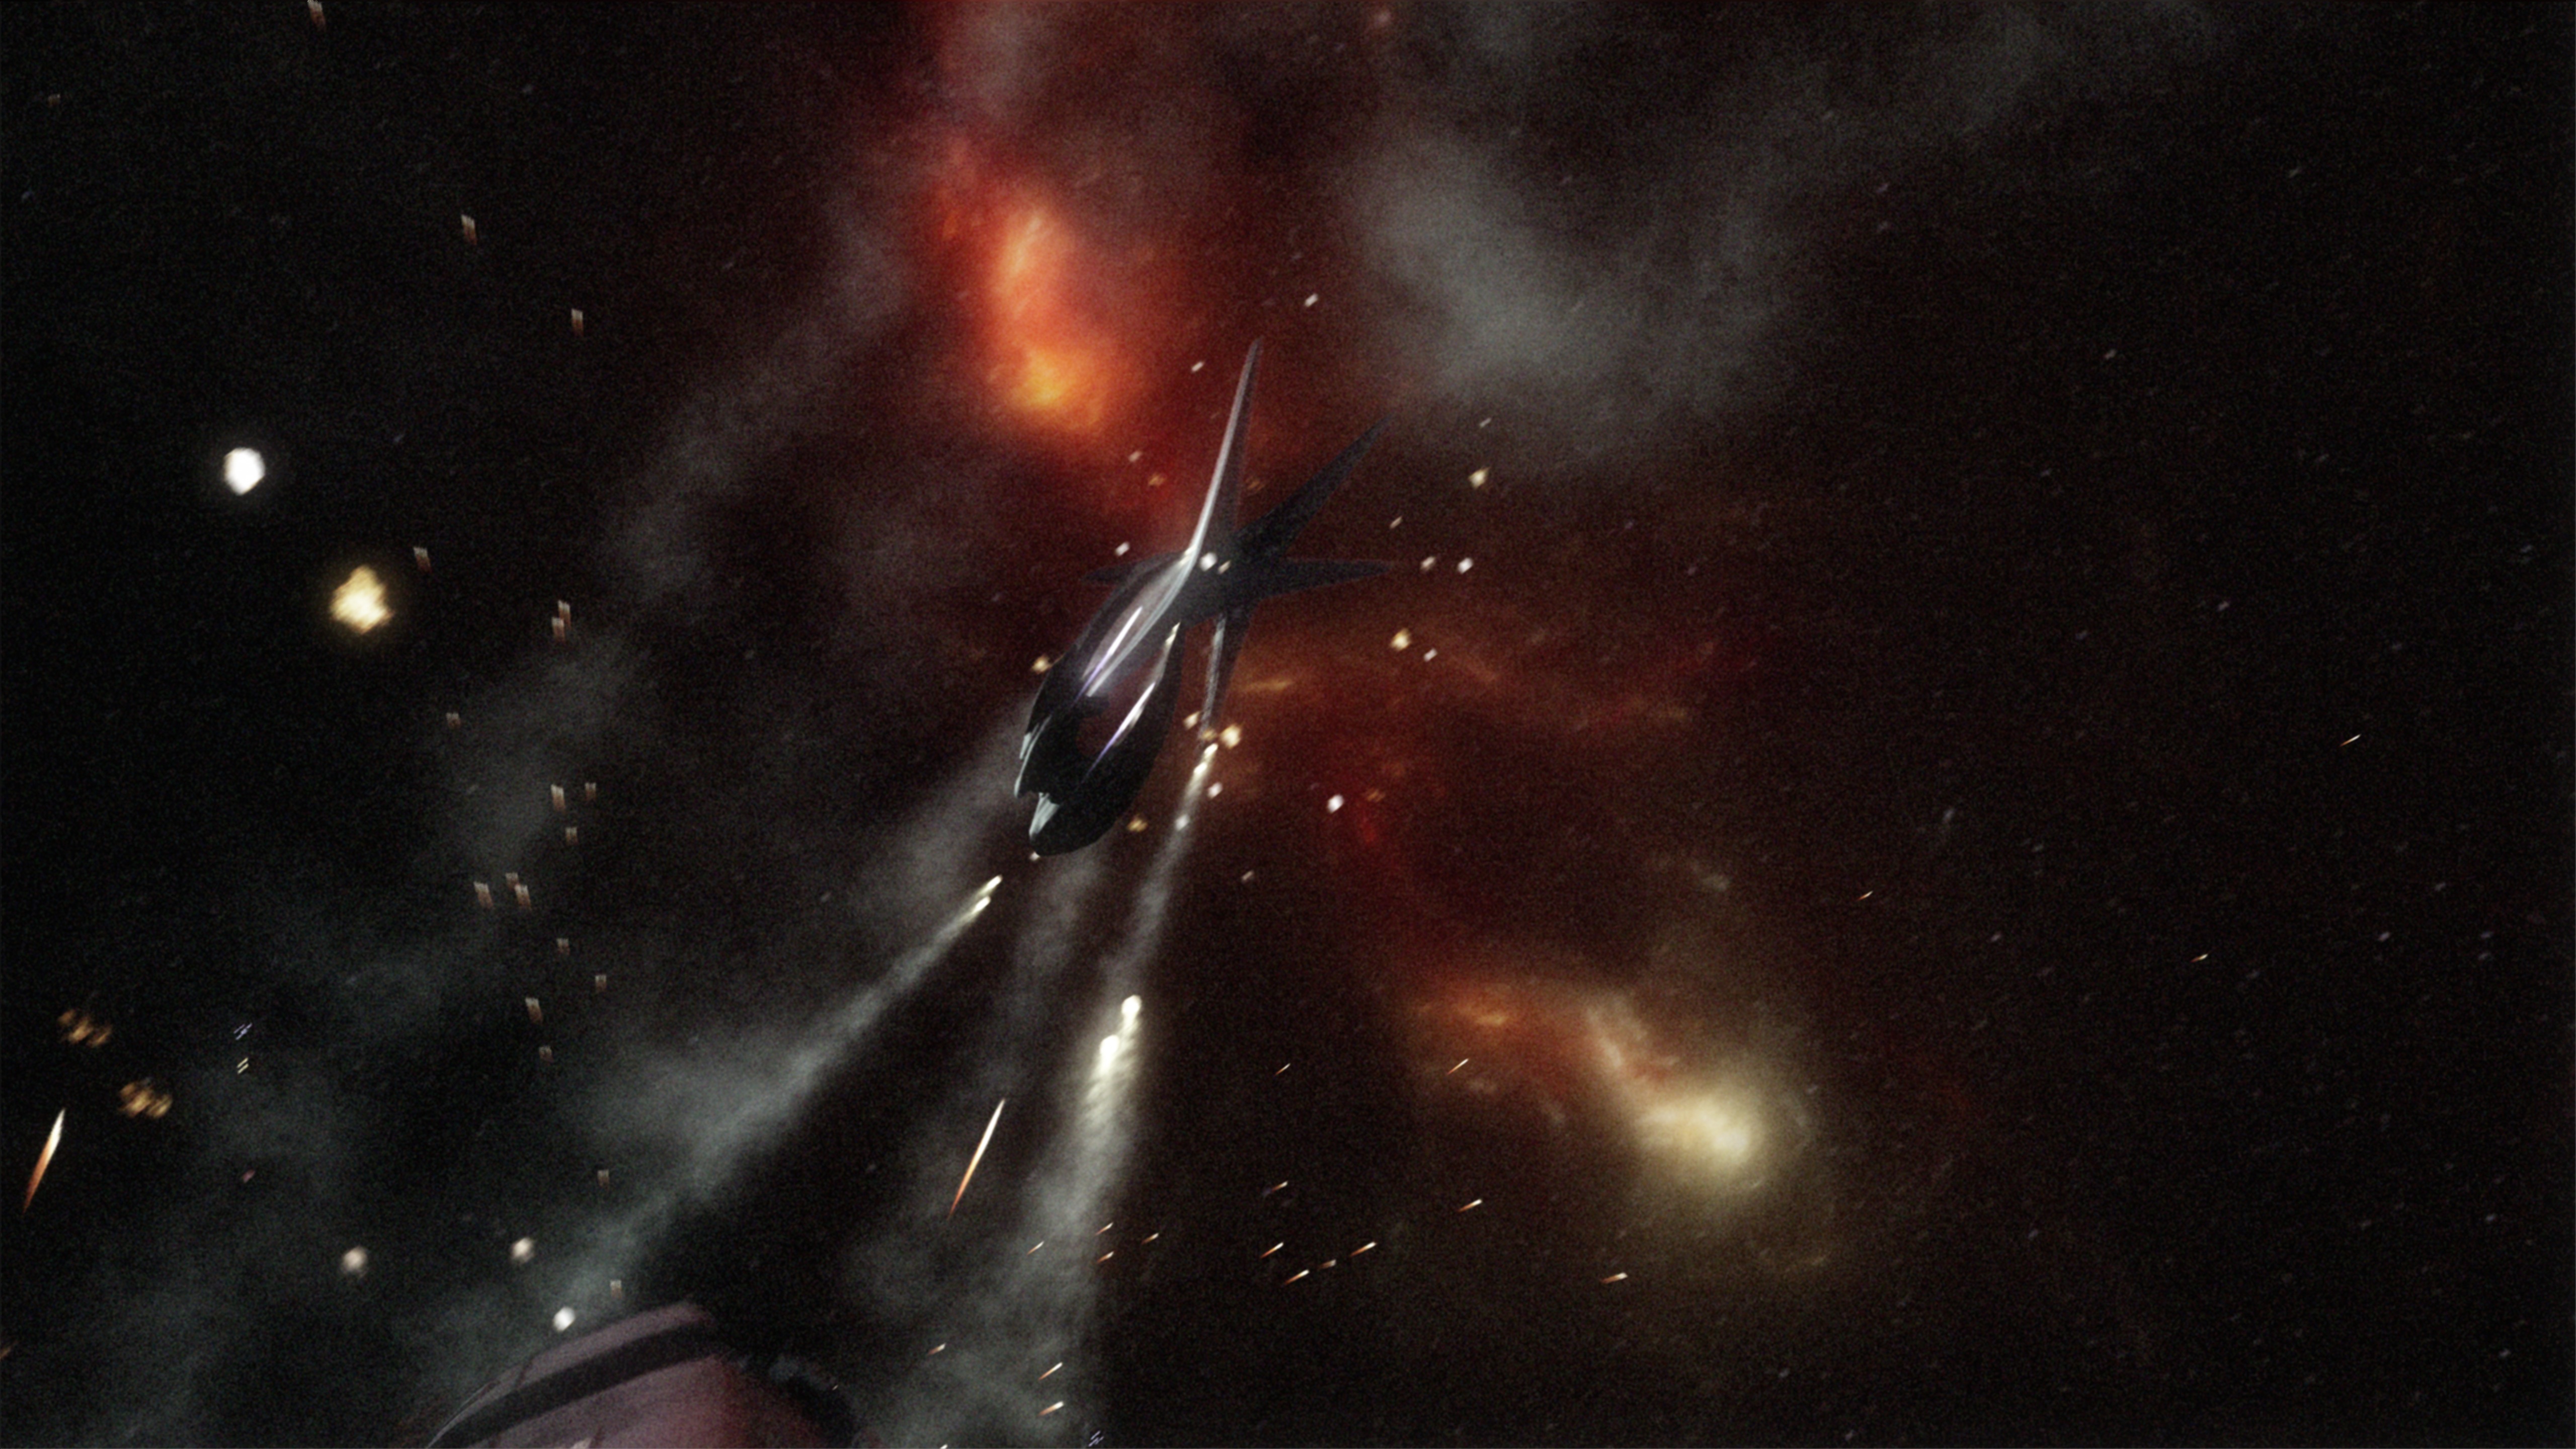
The most ambitious section was easily the recording of a pilot being shot down for the third mission’s briefing.
I animated a BSG-style space-battle, shot from a Viper gun-camera, with no cuts. The most challenging part was working out the timing and animation of the camera, so I could show everything I needed to show, without a lot of dead air, while still feeling like something the player would recognize from the show and, more importantly, from their experiences with the game, where they would’ve been playing the mission this recording was depicting moments earlier.

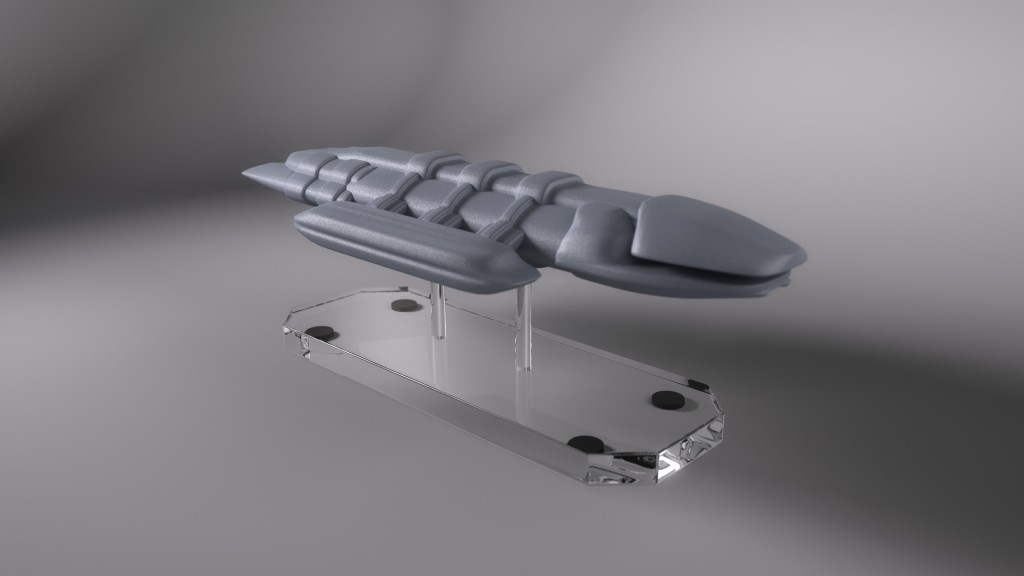
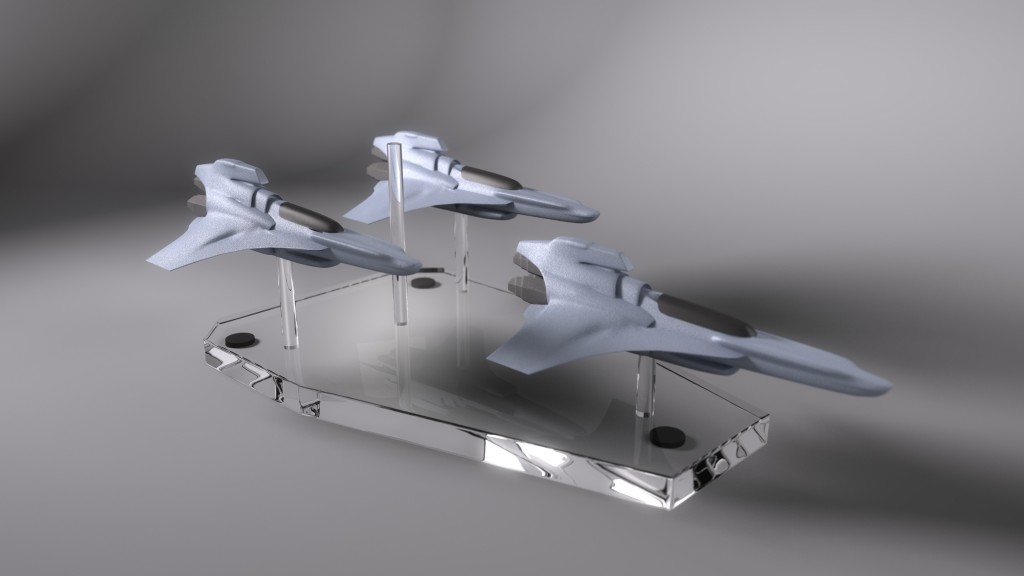
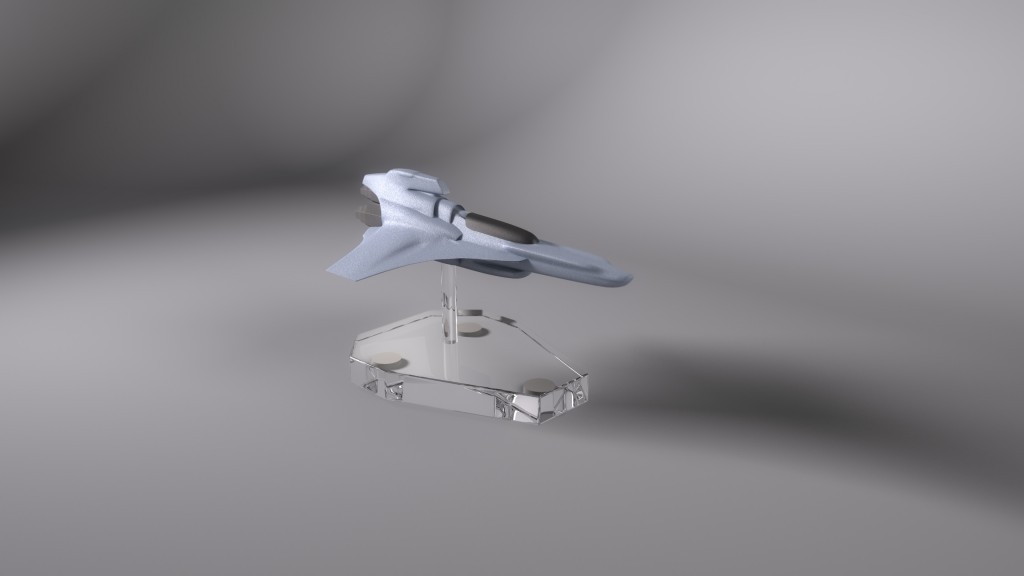
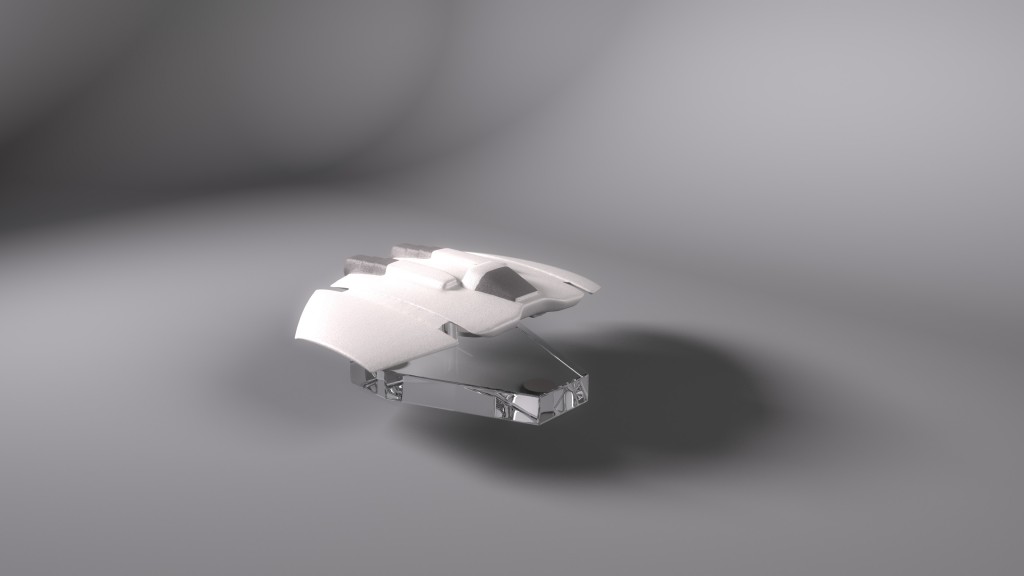
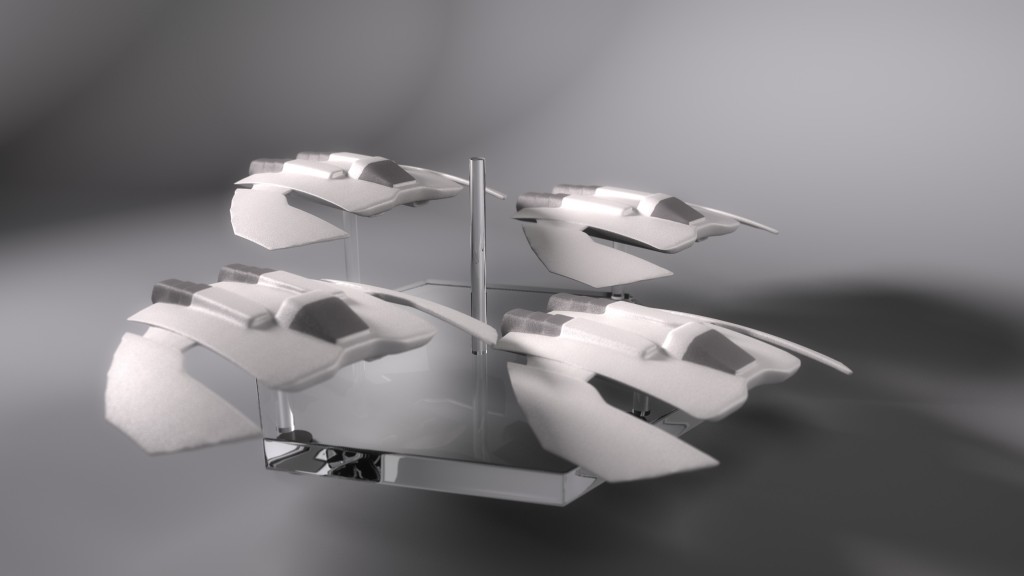
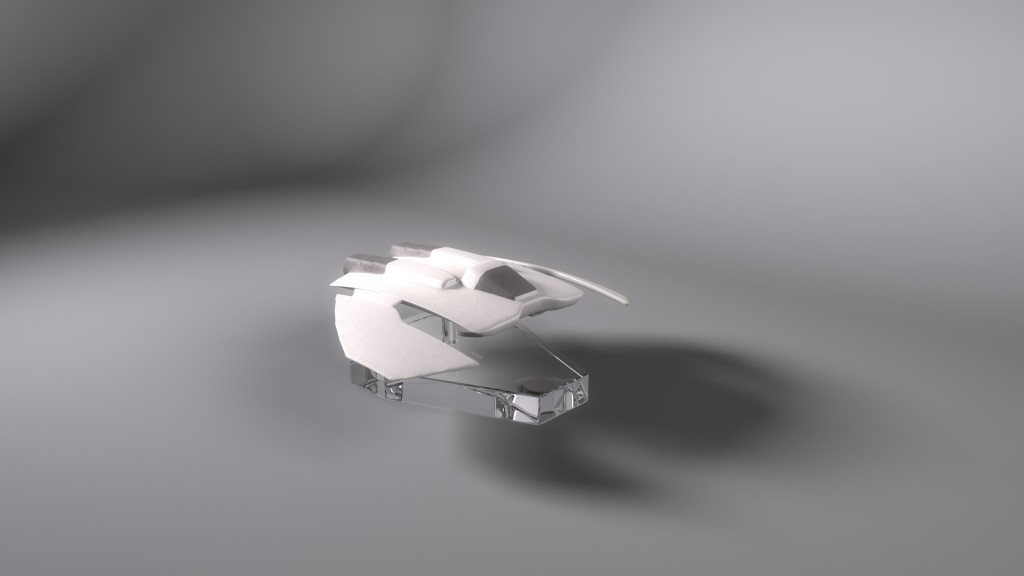
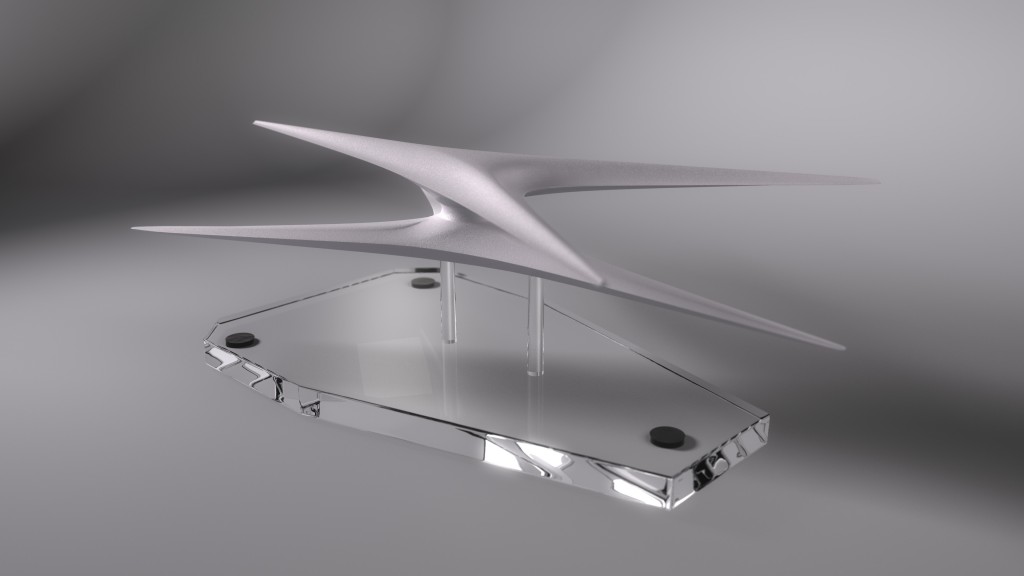
As a bonus, I created desktop-sized renders of all the tabletop models I created for this project, including several that weren’t used. At least, not in this release.
A version of this post appeared on the Diaspora Developer Blog.
Hey, I Can Do Motion Graphics, Too!
I was pleased to see that these videos I animated at Ninjaneer have been publicly released.
The project was very straightforward, so there’s not much to sink my teeth into with one of my trademark write-ups. Assets, storyboards, and voiceovers were all provided for us. Heather Knott was lead on the project, and we coordinated and cross-checked to ensure all our flourishes and tweening were consistent, so the videos would have a unified style. The videos were animated in Adobe After Effects from assets provided as Adobe Illustrator files, and compression for delivery was done with Handbrake.
Step From the Road to the Sea to the Sky
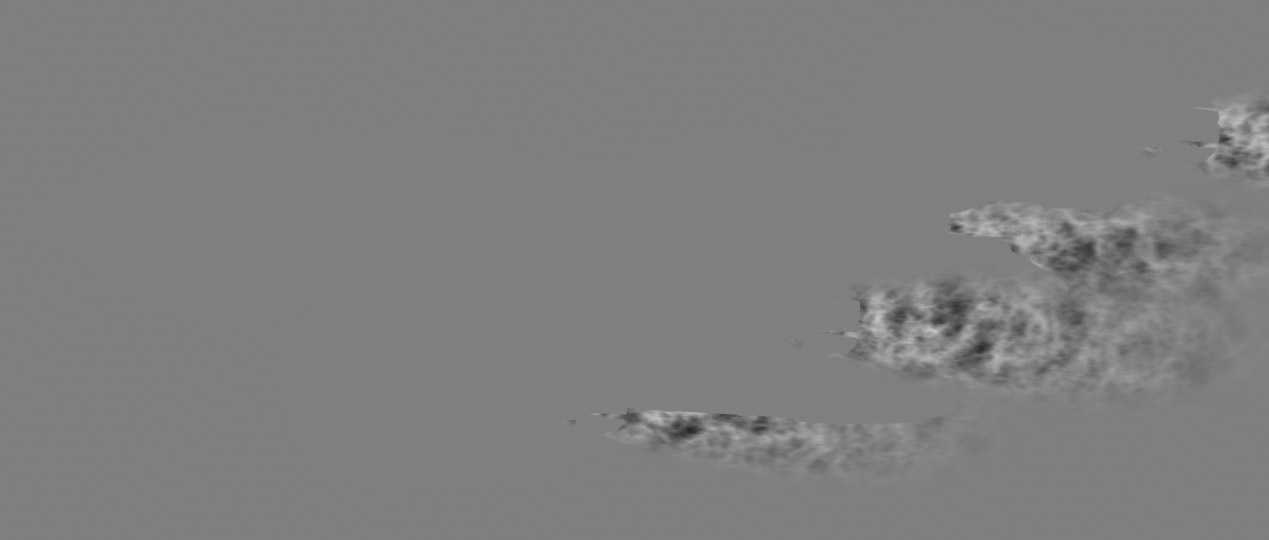
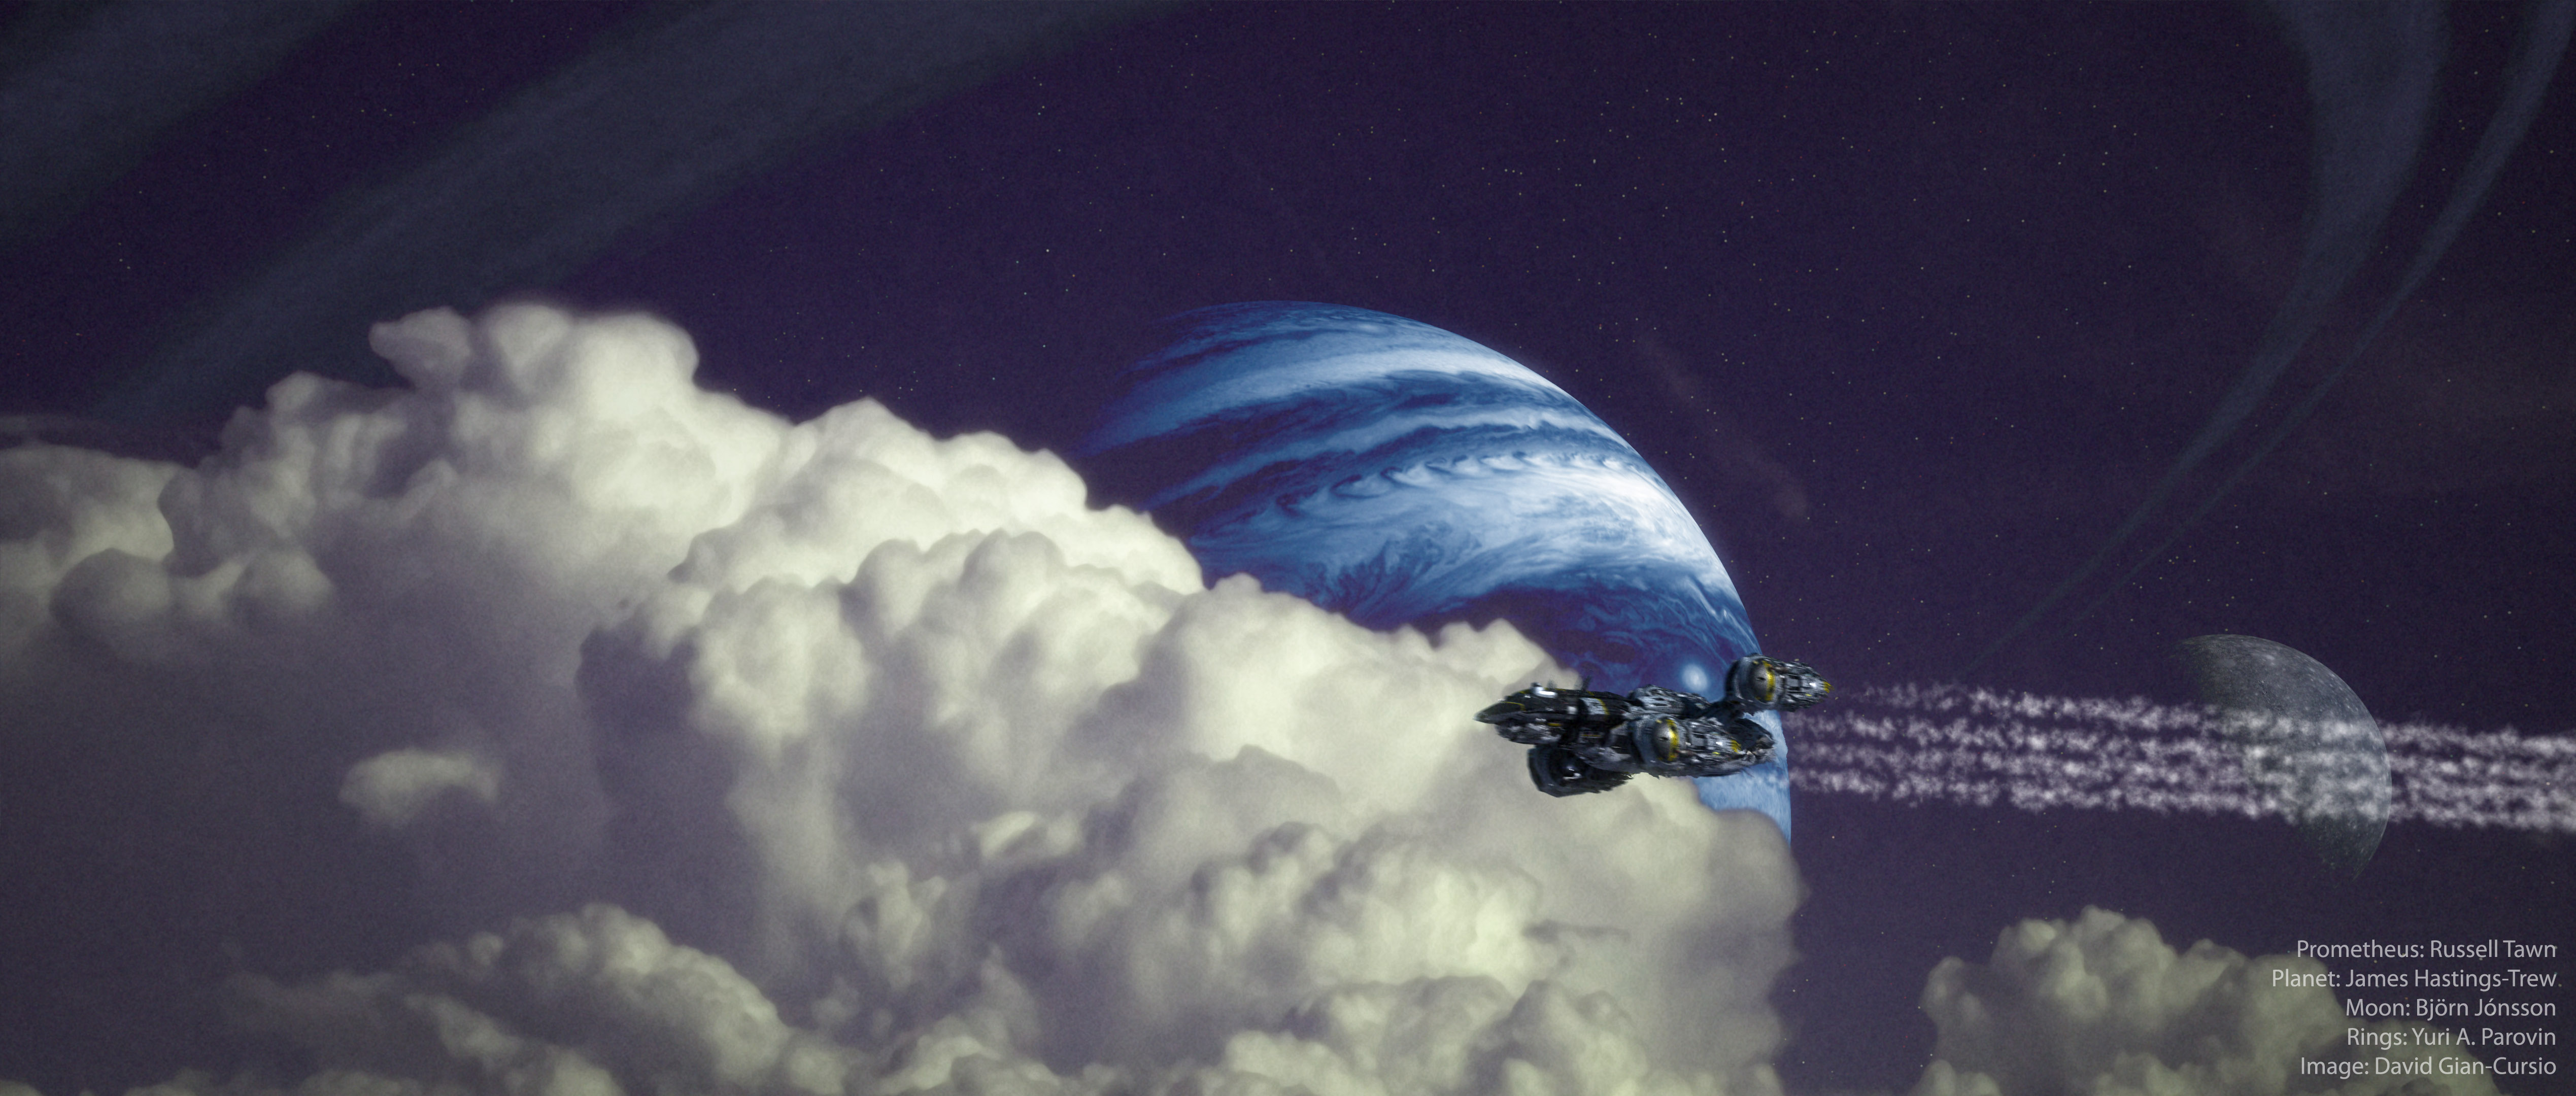
A quick animation using Foundation 3D’s favorite new spaceship. There wasn’t much excitement to this. A bit of noise added to the camera to give it some wobble (which YouTube insists on trying to “correct”), and the Jupiter map was recolored in the comp to be an alien planet. The cloud plate was a photo I shot with my phone and then enlarged with this on-line tool, though I still had to do some noise reduction in Photoshop.
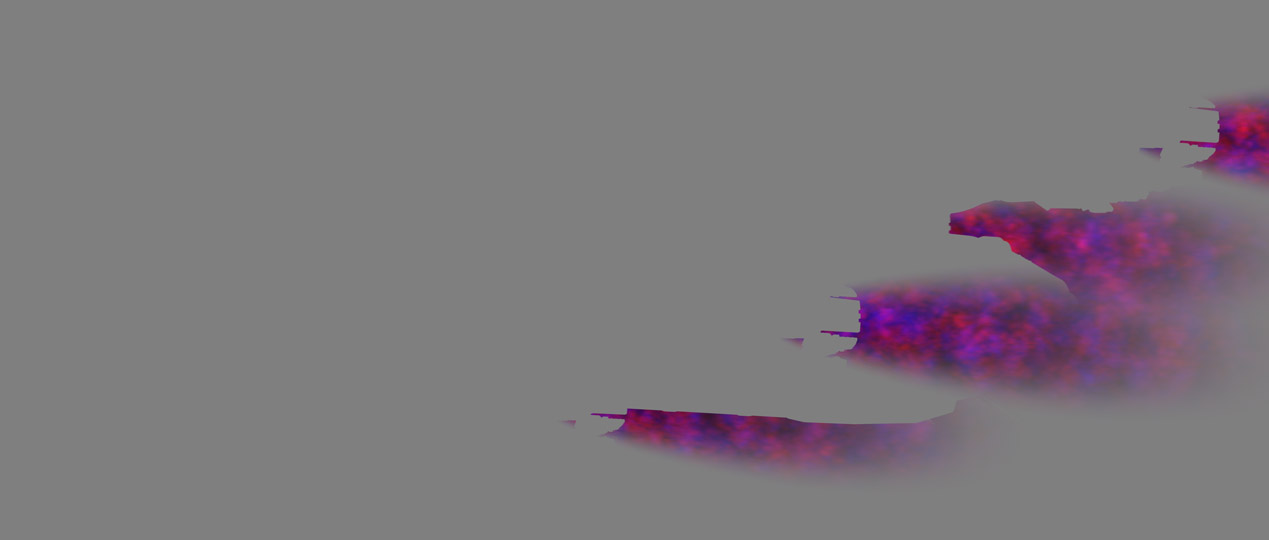
The most interesting thing was a new idea I tried to do the heat haze coming from the engines, which I made using After Effects’ “Displacement Map” filter. I created a couple of blimp-shaped dummy objects in Lightwave which I placed inside and behind the engines of the ship. I colored the environment and the ship 50% grey for the render, and gave the gave the haze objects an animated black-and-white procedural noise texture. I had the transparency fade towards the rear and edges of the object with gradients.
The Displacement Map filter can actually drive horizontal and vertical seperately displacement based on separate color channels. I experimented with using colored noise when I rendered the still frames, but it would only make a real difference in an animation.
Credits:
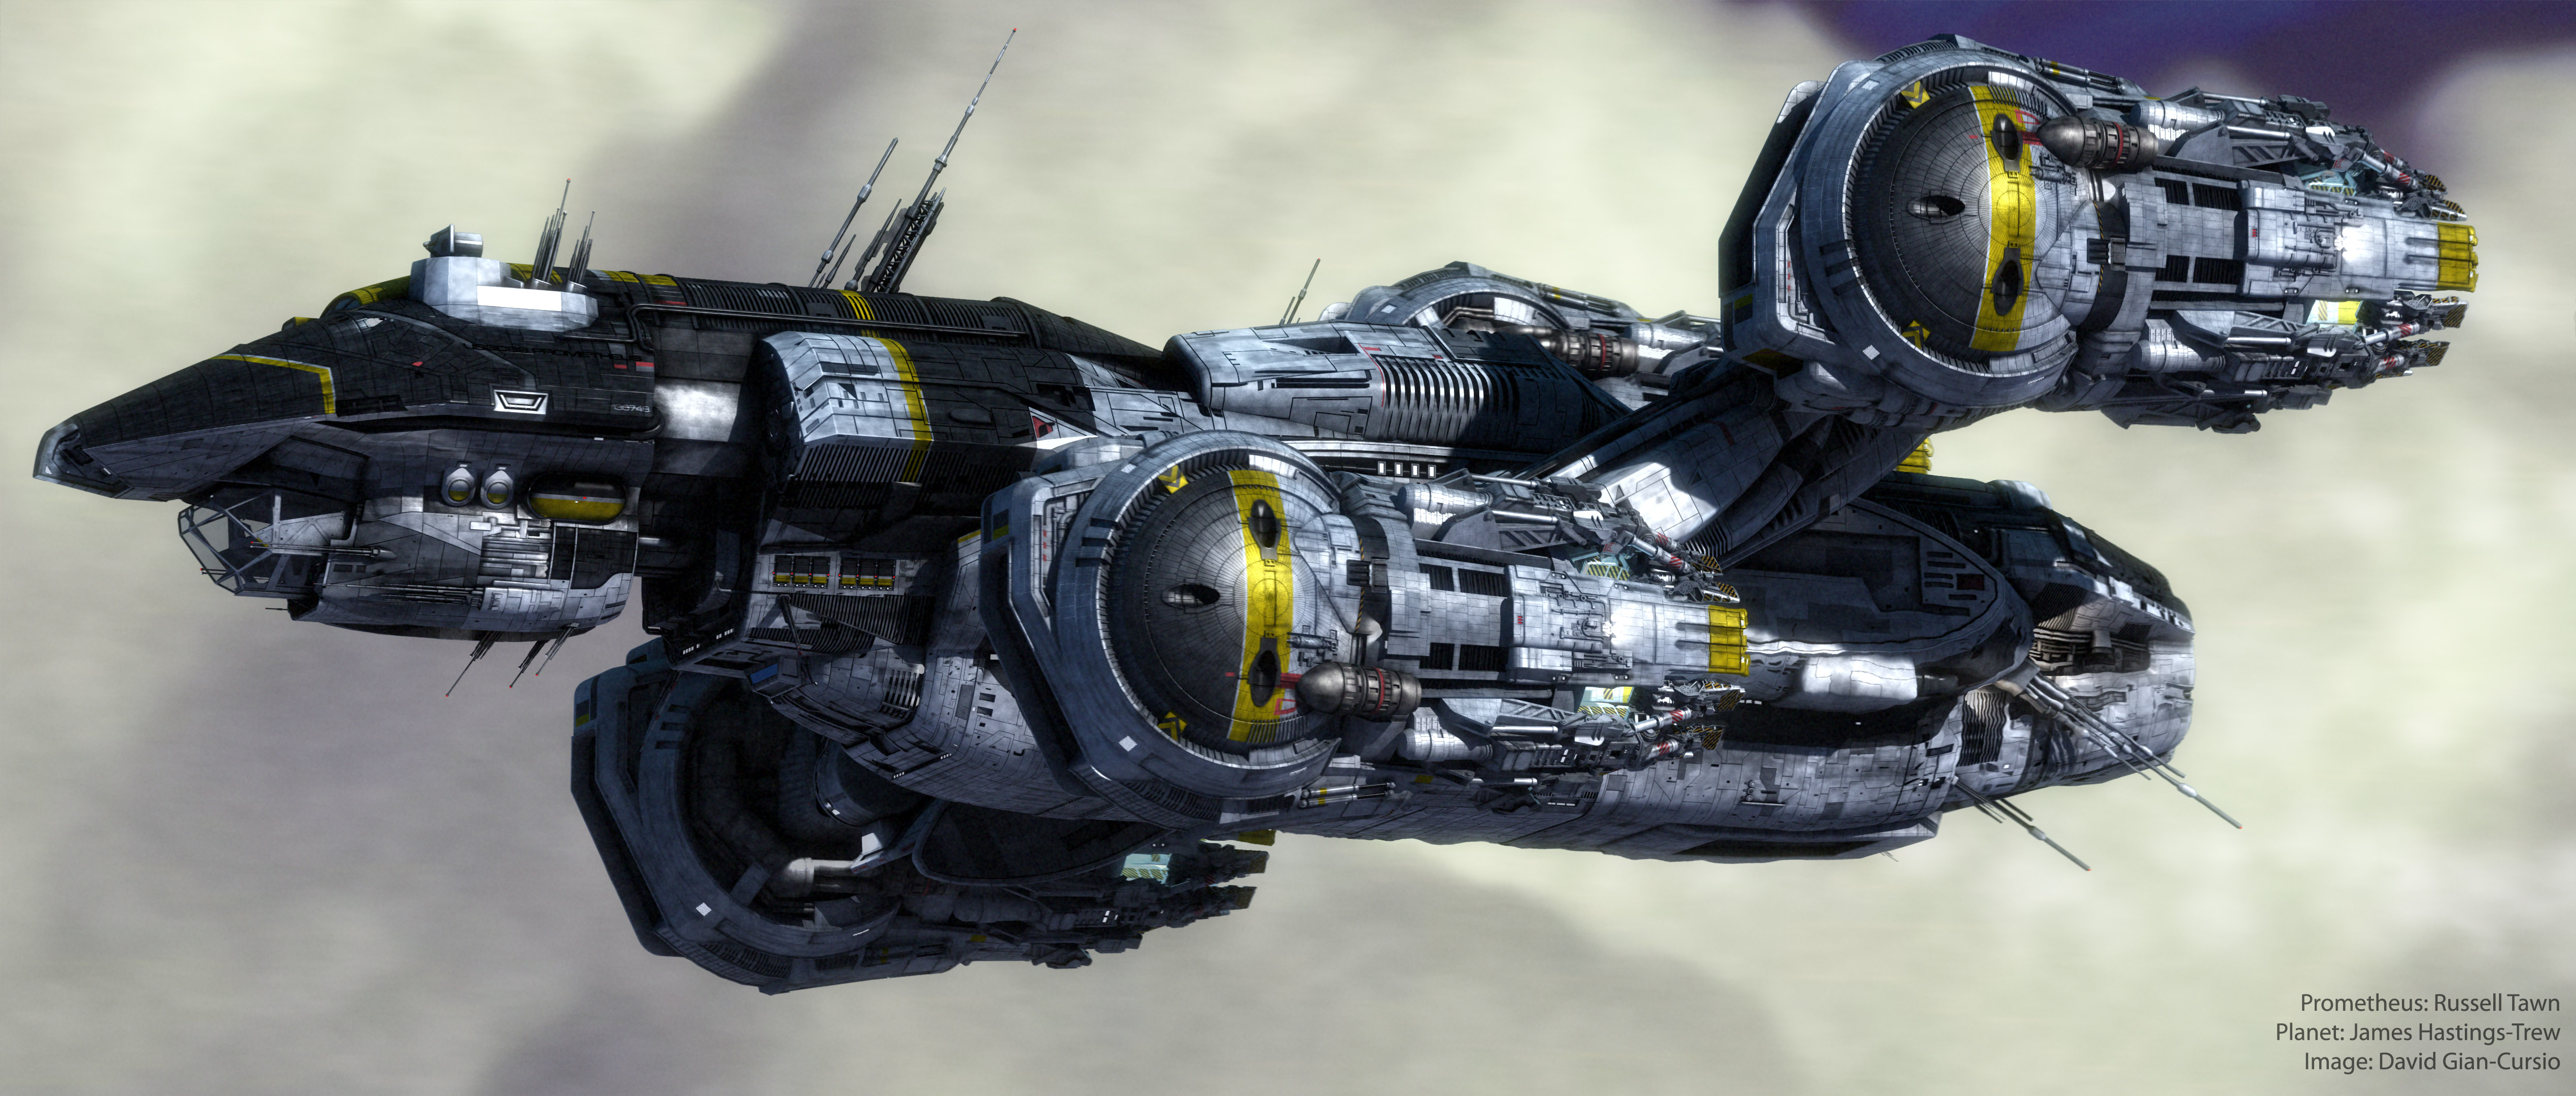
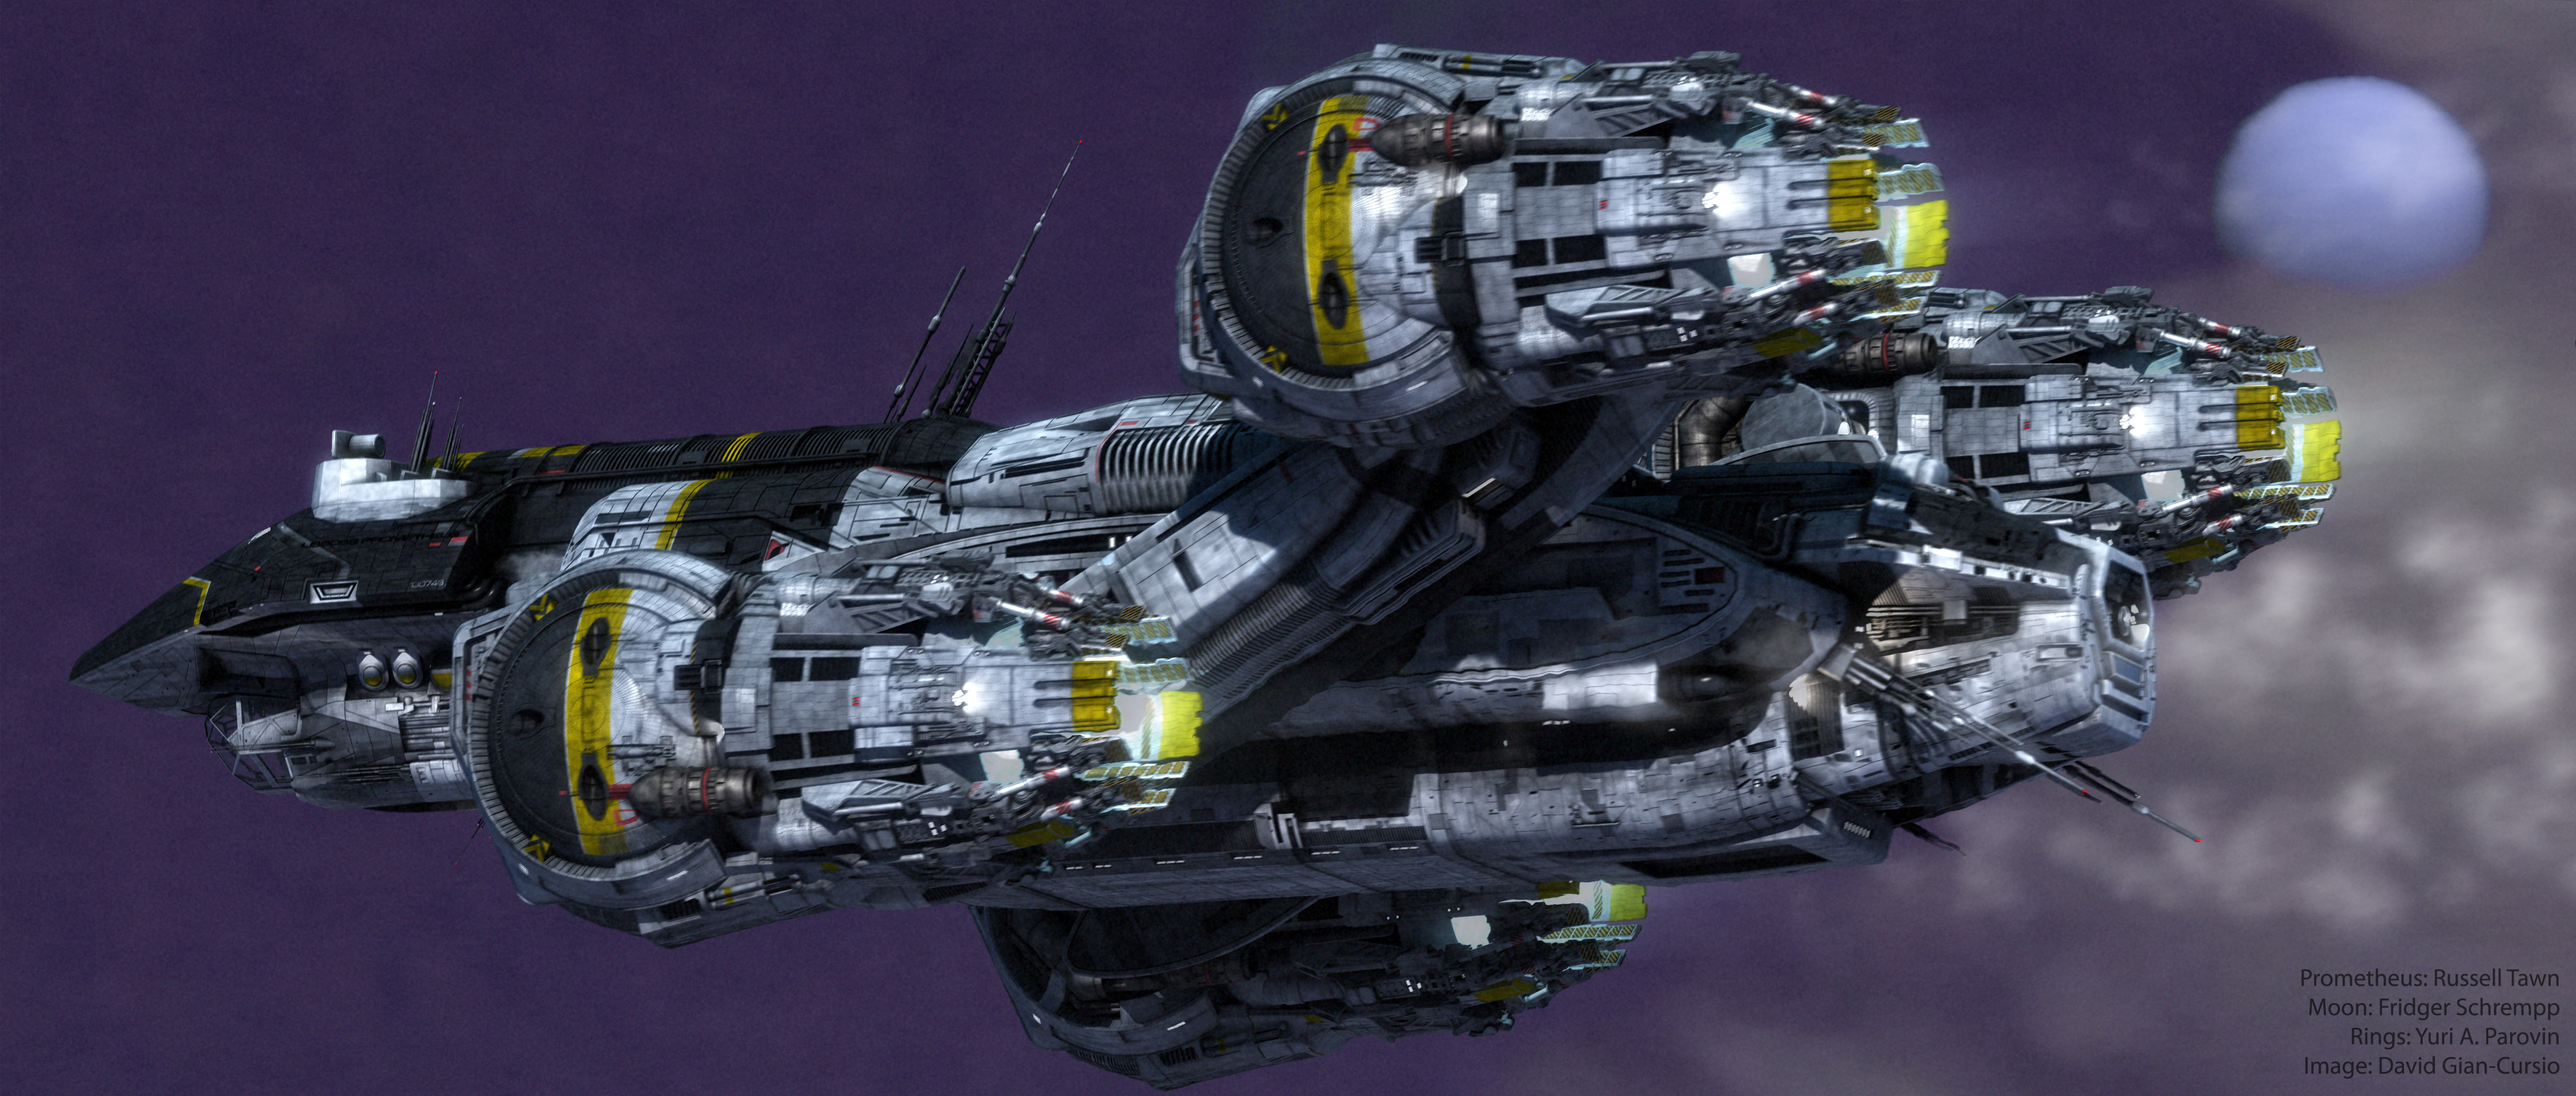
Prometheus: Russell Tawn
Planet: James Hastings-Trew
Moons: Fridger Schrempp and Björn Jónsson
Rings: Yuri A. Parovin
I also have a trio of 4k stills for your viewing pleasure.
General Reel – June 2013
Scene Development Reel – June 2013
Motion Graphics Reel – June 2013
We Do Not Have Time For Your Damned Hobby, Sir!
The Red Silk Thread is an opera by composer Stella Sung with libretto by Ernest Hilbert. It tells the story of Marco Polo’s return to Europe at the end of his famous voyages through Asia. This past April, a workshop performance took place at the University of Michigan, in advance of a full premiere at the University of Florida in April, 2014.
Ninjaneer Studios provided virtual sets for the Opera, projected behind the actors and used in place of physical scenery. There are six principle settings in the drama: the Court of Kublai Khan, the Gardens of Kublai Khan, a Chinese treasure ship at sail, the Court of the Persian King, a Genoese prison cell, and a desert dream-scape.
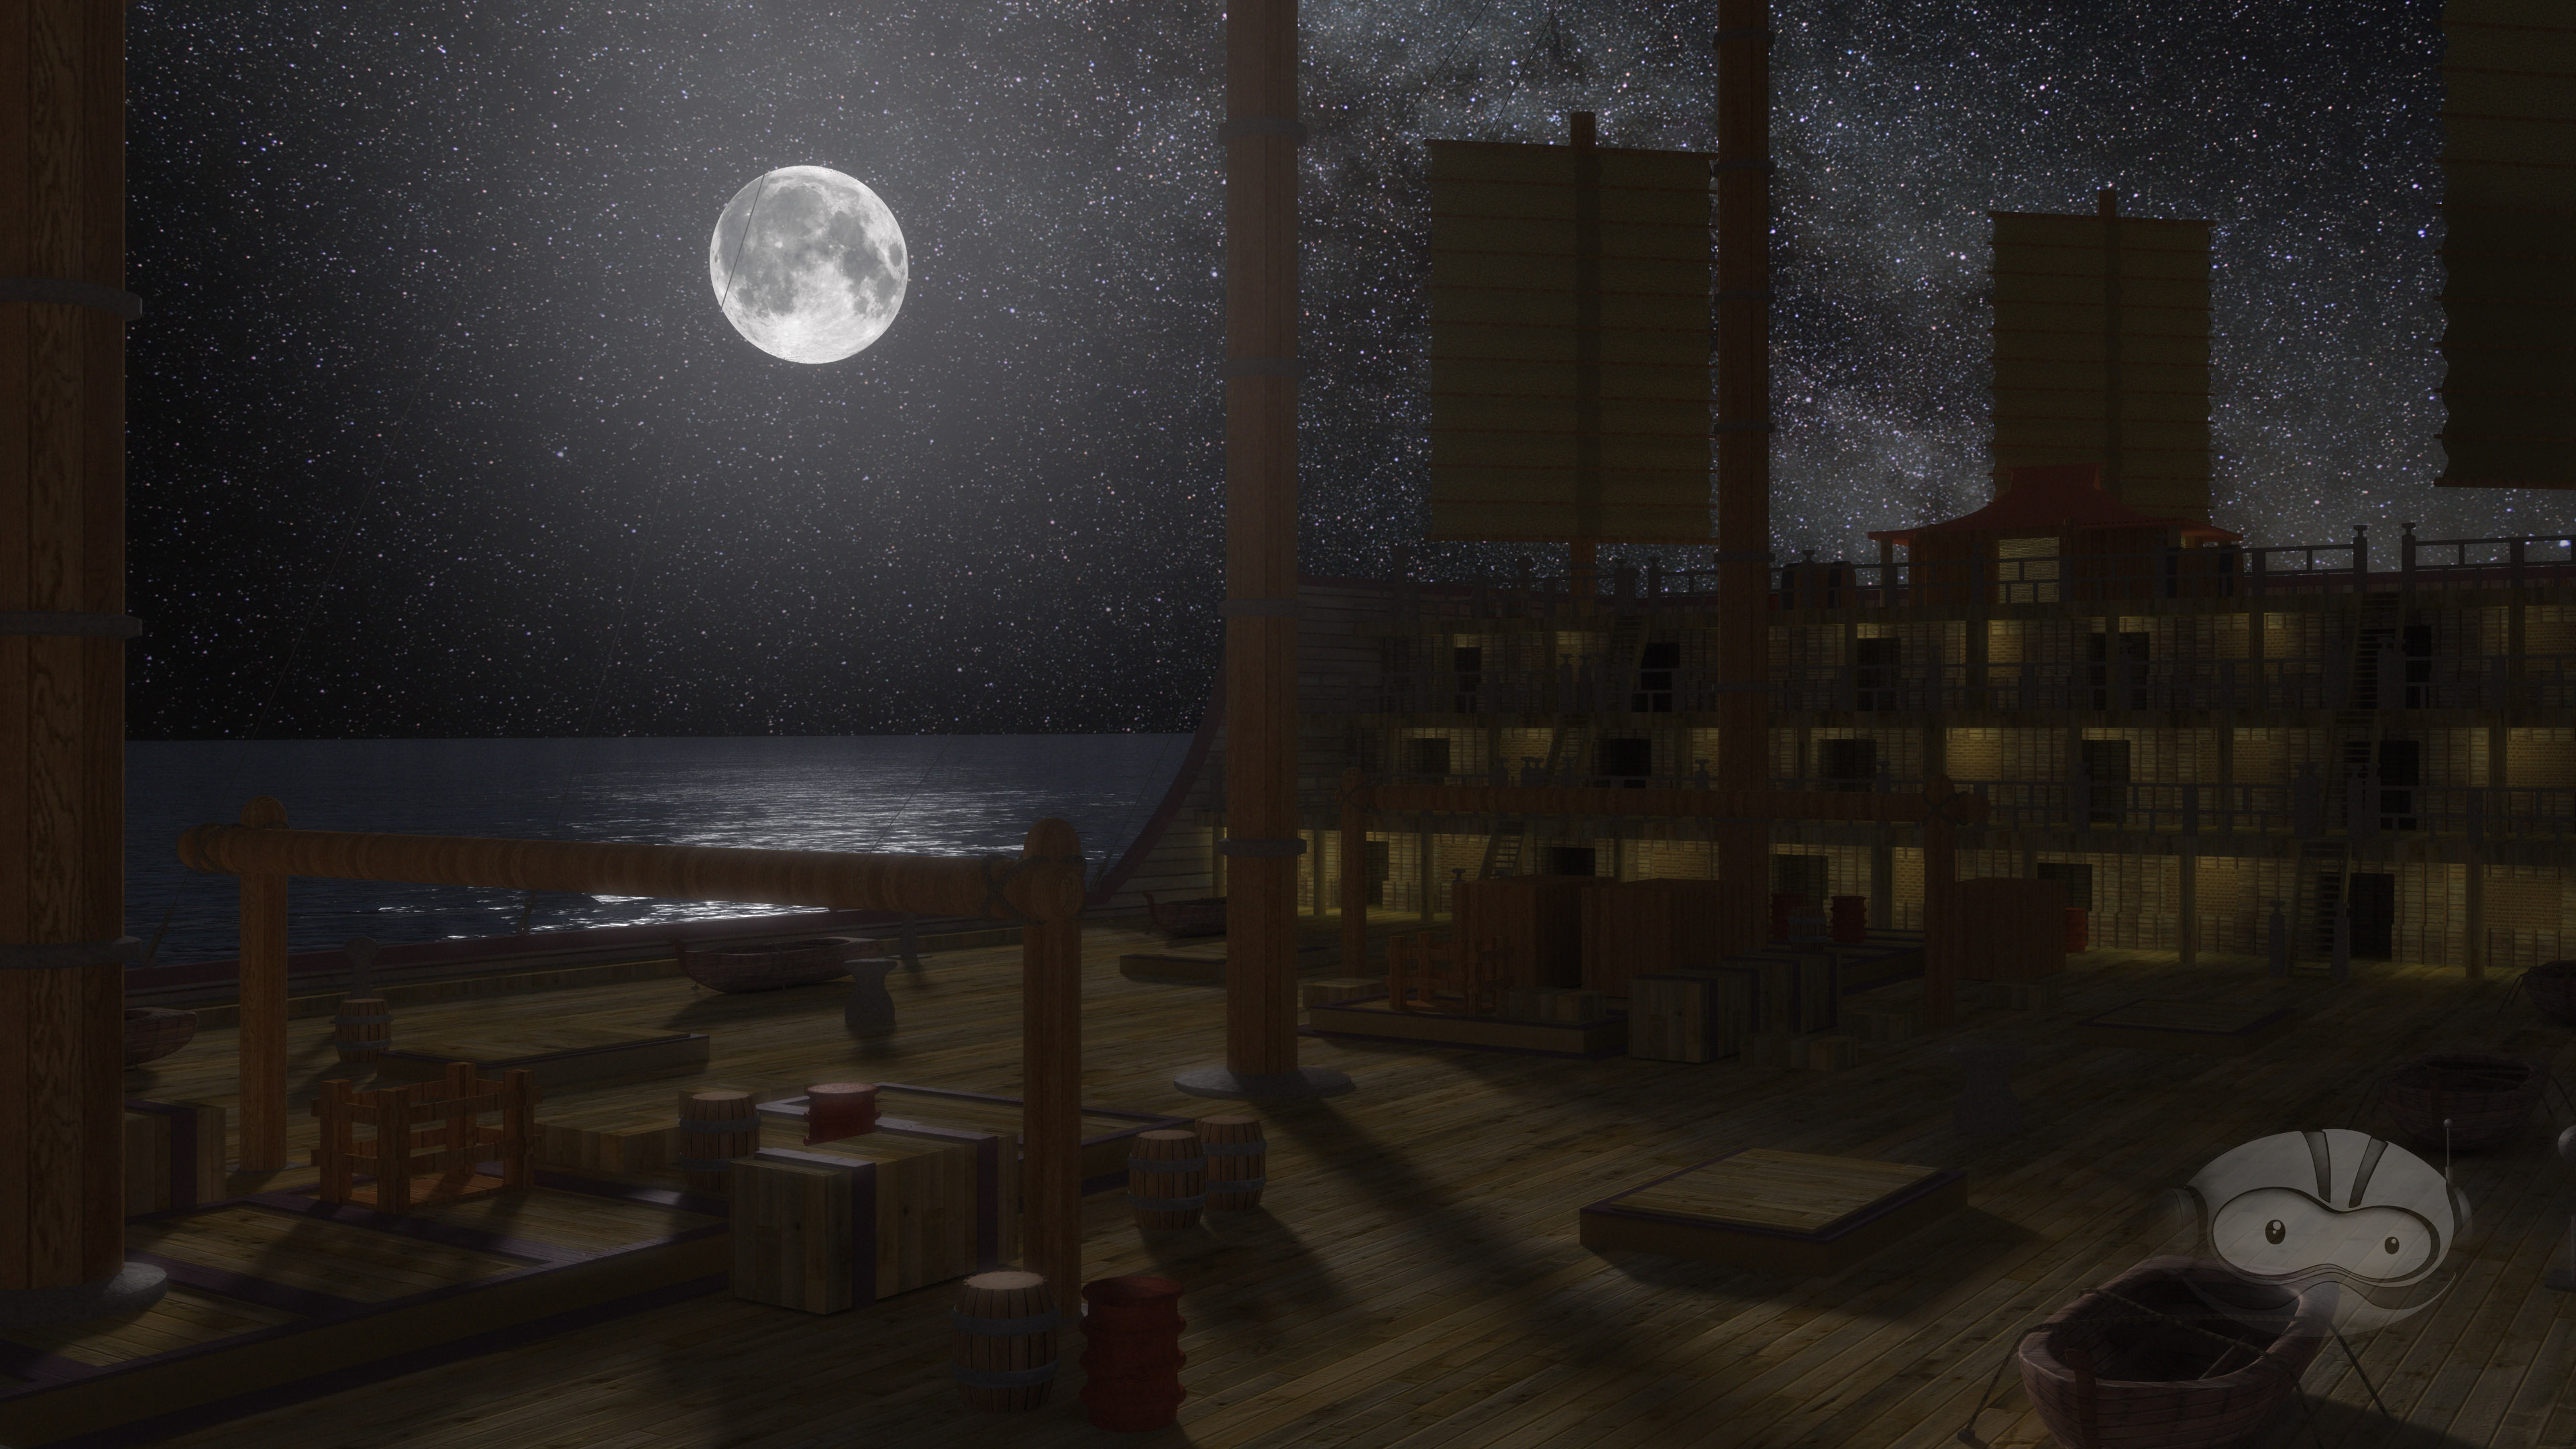
Thanks to my love of all things nautical, I immediately volunteered to take over the ship scene. The opera’s creative team had already put together some research on the types of boat they had in mind.
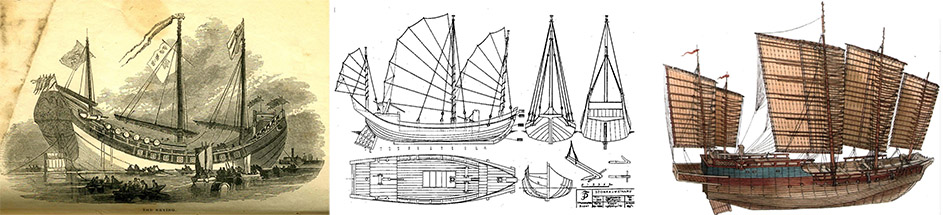
I used this as a jumping-off point, and found additional materials. My primary reference ended up being a high-resolution photo of an exquisitely detailed model of a Ming Dynasty treasure ship. While this exact design is of dubious historicity, especially for an ocean voyage, and dates from at least a hundred years after Marco Polo died, information on the ships of his time was sketchy at best, and what I did find didn’t look nearly as impressive.
I began by roughing out the general shape of the hull in Lightwave Modeler. Even though the concept only called for the deck to be seen, I wanted to have at least a foundation for the exterior in case it was needed later. It also made it easier to ensure the deck was proportionate. I matched the camera angle as best I could to my reference photo in Lightwave Layout, and switched back and forth while adjusting the hull. I’ve found that while it isn’t a perfectly accurate technique compared to working off a set of orthographic schematics, it’s much better than eyeballing it.
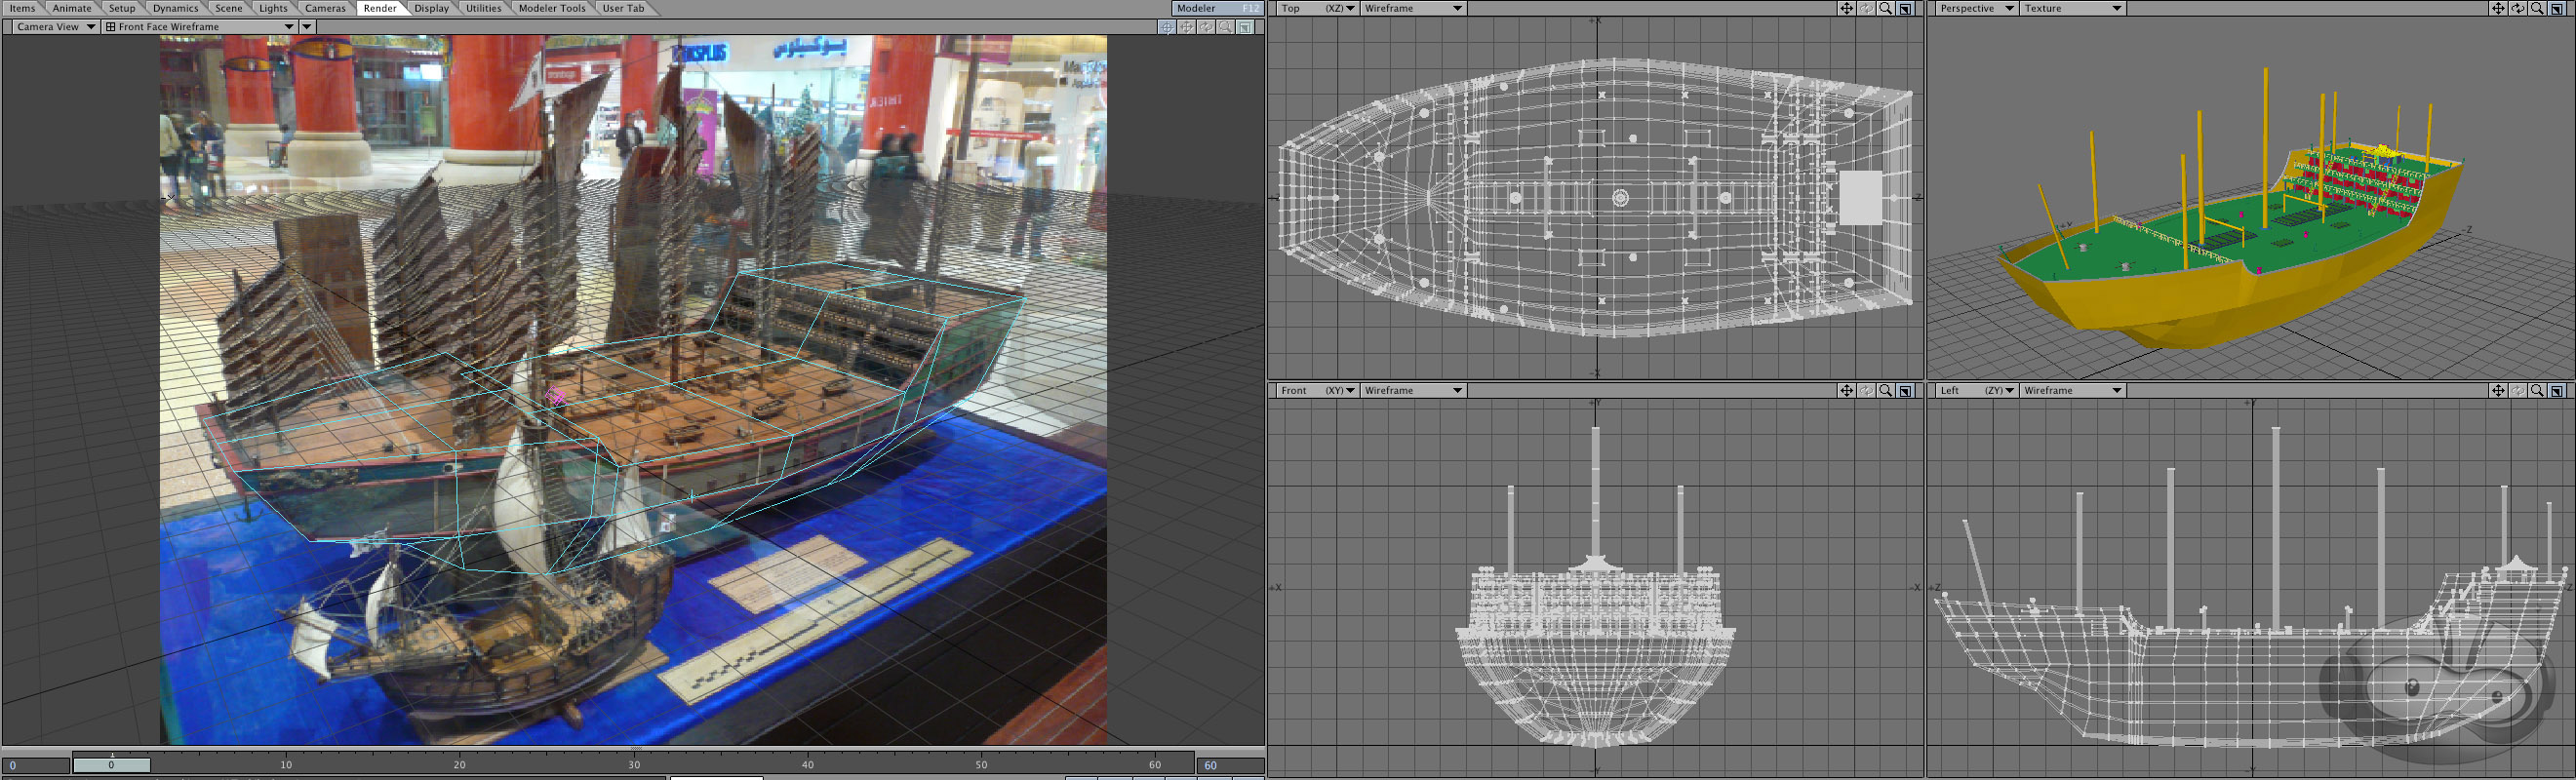
After completing the majority of the modeling, I began texturing the model, ending with populating the deck with various scenery objects

I then presented Dr. Sung with a set of potential camera angles.

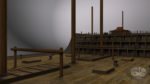
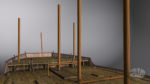

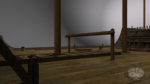
After getting the go-ahead for a 3/4 view towards aft, I began setting up the scene and lighting. The motion of the horizon was based on stock footage from a locked-off camera on the deck of a boat. A long-exposure photo of the night sky was used as a placeholder. I started with my standard ocean model, but had the usual problem with flickering as it got closer to the horizon. A combination of making the waves larger and rendering a limited region of the frame at a much higher resolution blunted the problem enough that it was no longer visible after post-processing.
The frame was split into several passes for rendering. This was primarily for efficiency, so only passes which required lengthy render processes like extreme antialiasing or multi-bounce radiosity would be put through them, and simpler elements could be rendered at reduced quality or, occasionally, as single frames.
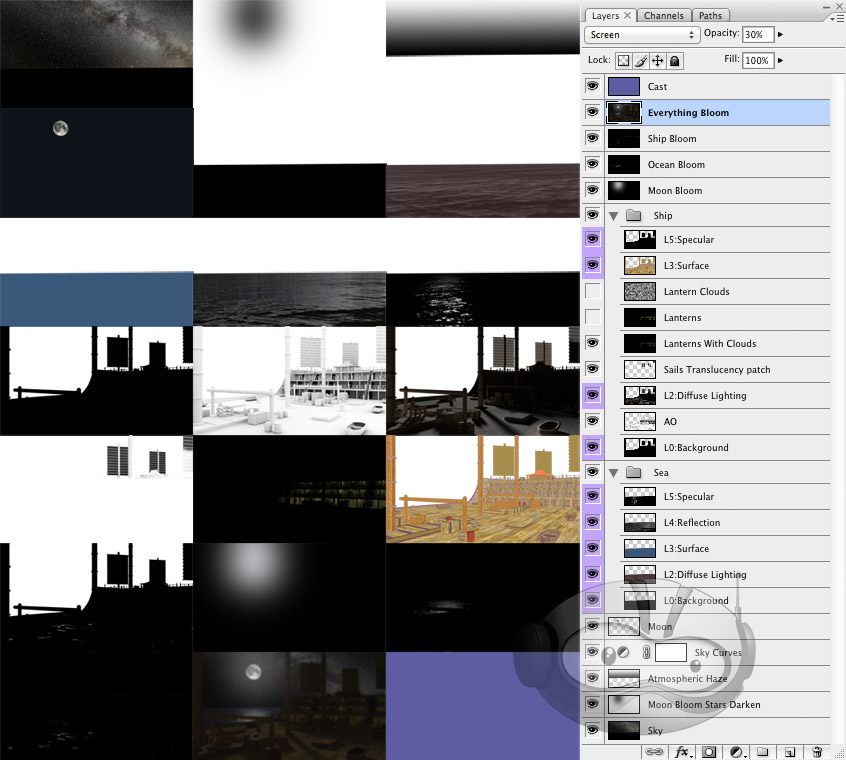
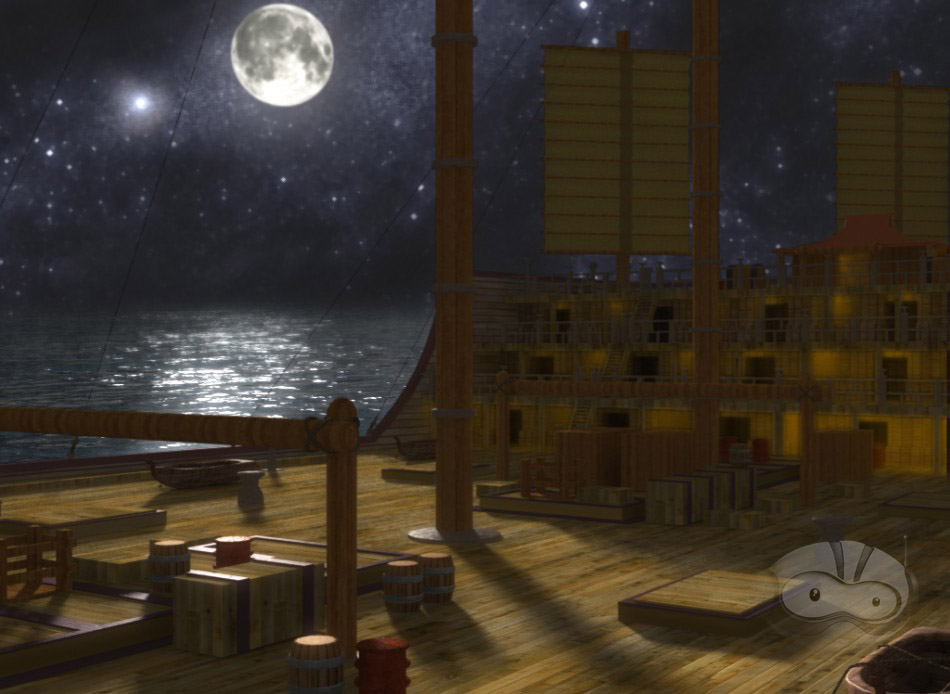
I prepared a test composite in Photoshop, which I passed along to Christopher Brown, who handled the compositing for all scenes in the opera. He built on my design, unifying it stylistically with the other scenes, and altering it to fit with the limited staging available for the workshop performance.
Initial Photoshop Test Composite
Final After Effects Composite
Over the next several months, all of us at Ninjaneer will be revising and expanding our virtual sets for the premiere at the University of Florida next year. I don’t want to ruin the surprises we’re planning, but I wouldn’t be surprised to see a few more ships in the Great Khan’s fleet.
A version of this post appeared on the official Ninjaneer Studios blog.